Create an Action
This guide walks through every field available when creating an action in Zeltask. Each action you create integrates into your team's workflow and becomes available for tracking, updates, and reporting.
Before You Start
- You need at least Staff Member permissions to create actions
- For assignment, users or teams should already exist in the system
- Optionally, have assets and locations created to link to the action
Steps
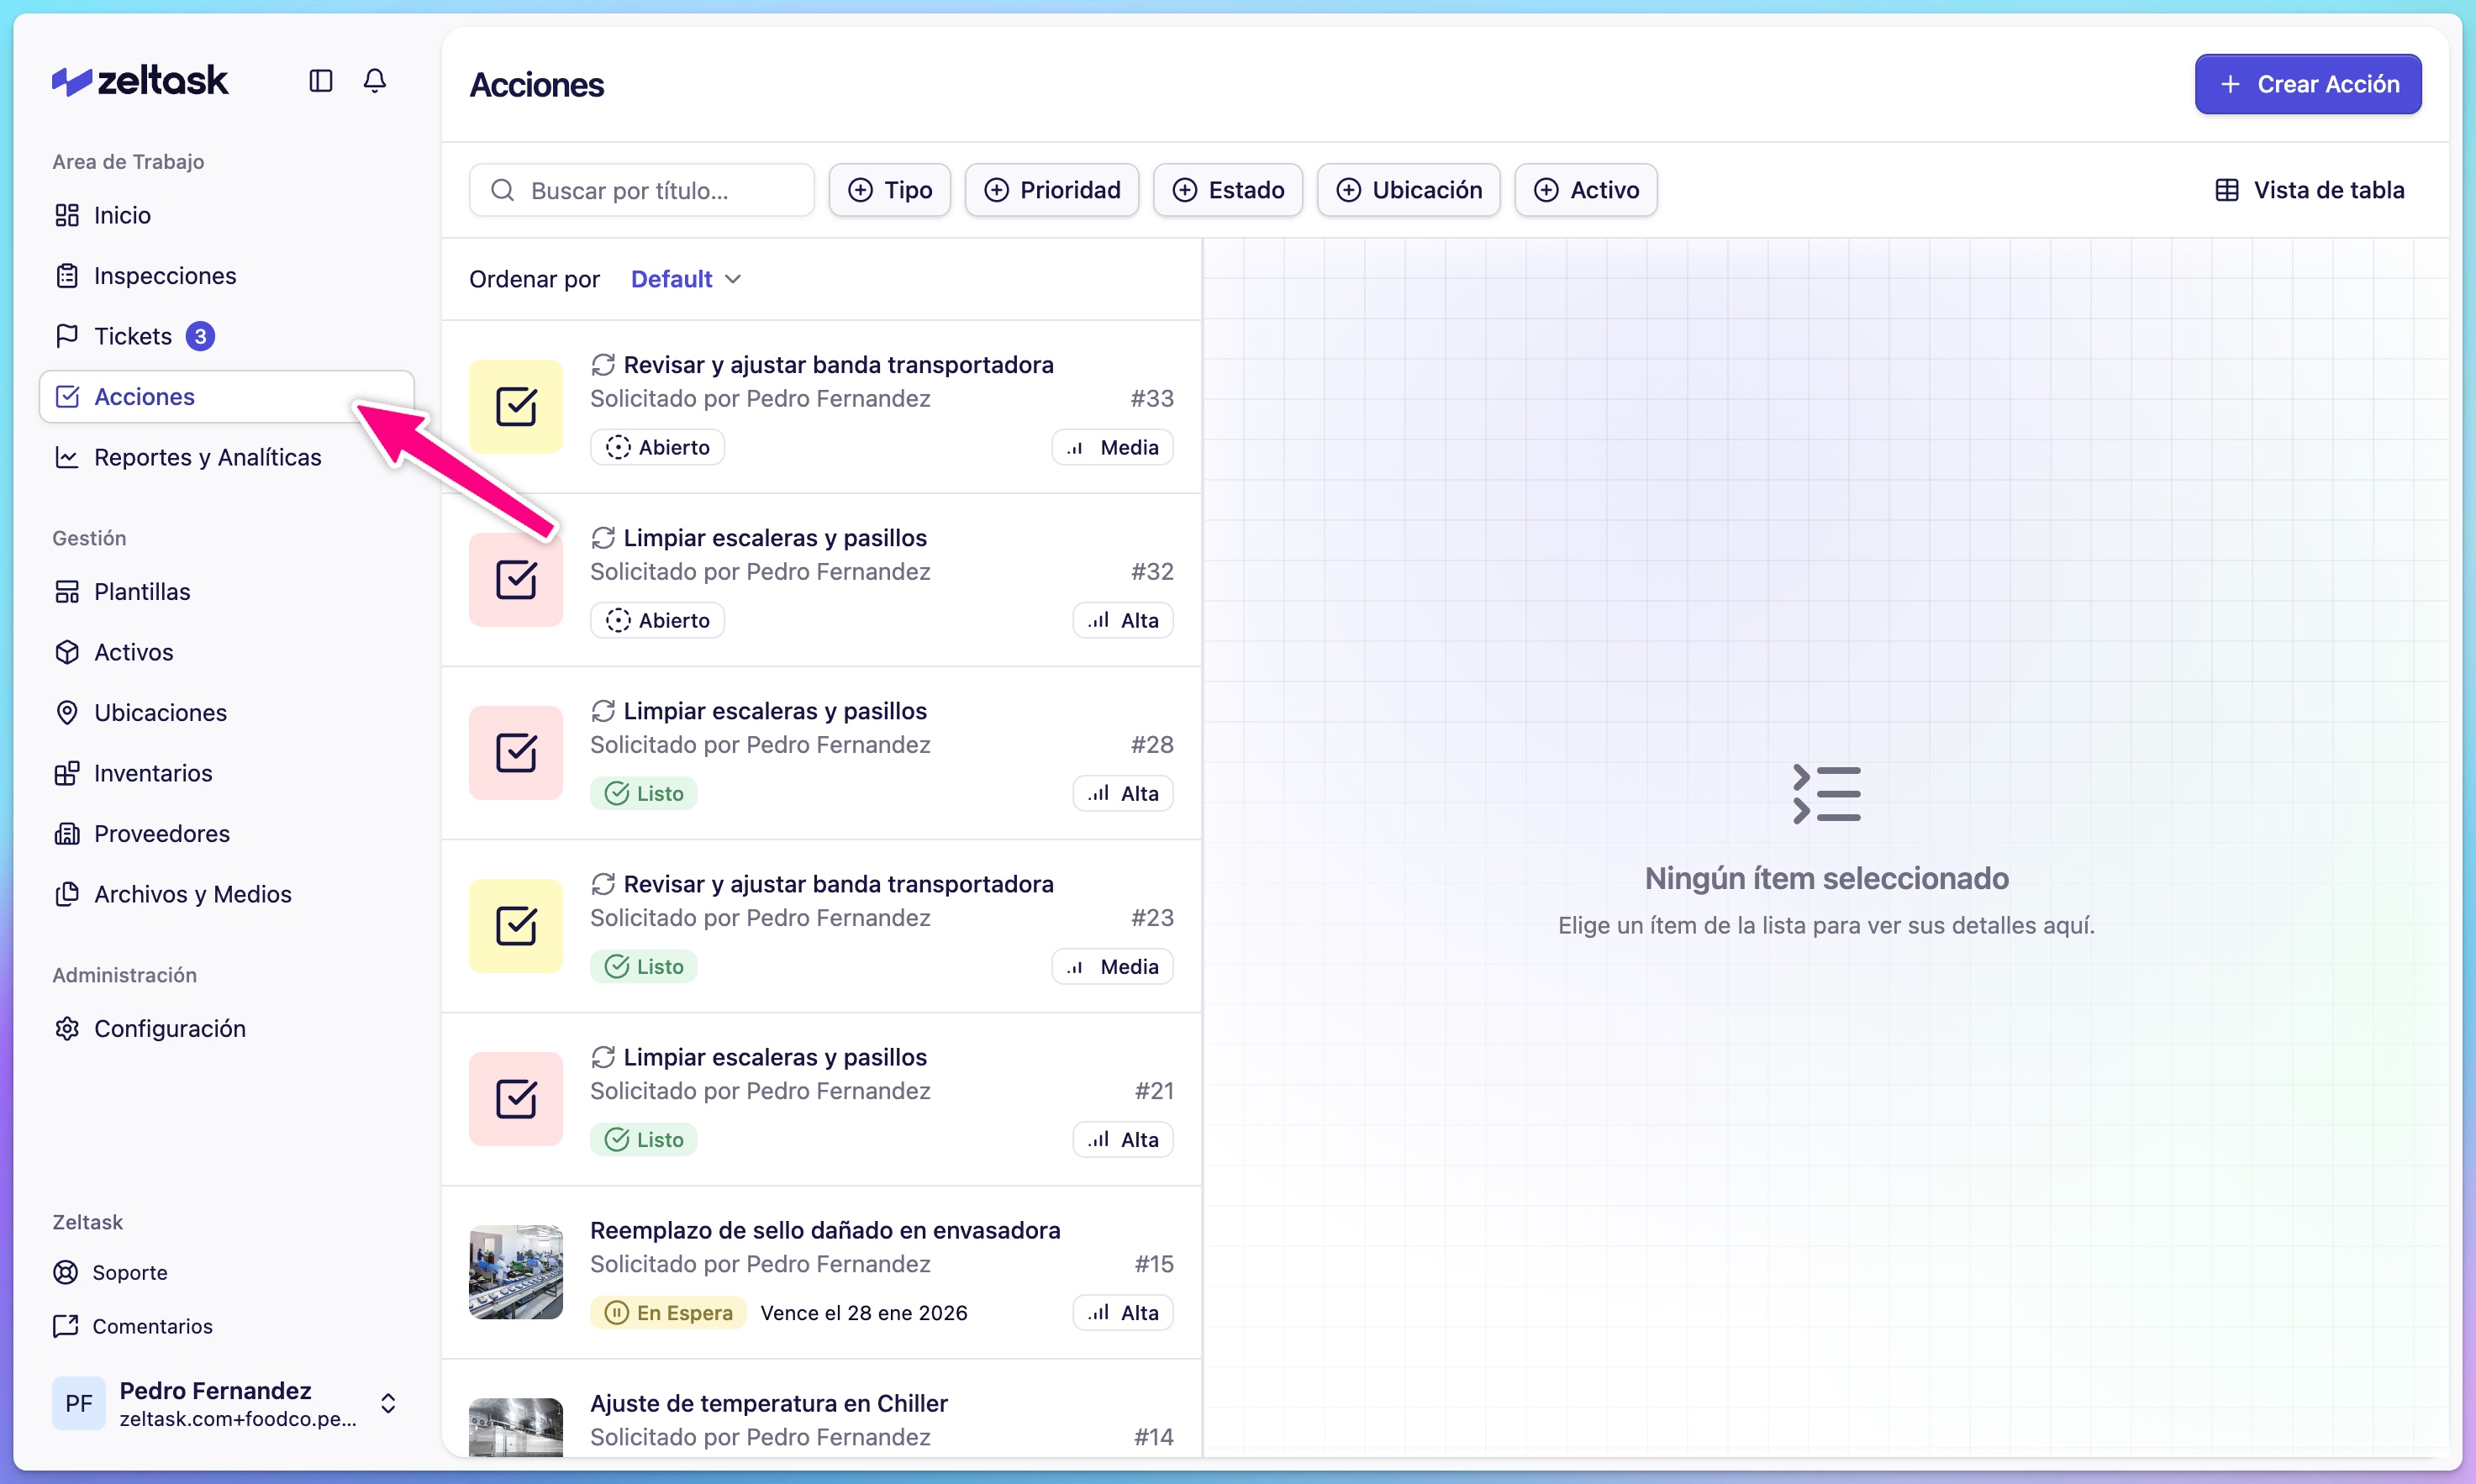
Step 1: Open the Actions module
- Click Actions in the left sidebar
- The actions list loads with any existing work orders
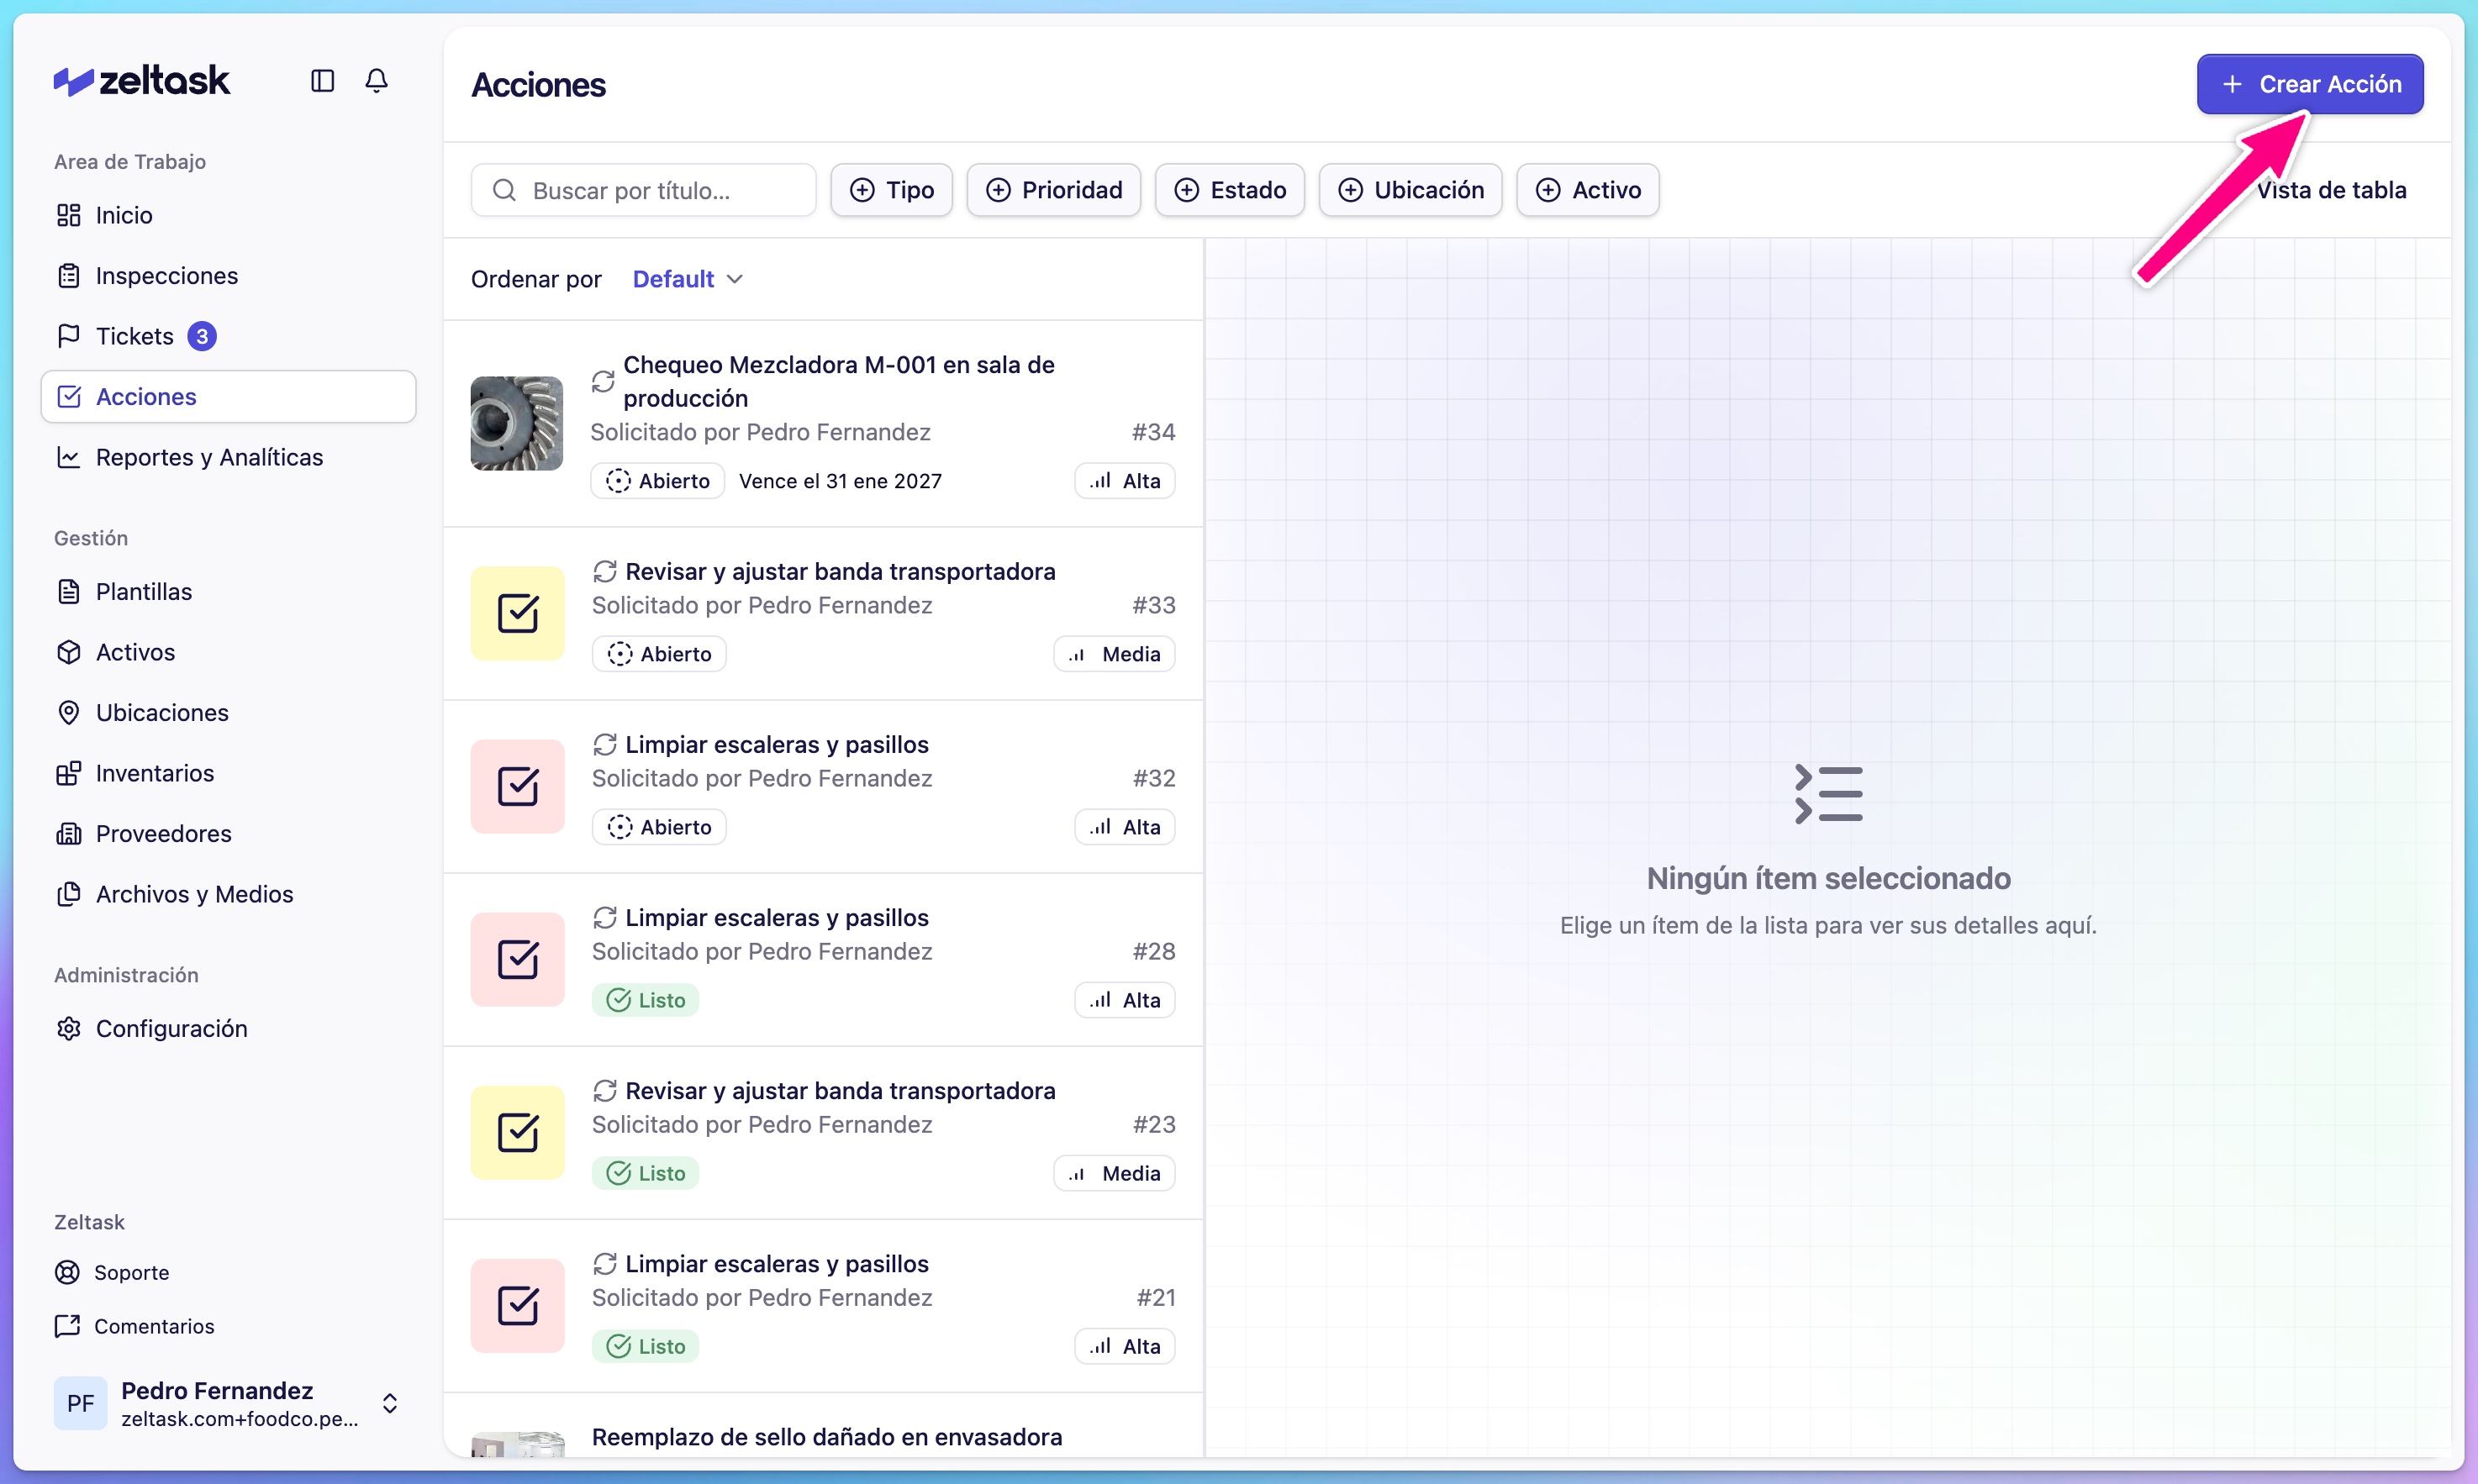
Step 2: Start creating an action
- Click Create Action in the top-right corner
- The action creation form opens
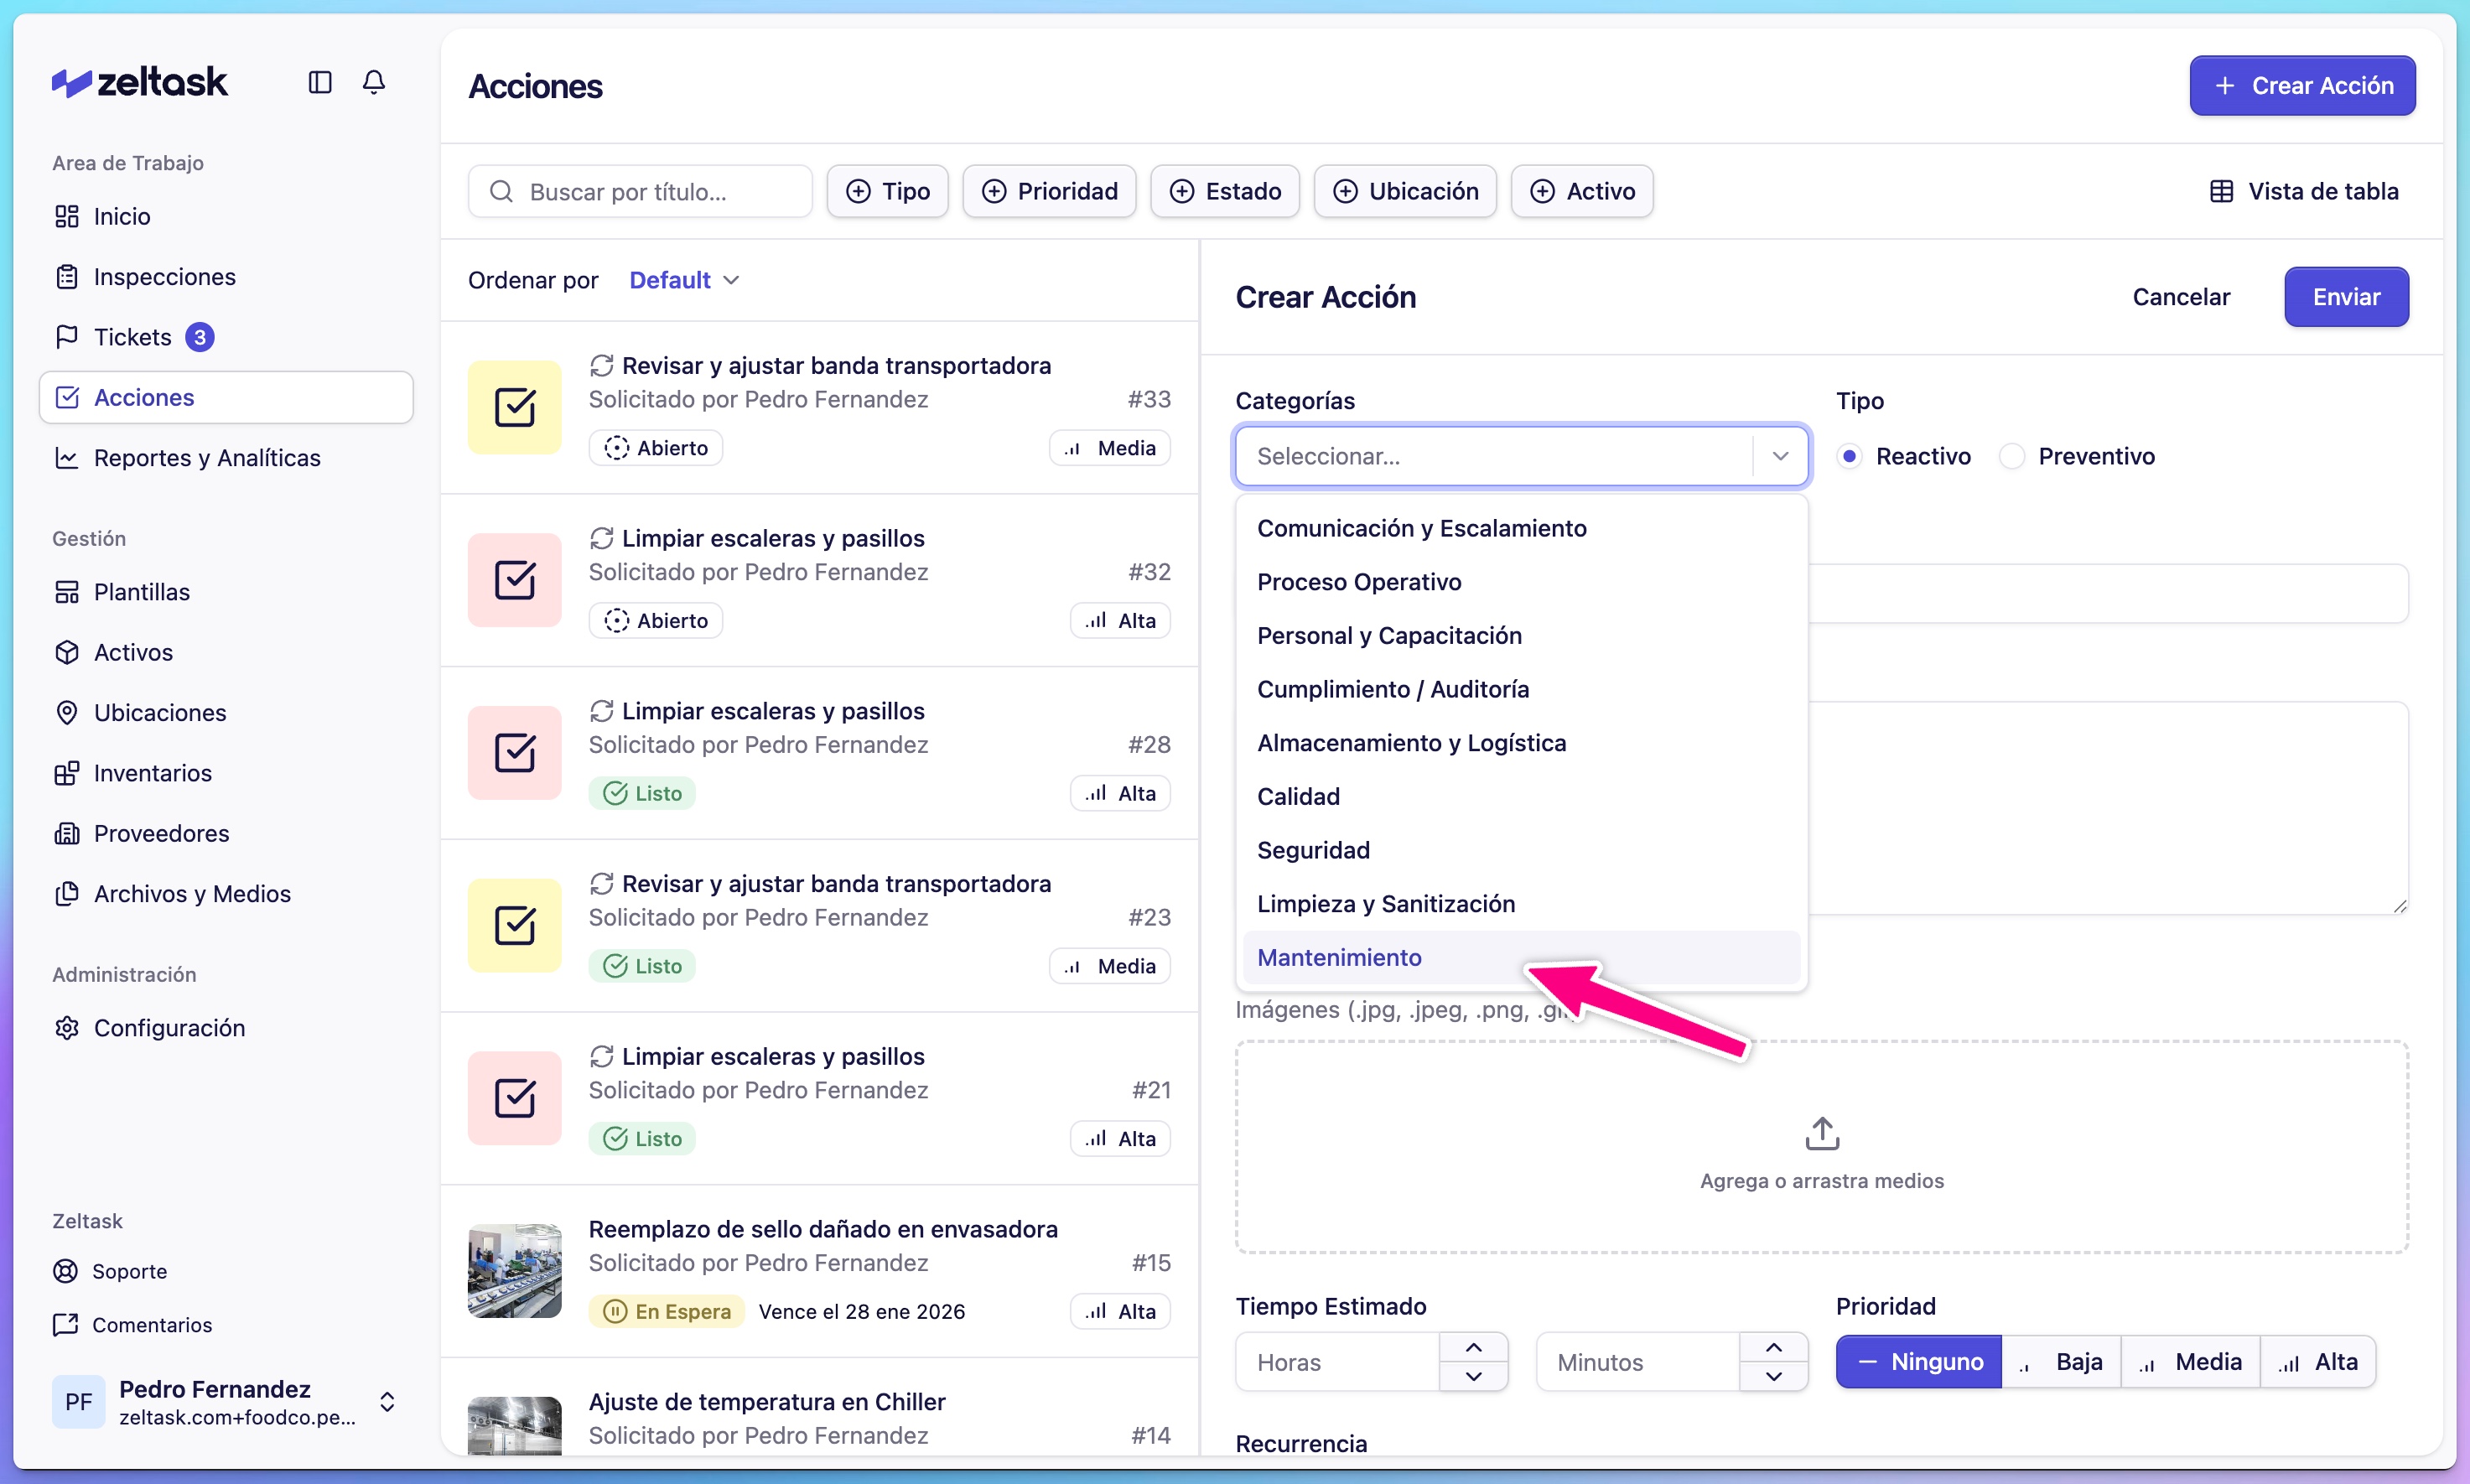
Step 3: Select category and type
Choose the area of work and action type:
| Category | Use For |
|---|---|
| Maintenance | General equipment or facility maintenance |
| Plumbing | Water systems, pipes, drainage |
| Electrical | Electrical systems and equipment |
| Type | Description |
|---|---|
| Preventive | Scheduled, recurring maintenance |
| Reactive | Response to an issue or urgent need |
Step 4: Enter title and description
| Field | Purpose | Example |
|---|---|---|
| Title | Brief, clear name for the task | "Monthly pump inspection" |
| Description | Detailed instructions for the technician | "Check pressure levels, inspect seals, lubricate bearings" |
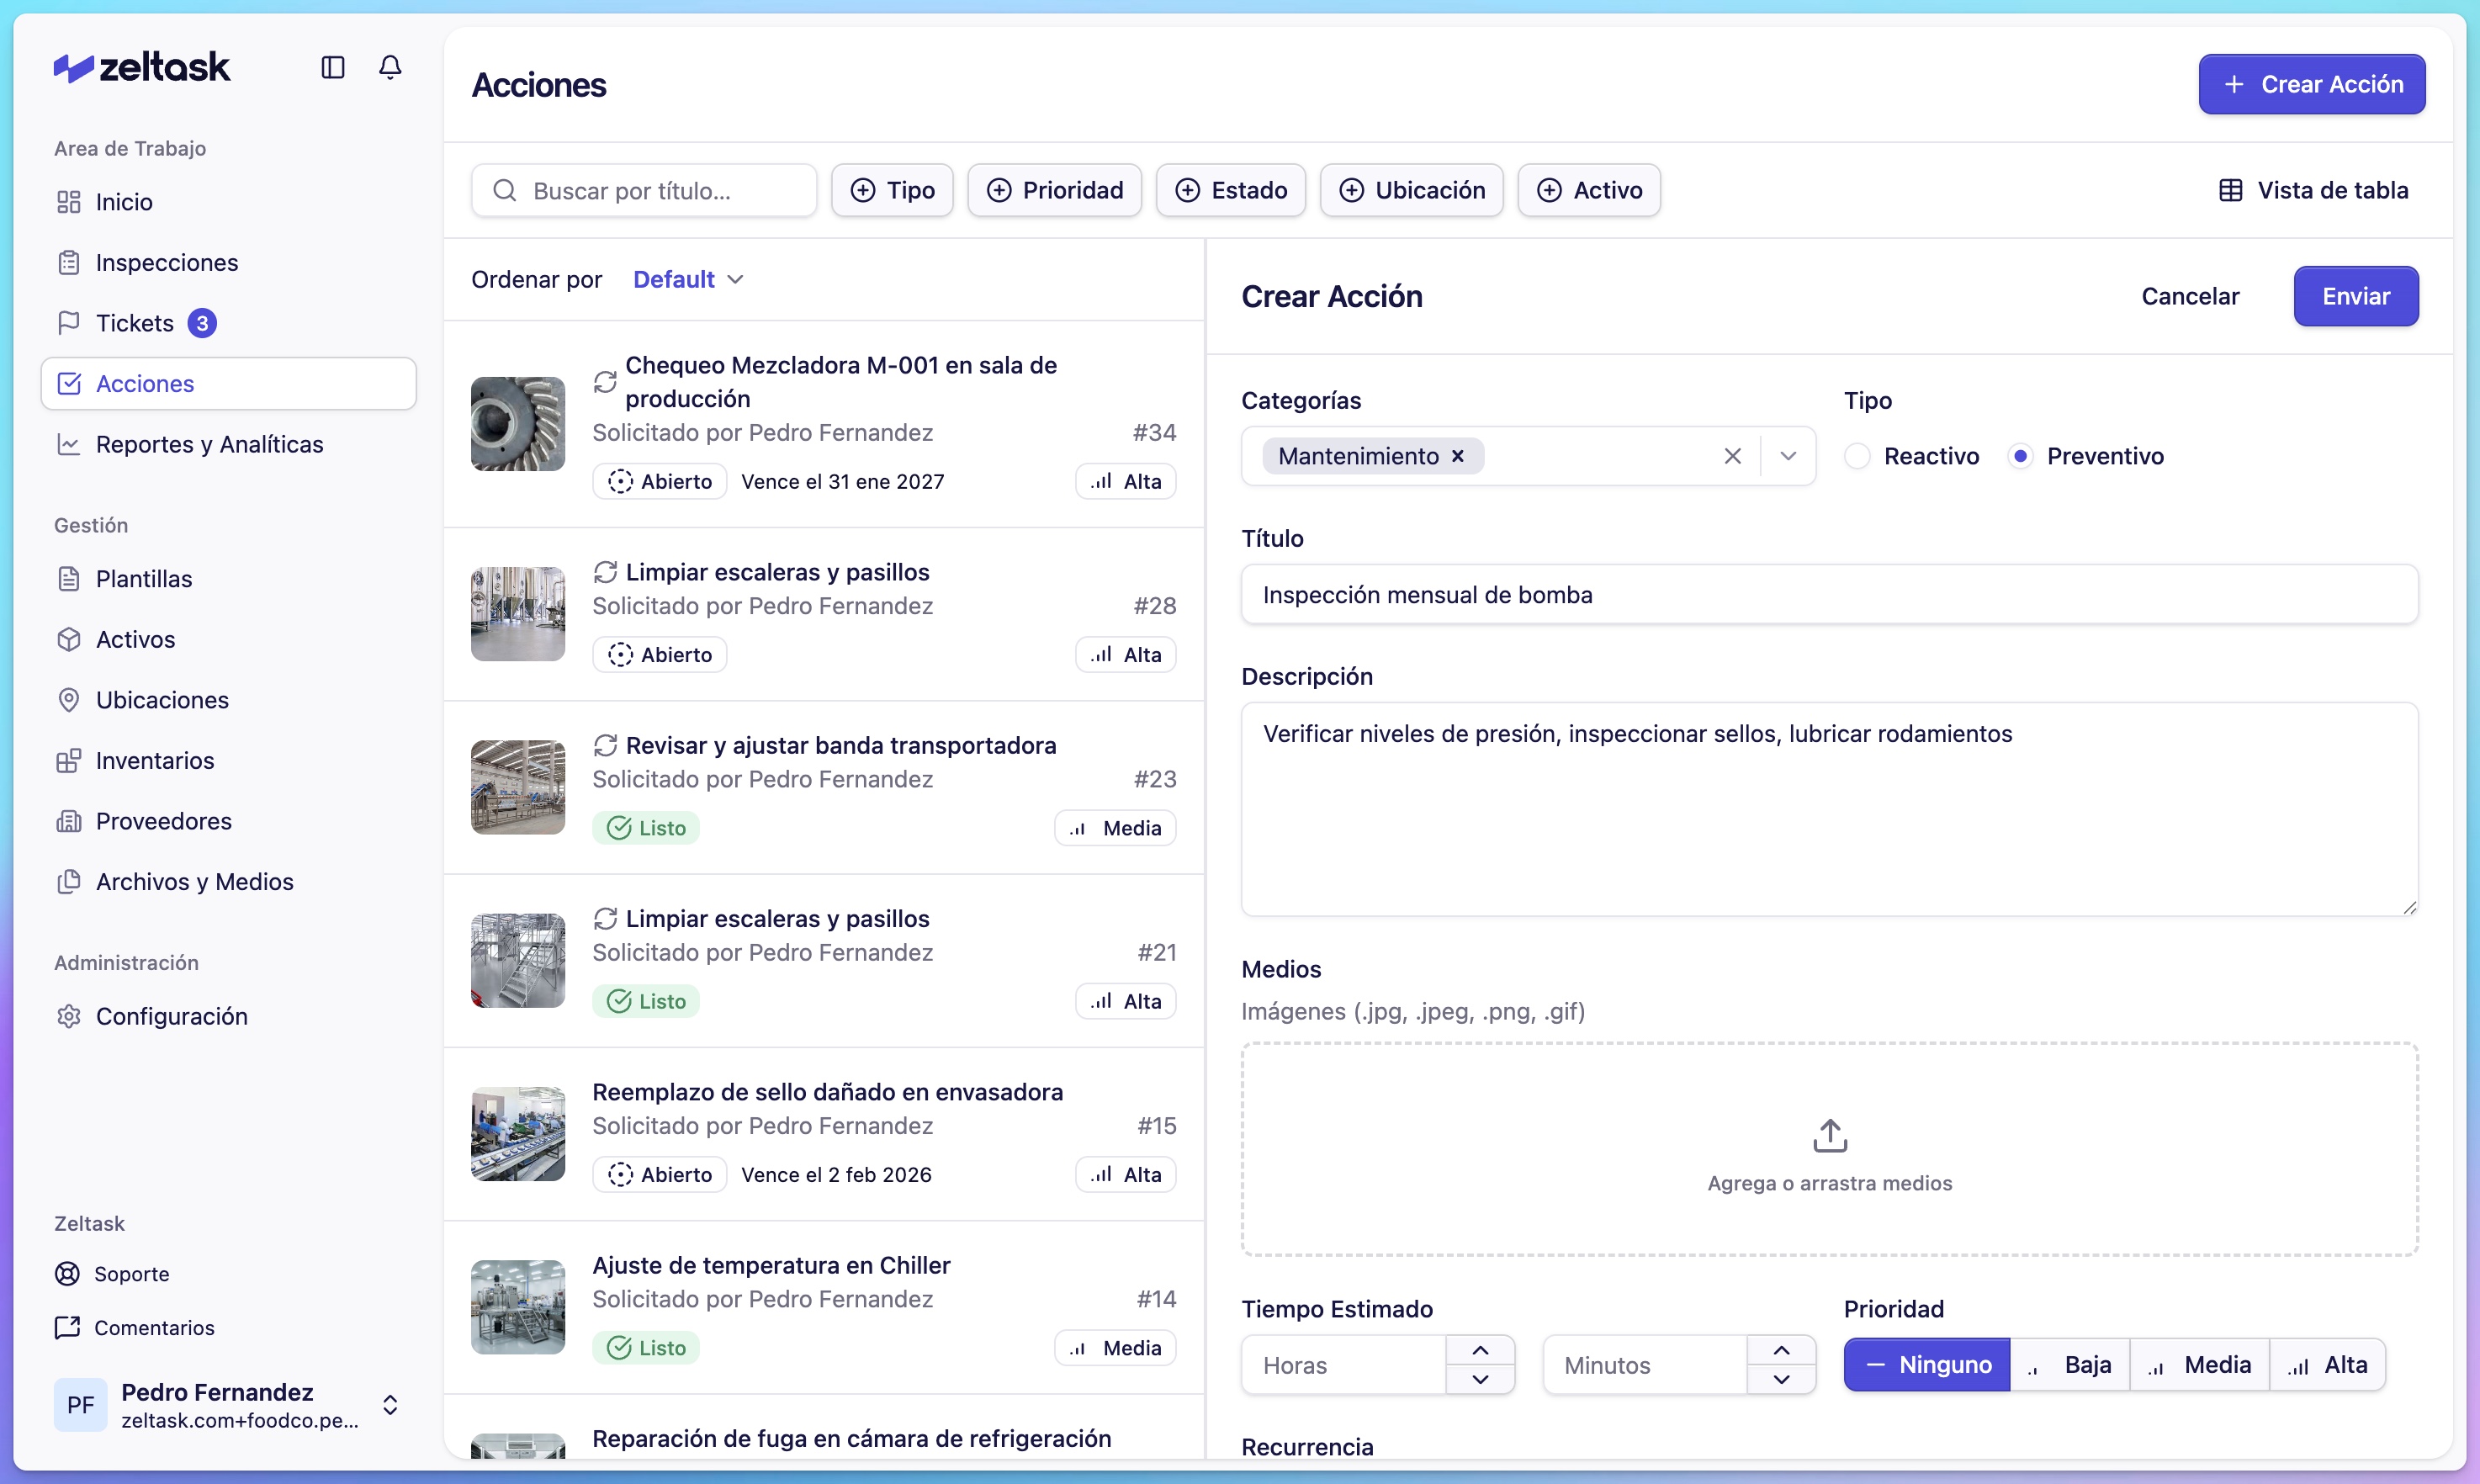
Write a clear title that explains what needs to be done. Use the description to provide context, instructions, or safety notes.
Step 5: Add supporting media (optional)
- Click Add Media
- Upload images showing the current condition, location, or specific issue
- Supported formats: JPG, PNG, GIF
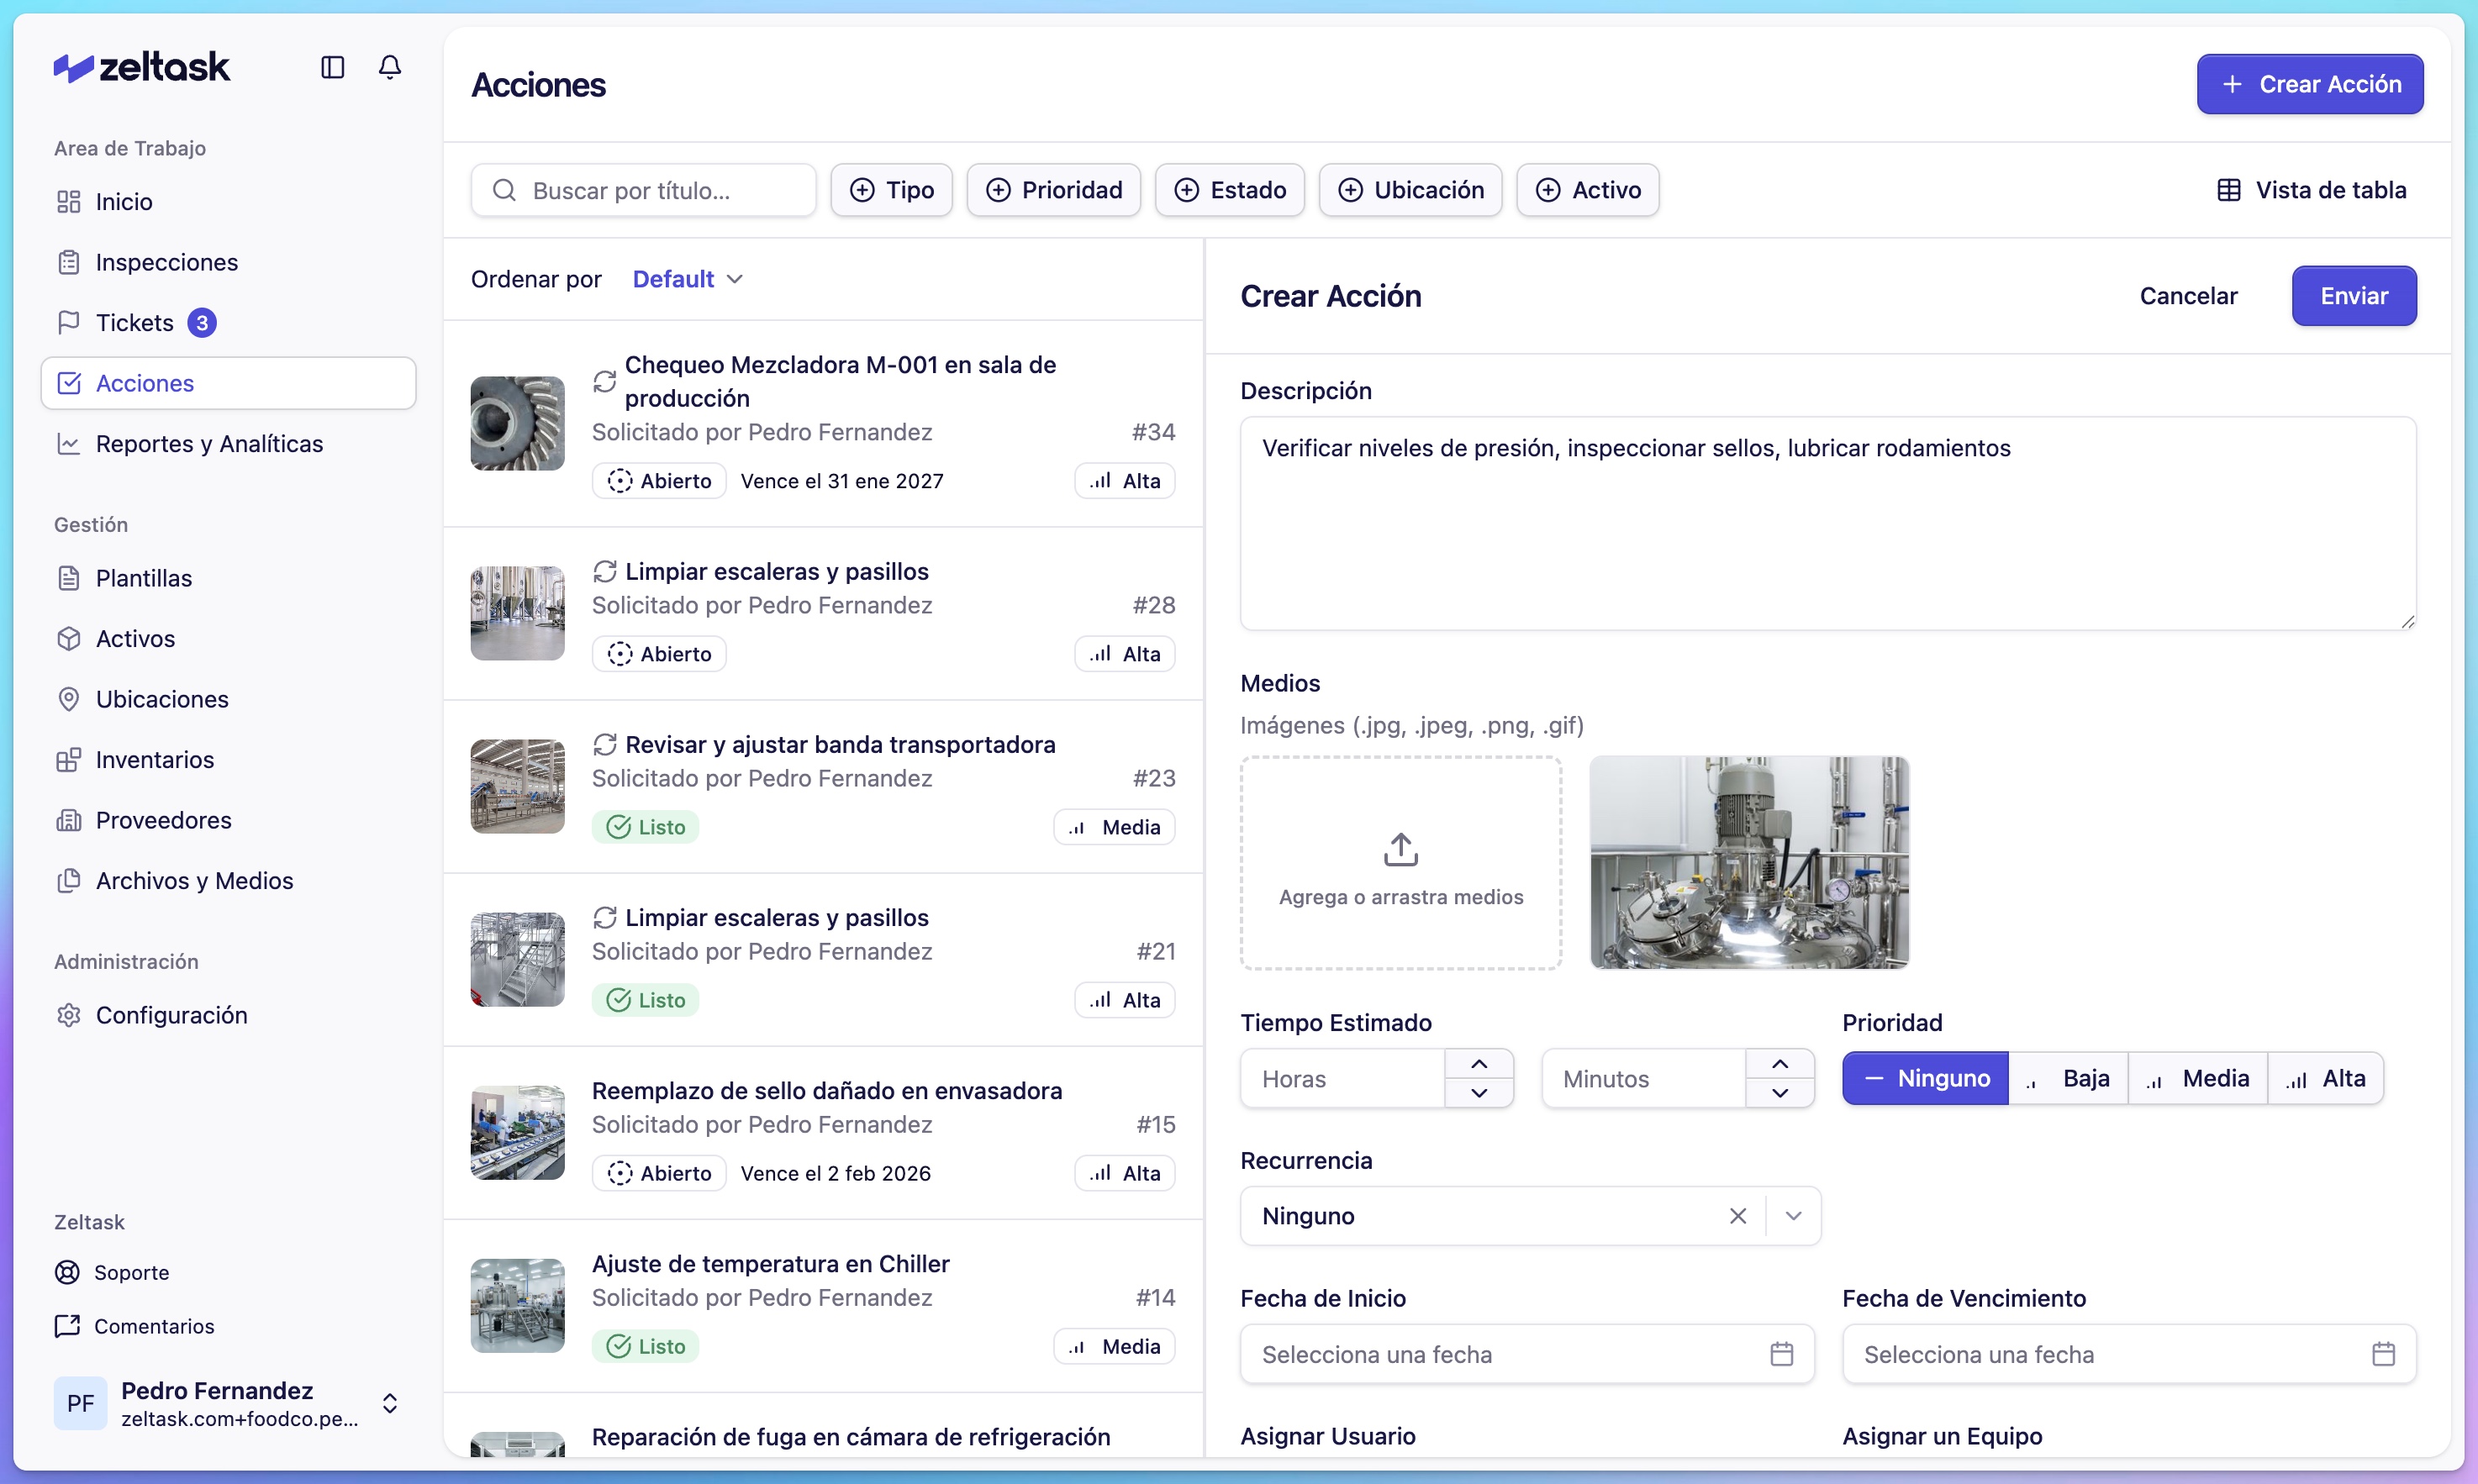
Visual references help technicians understand exactly what needs attention.
Step 6: Set estimated time
Select how long the task should take:
- 15 minutes
- 30 minutes
- 1 hour
- 2 hours
- Custom duration
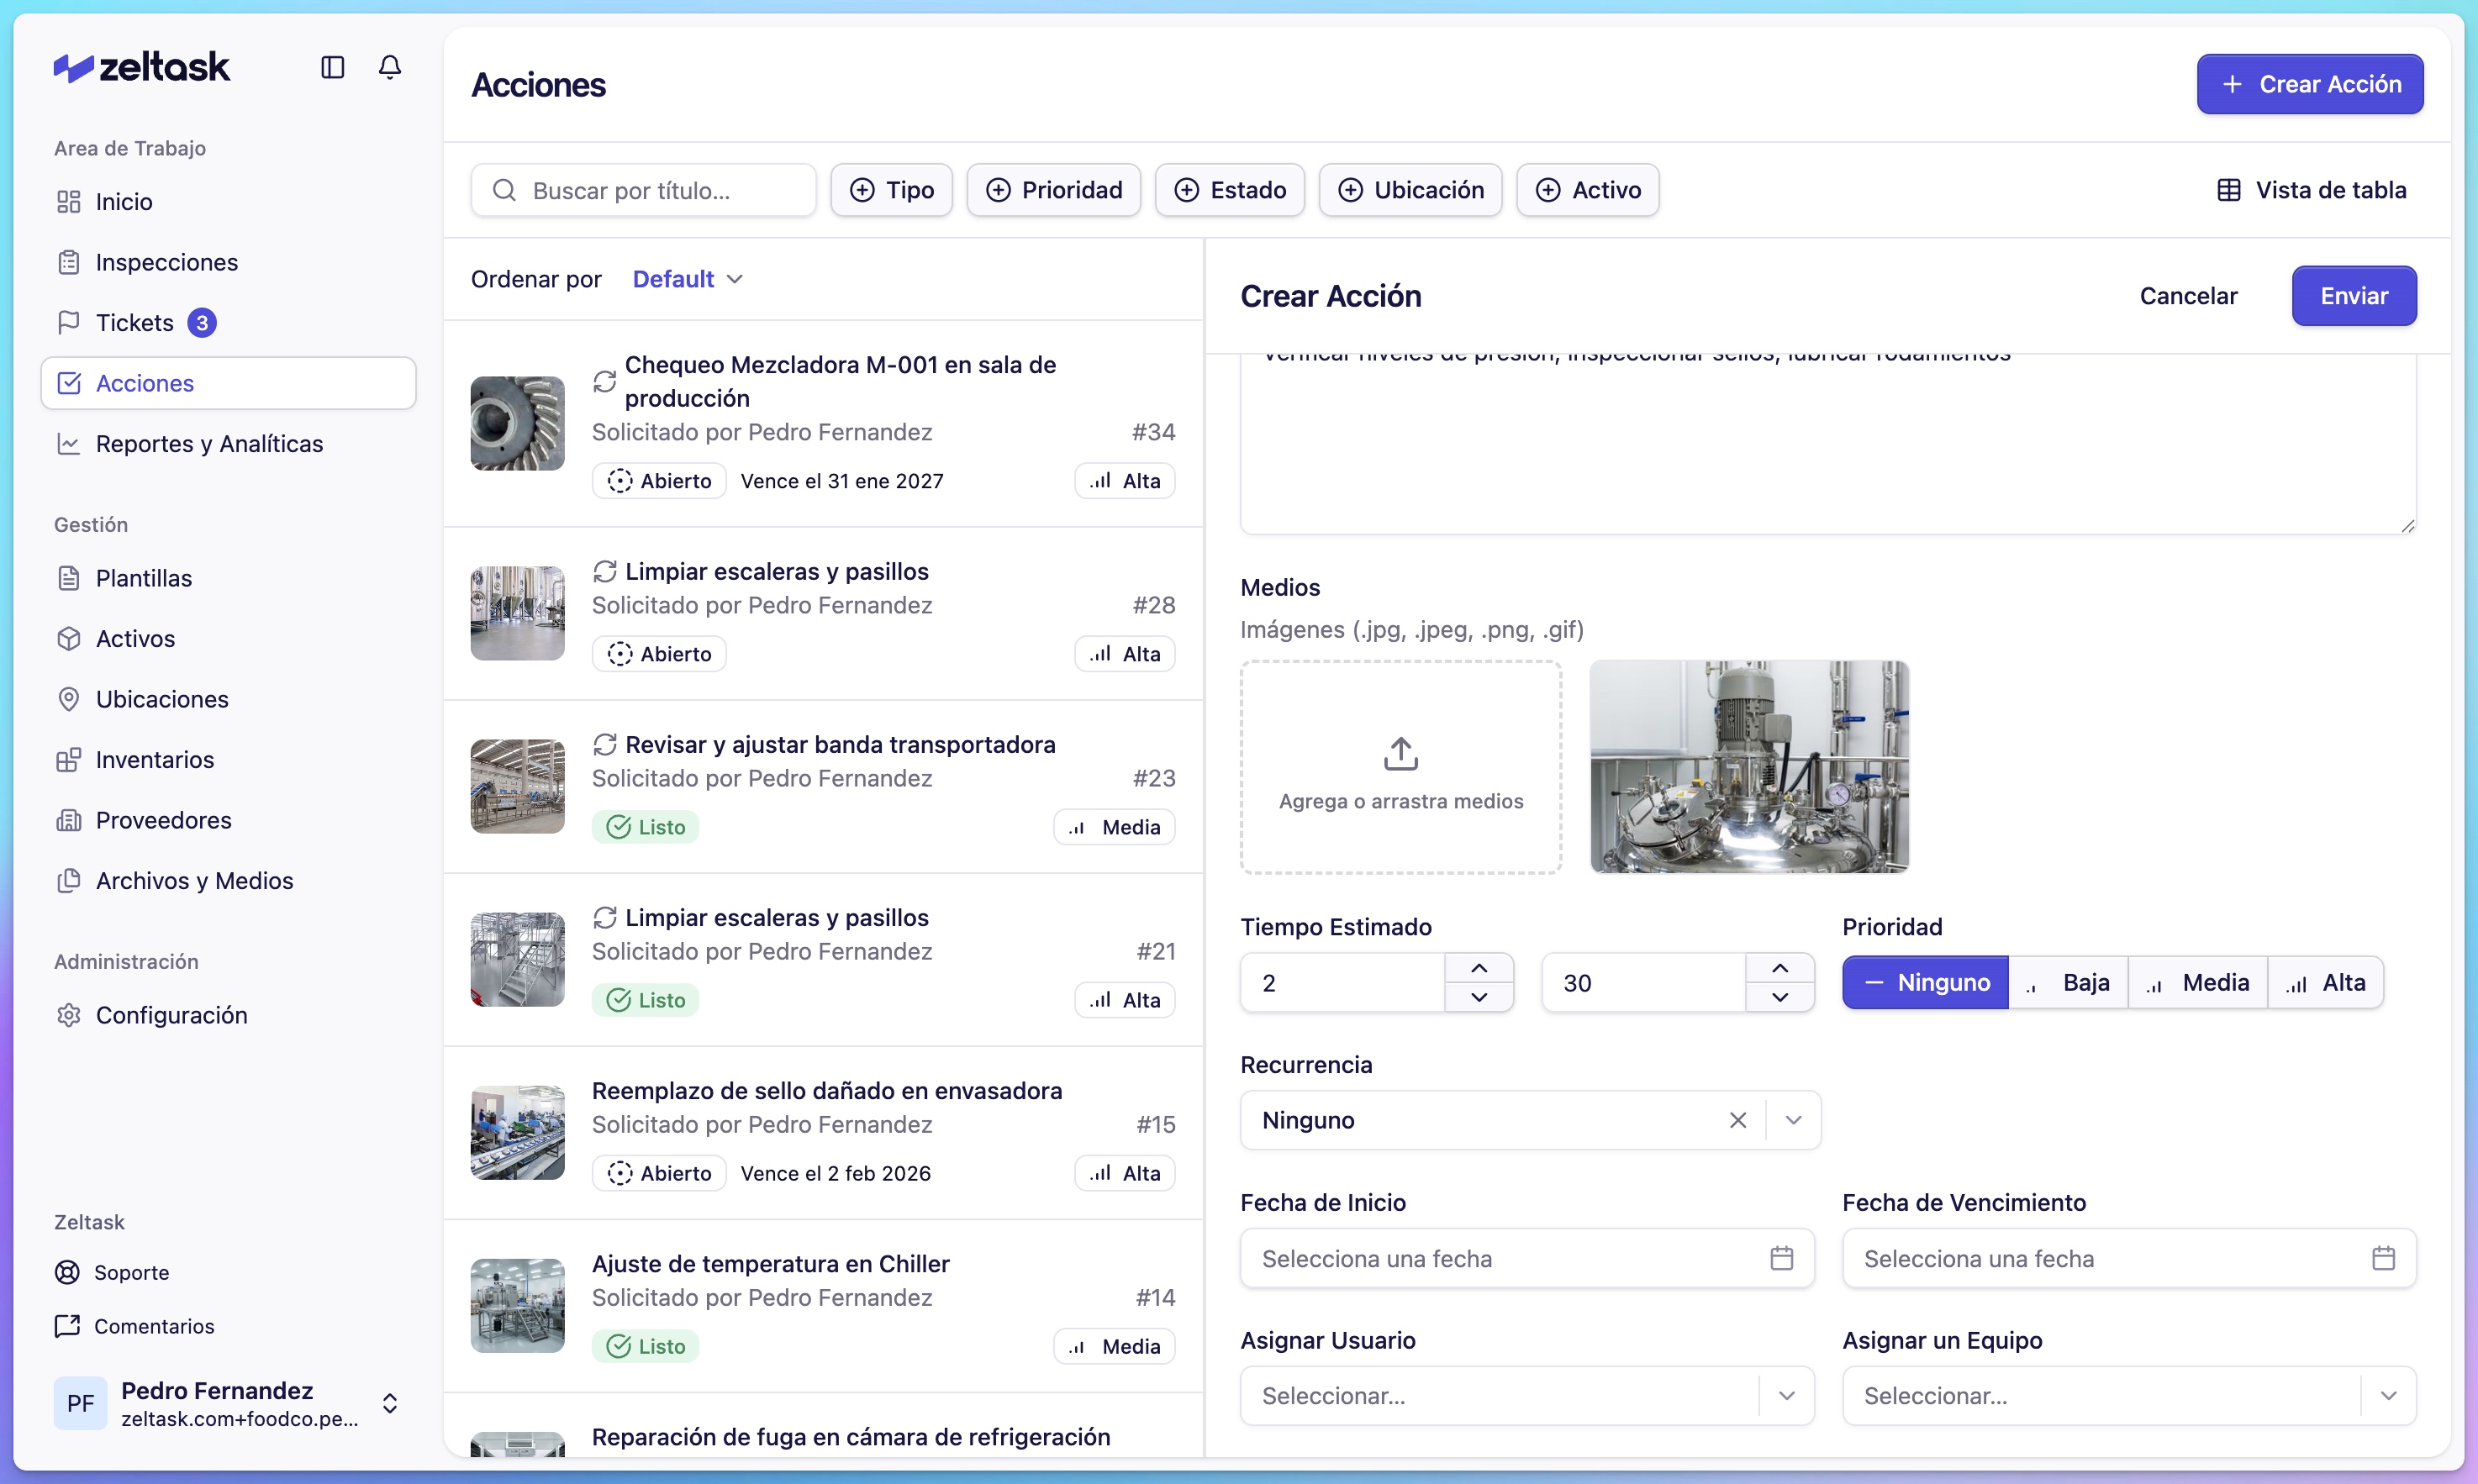
This helps with workload planning and measuring operational efficiency.
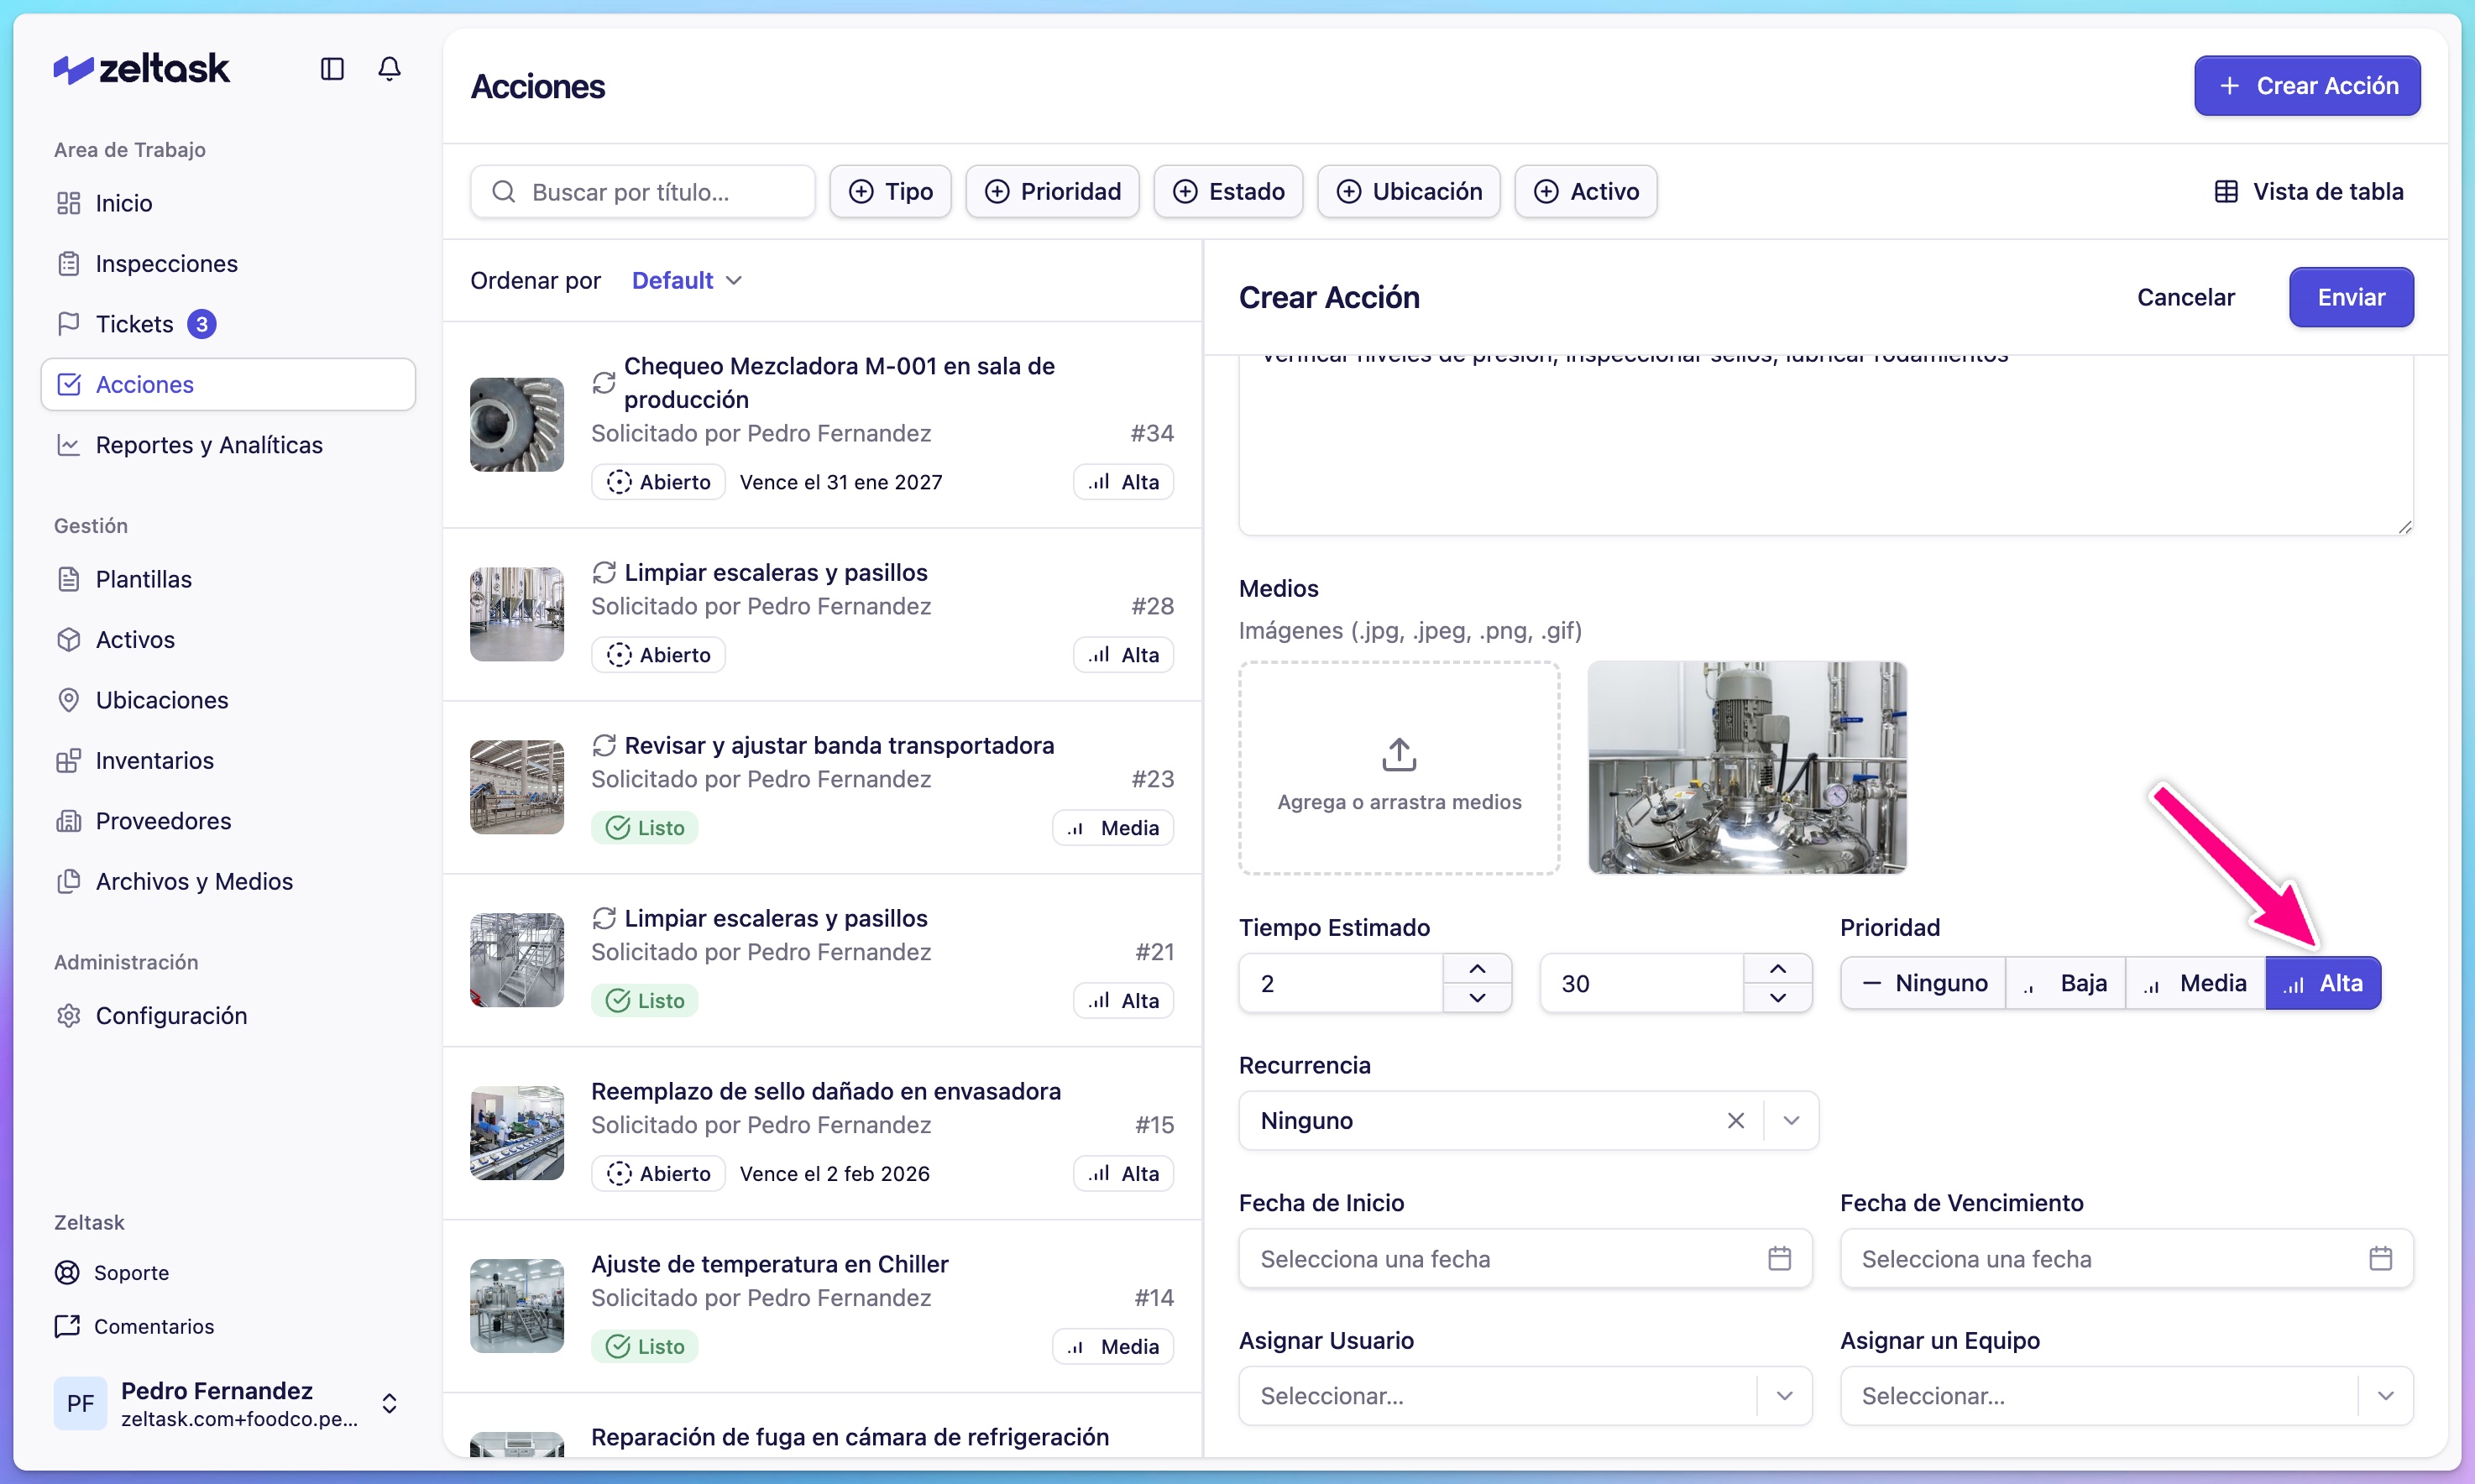
Step 7: Set priority
| Priority | When to Use |
|---|---|
| None | Low-urgency tasks with flexible timing |
| Low | Can wait, but should be done soon |
| Medium | Standard priority, complete in normal order |
| High | Urgent, requires immediate attention |
Step 8: Configure recurrence (preventive actions)
For recurring tasks, set up a schedule:
- Enable the Recurring toggle
- Select Recurrence: Daily, Weekly, Monthly, or Yearly
- Configure the pattern:
- Weekly: Select which days
- Monthly: Select which day of the month
- Yearly: Select month and day
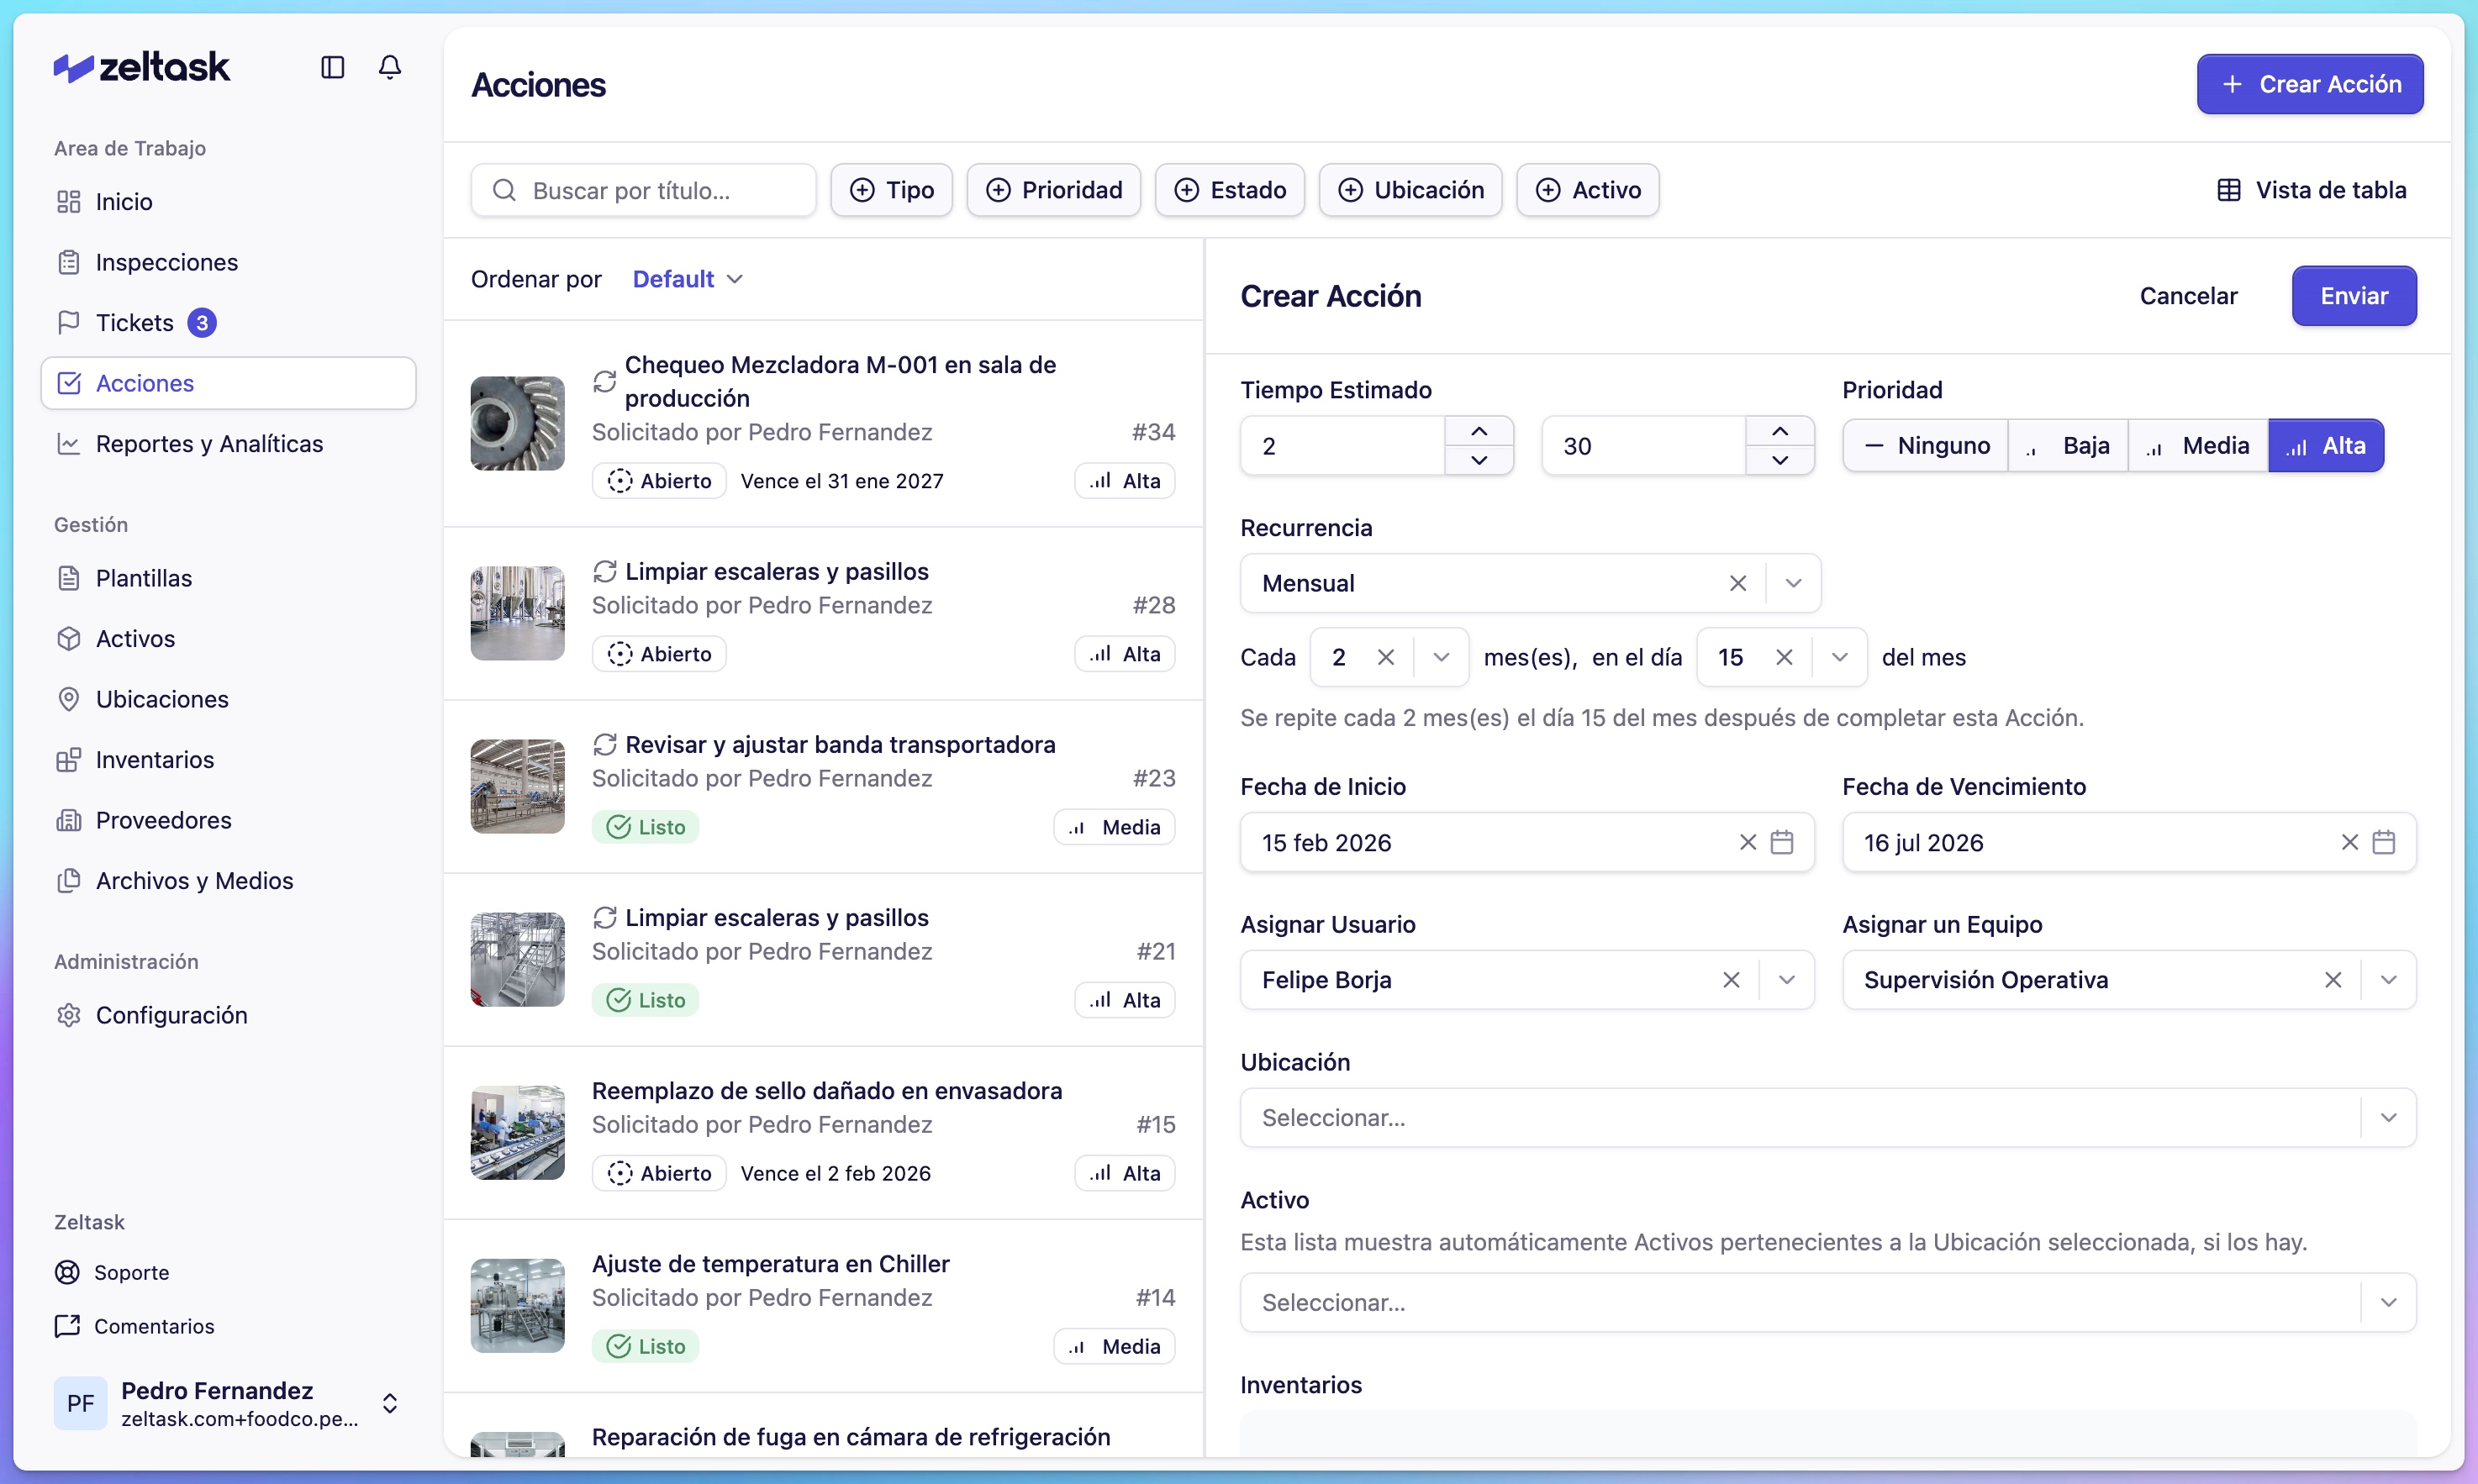
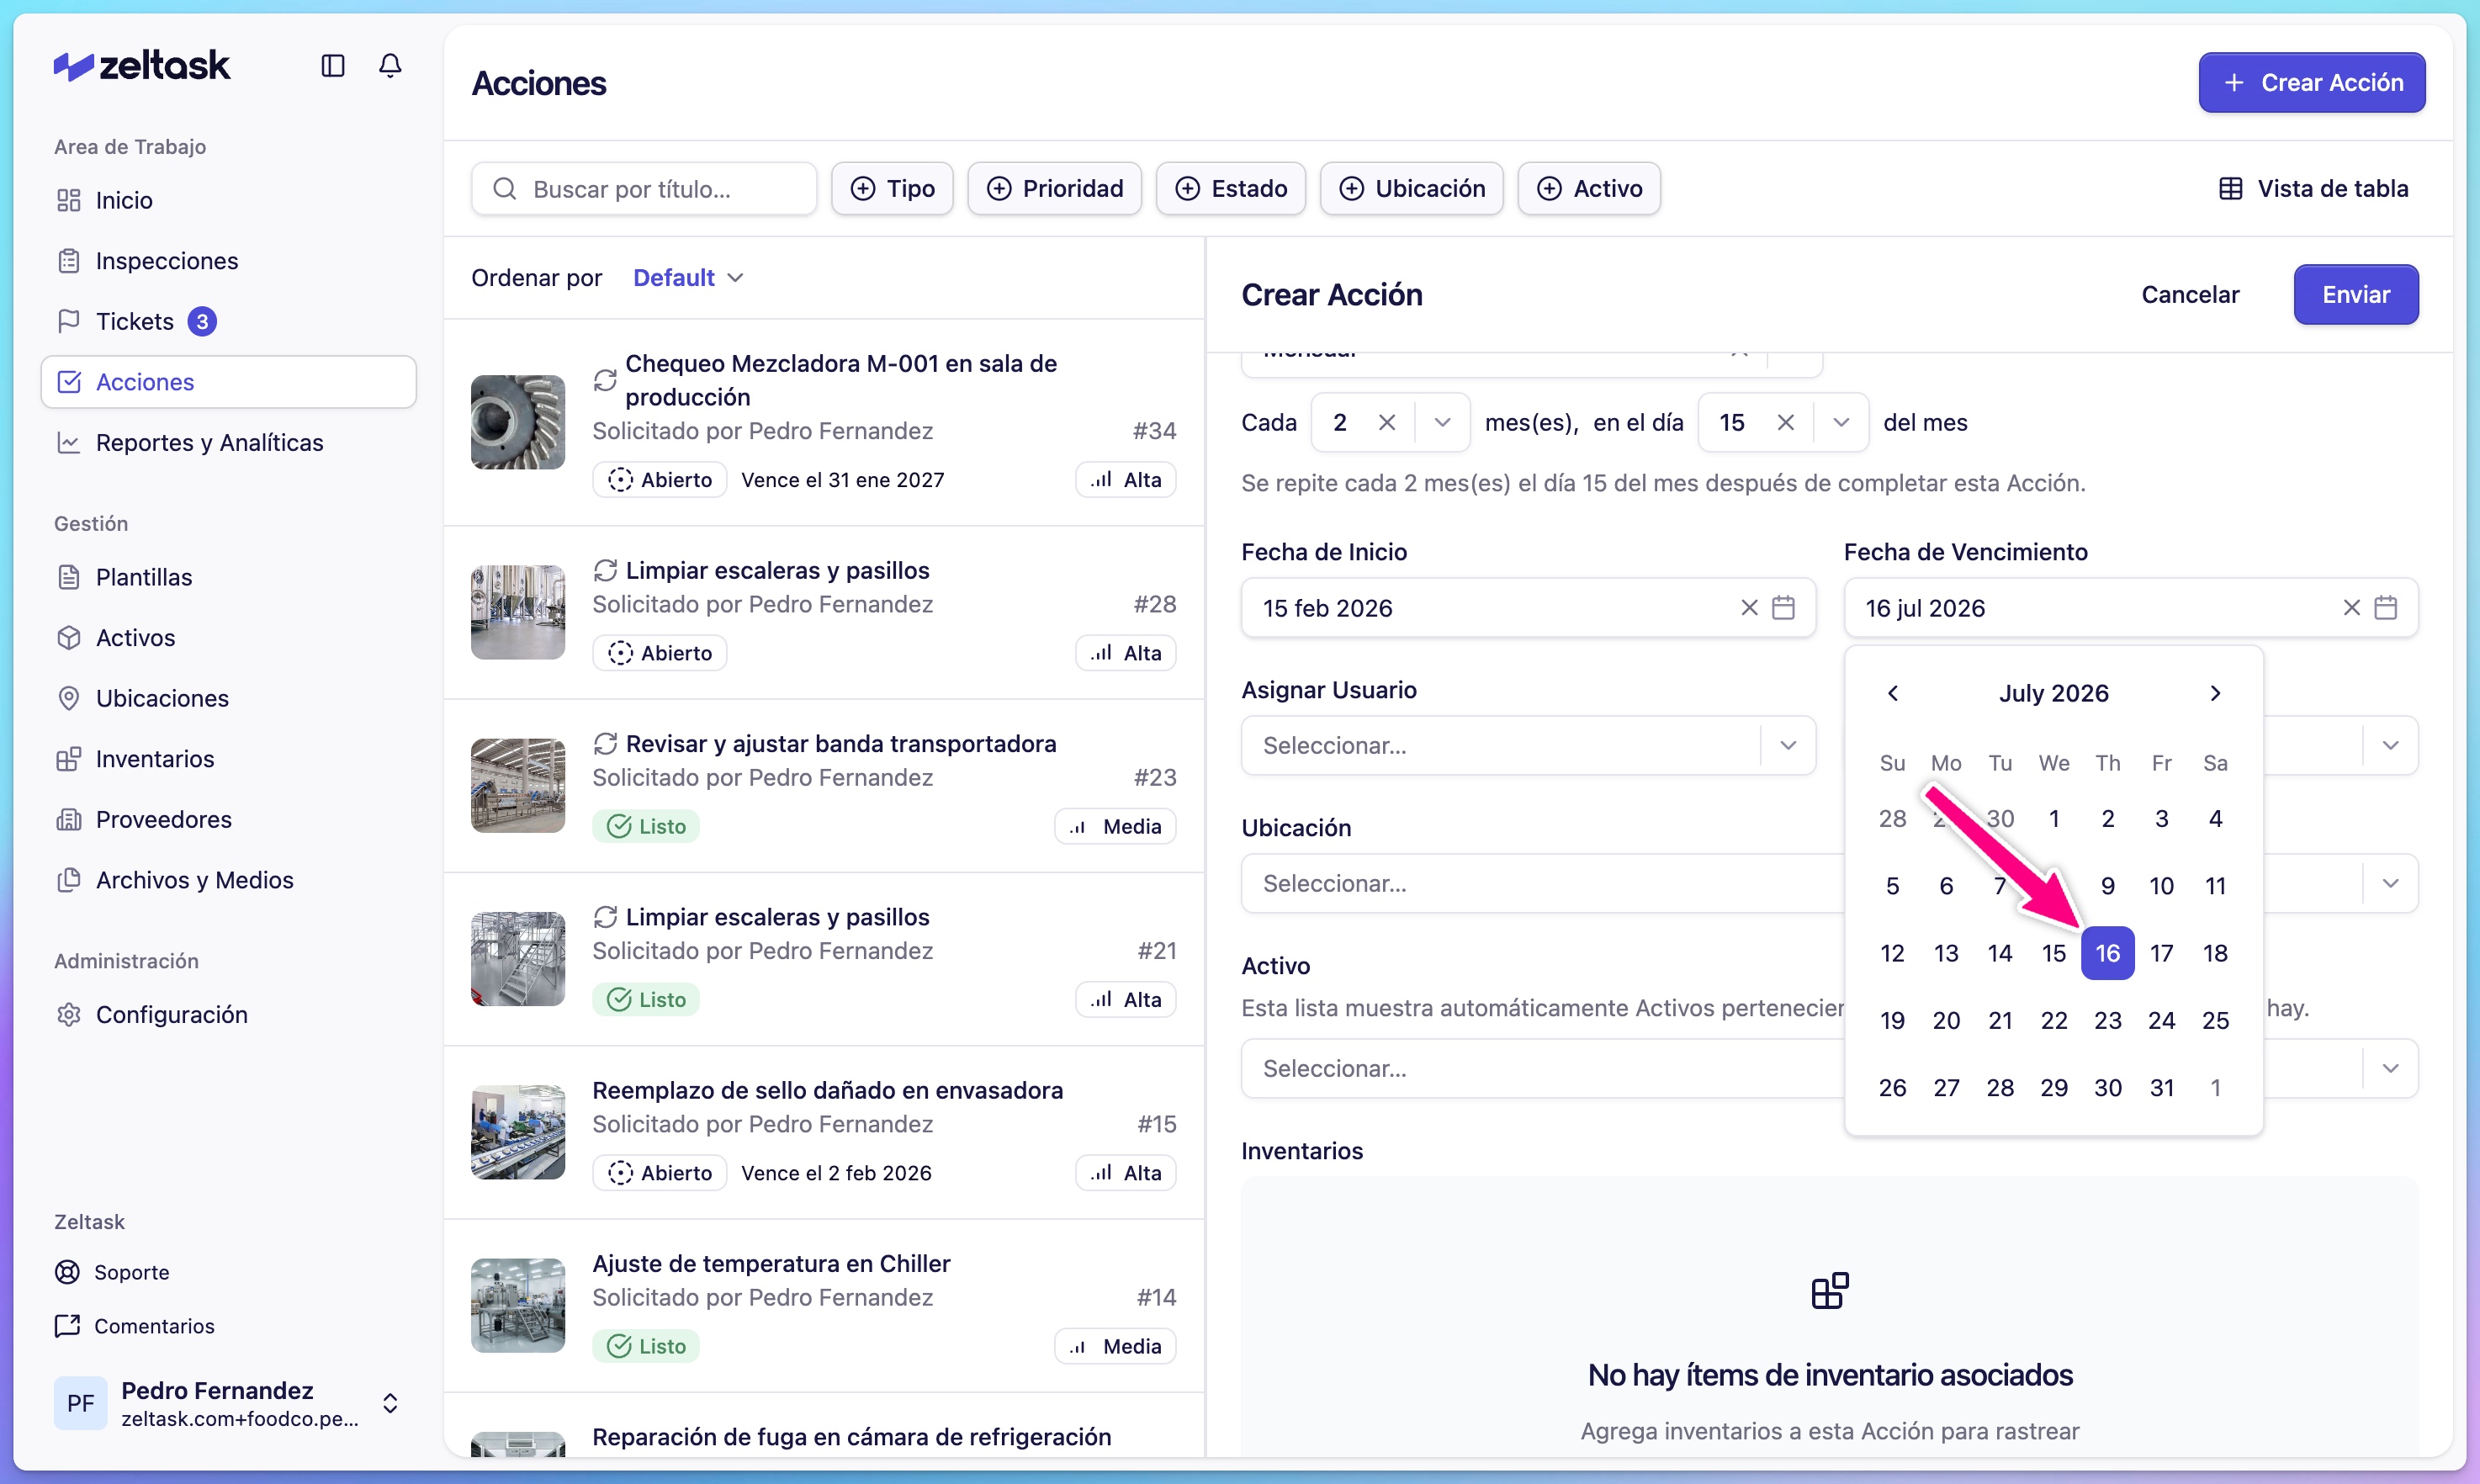
Step 9: Set dates
| Field | Purpose |
|---|---|
| Start Date | When the action begins or becomes active |
| Due Date | Deadline for completion |
Step 10: Assign responsibility
Choose who should complete the work:
| Option | When to Use |
|---|---|
| Assign to User | A specific person must complete the task |
| Assign to Team | Any team member can pick it up |
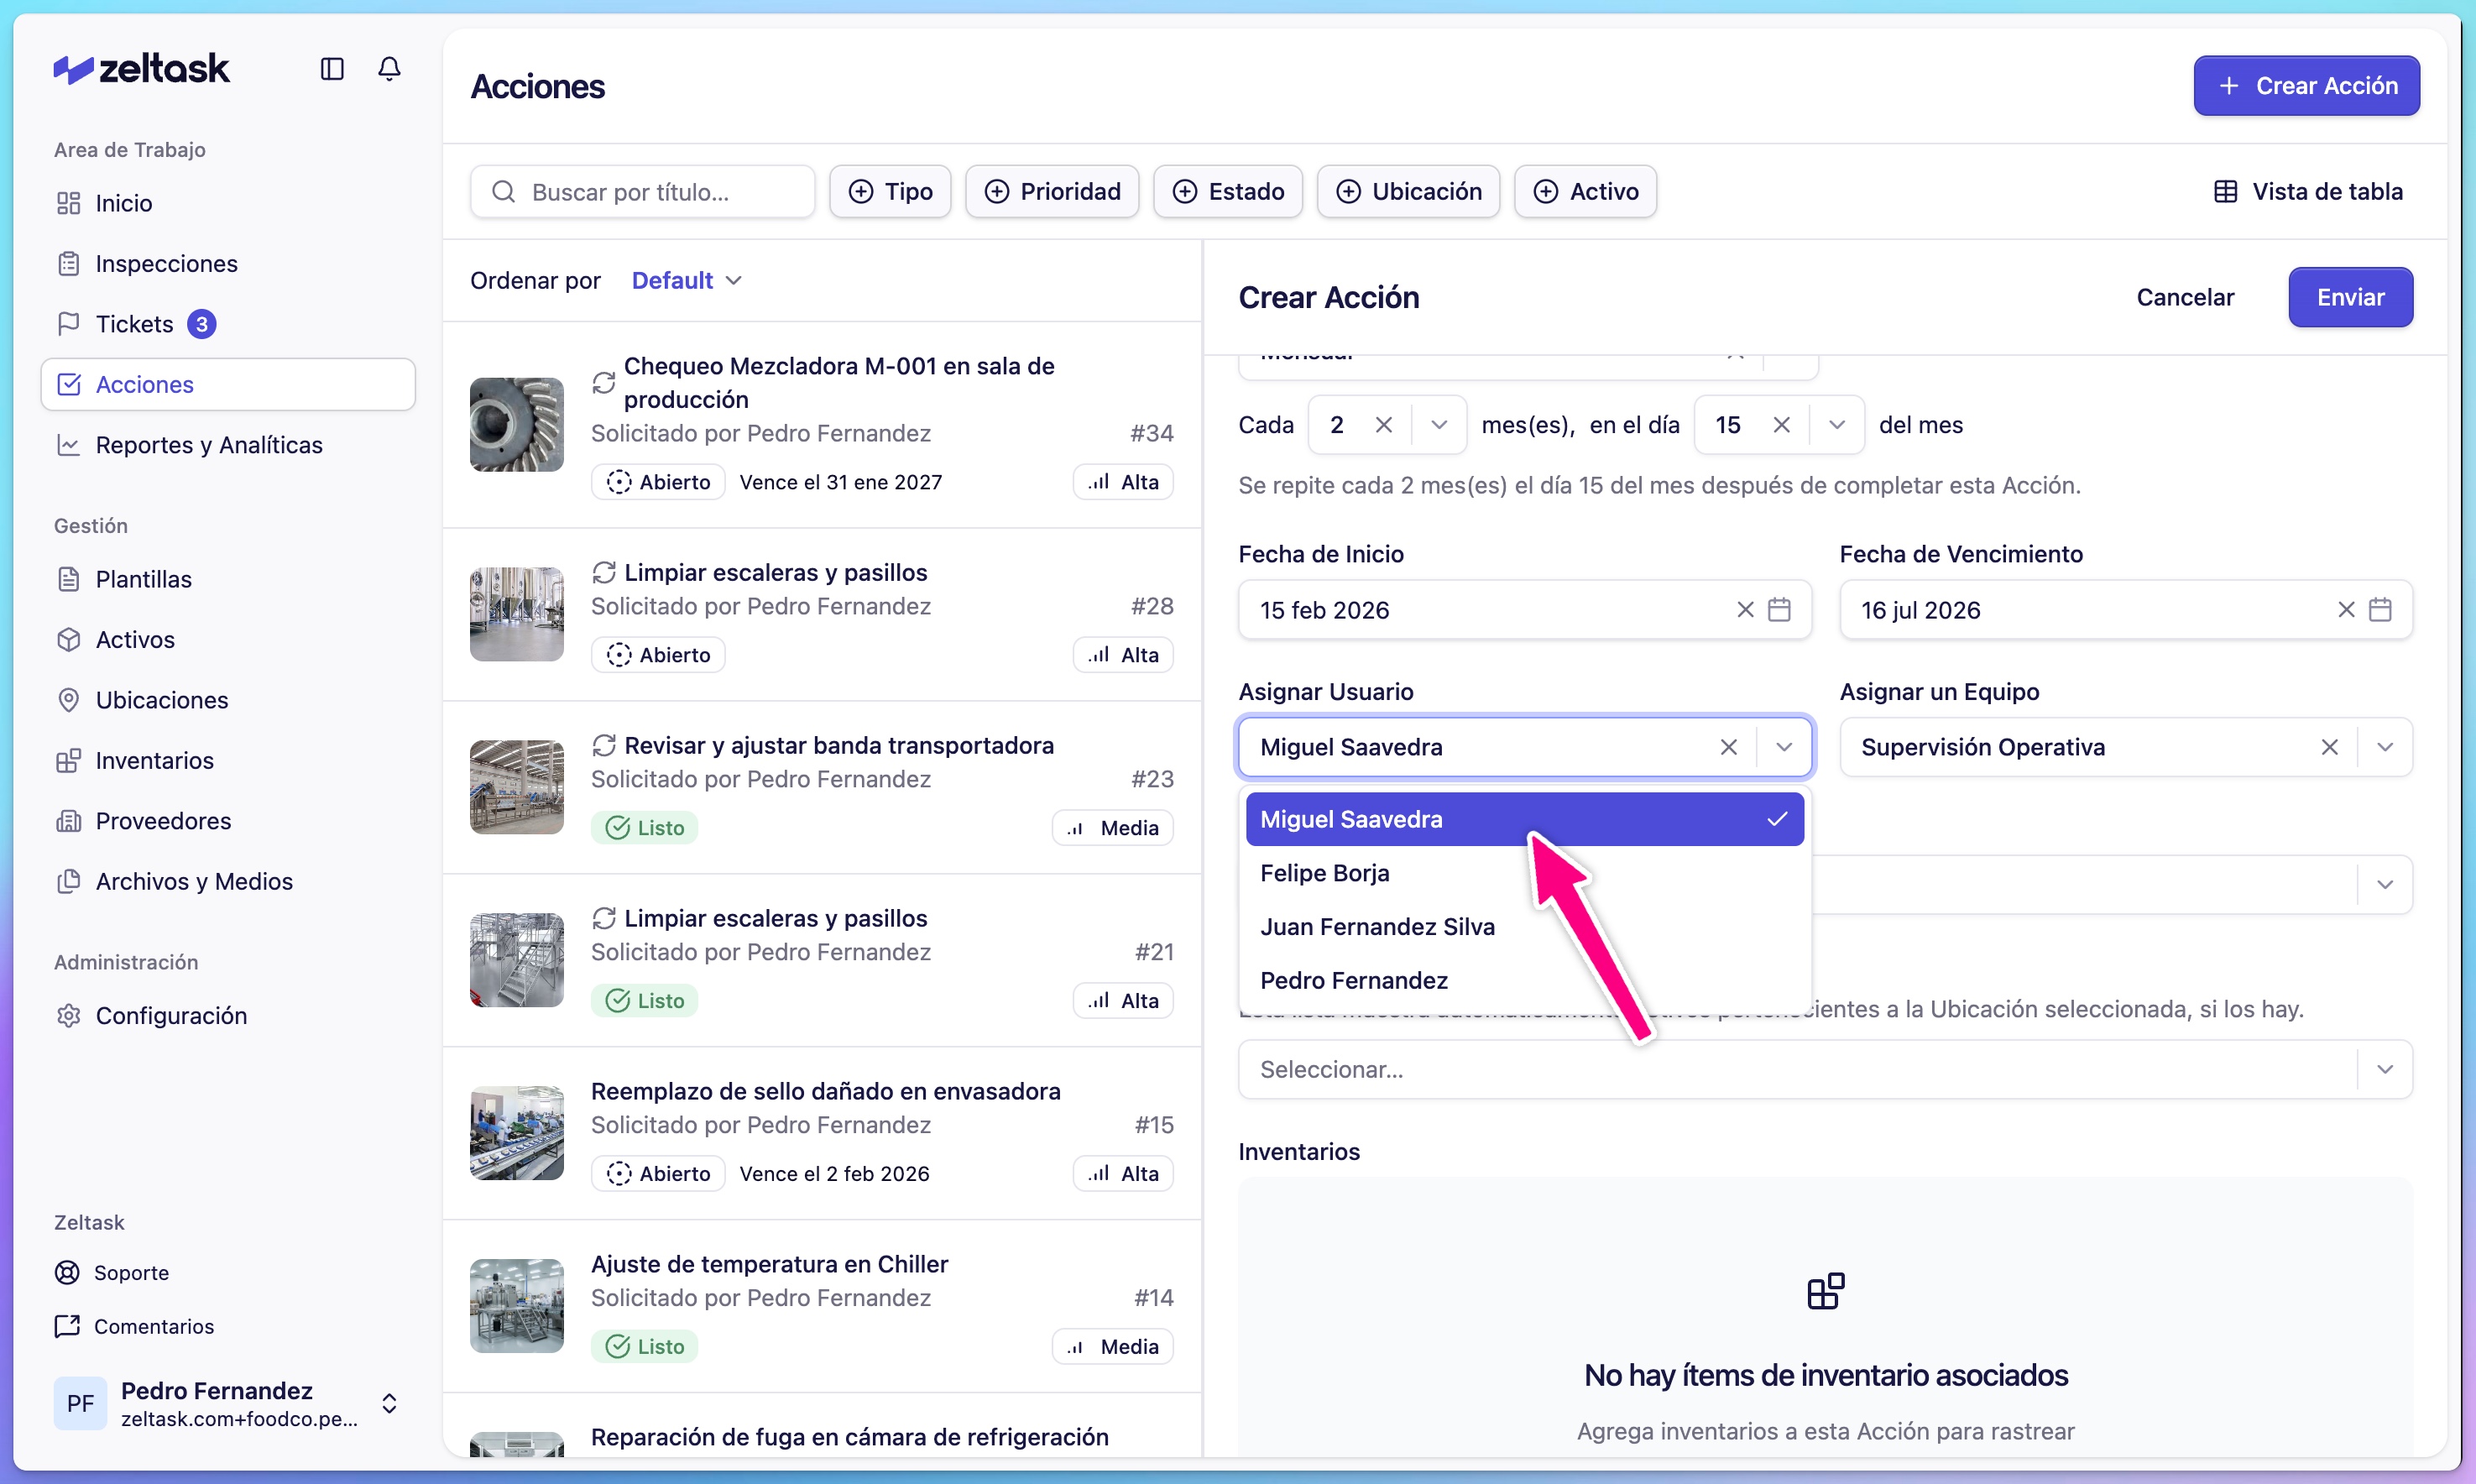
The assigned person or team receives a notification when the action is created.
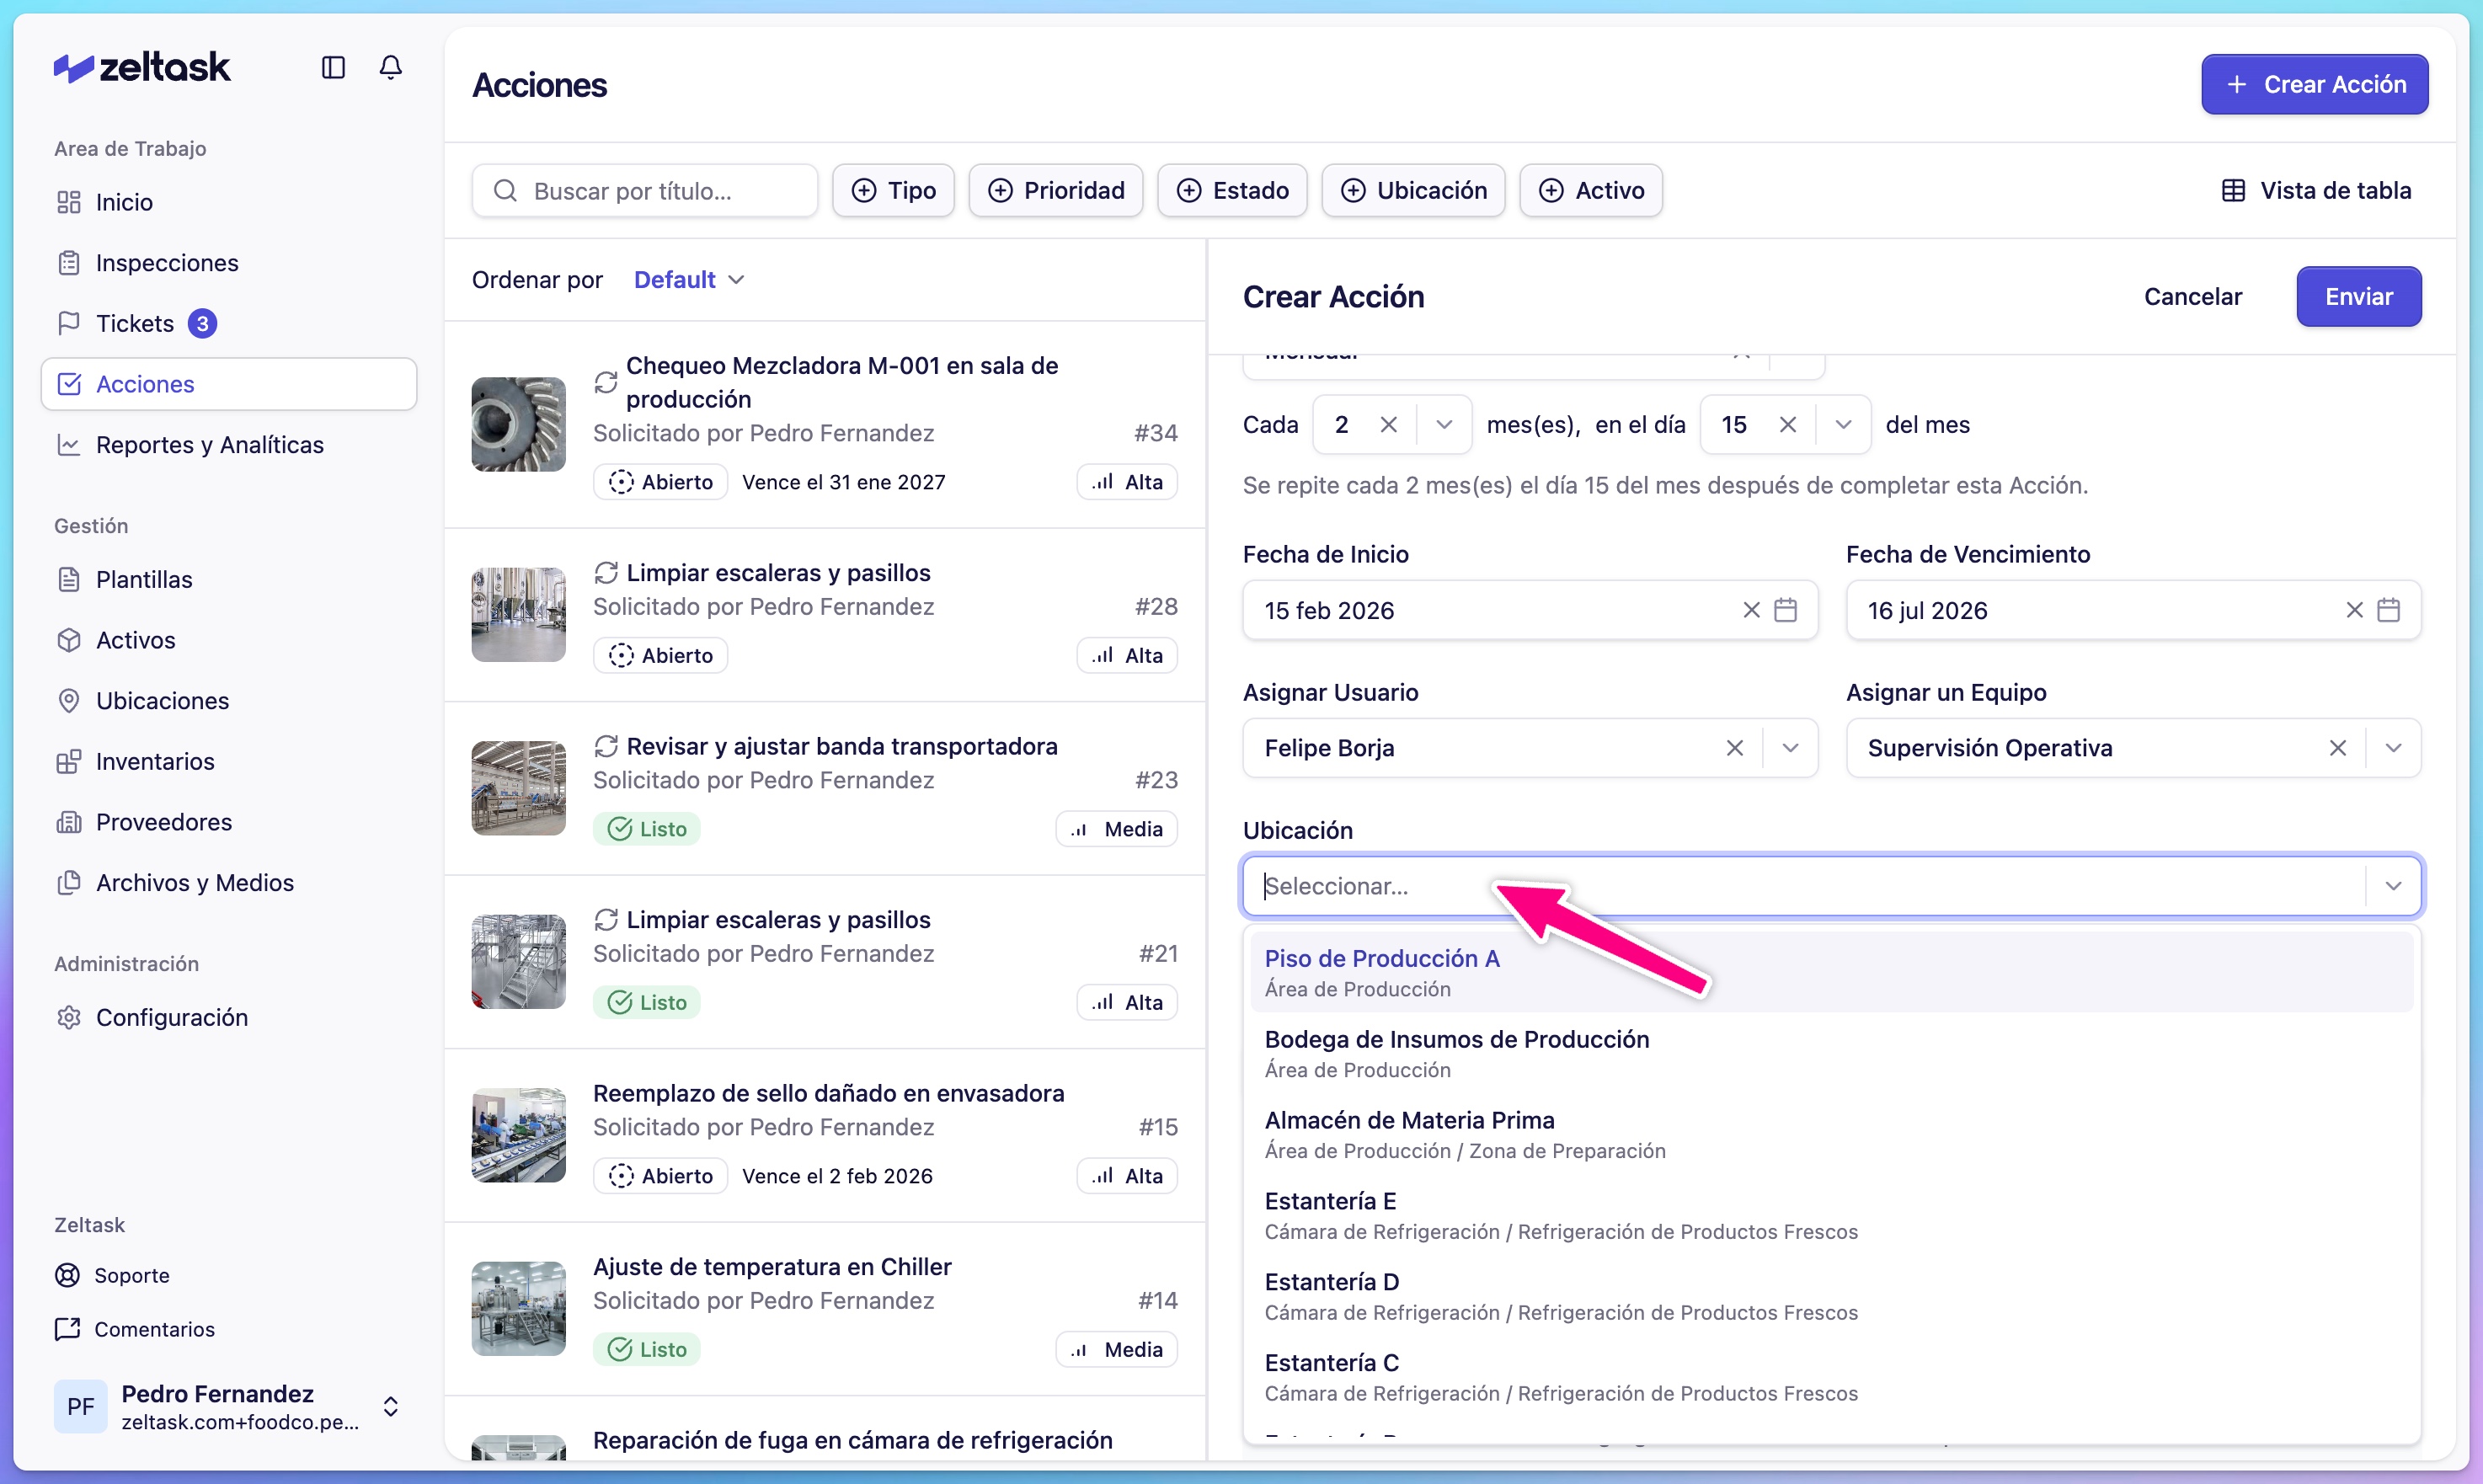
Step 11: Link to location
Select where the work should be performed:
- Click the Location dropdown
- Search or browse available locations
- Select the appropriate area
Step 12: Link to asset
Associate the action with specific equipment:
- Click the Asset dropdown
- Search or browse available assets
- Select the equipment
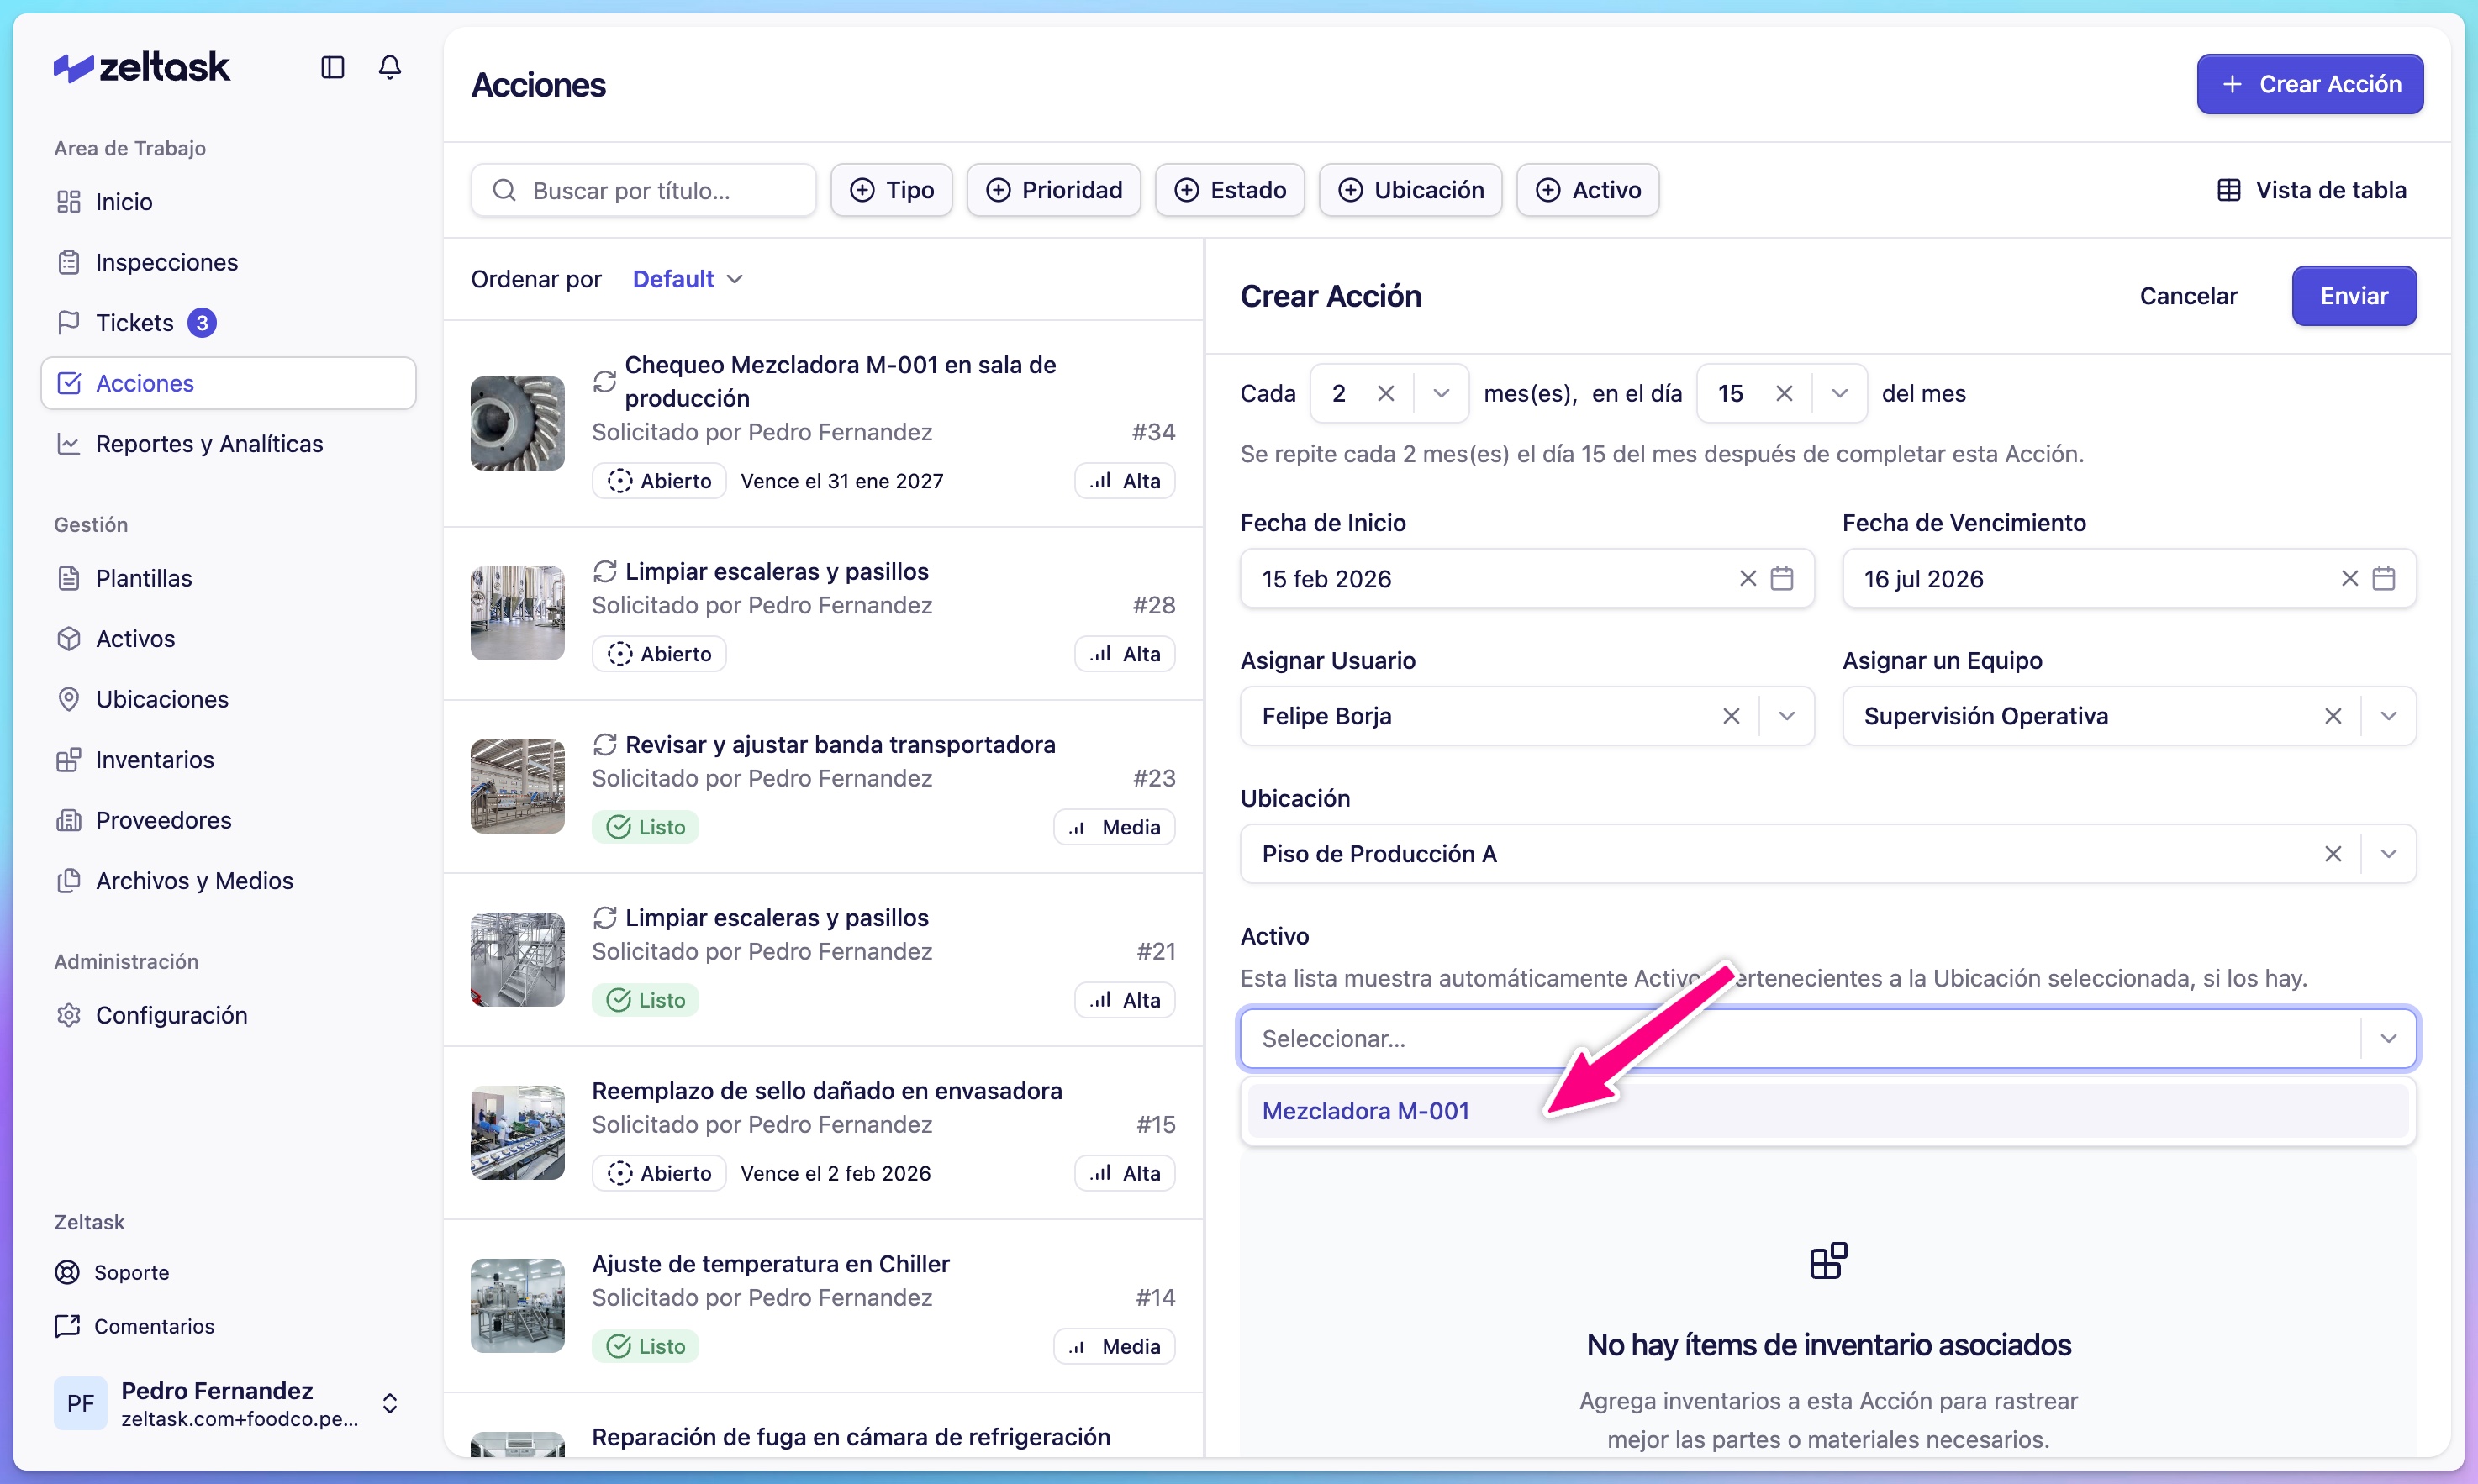
Linking to assets builds maintenance history over time.
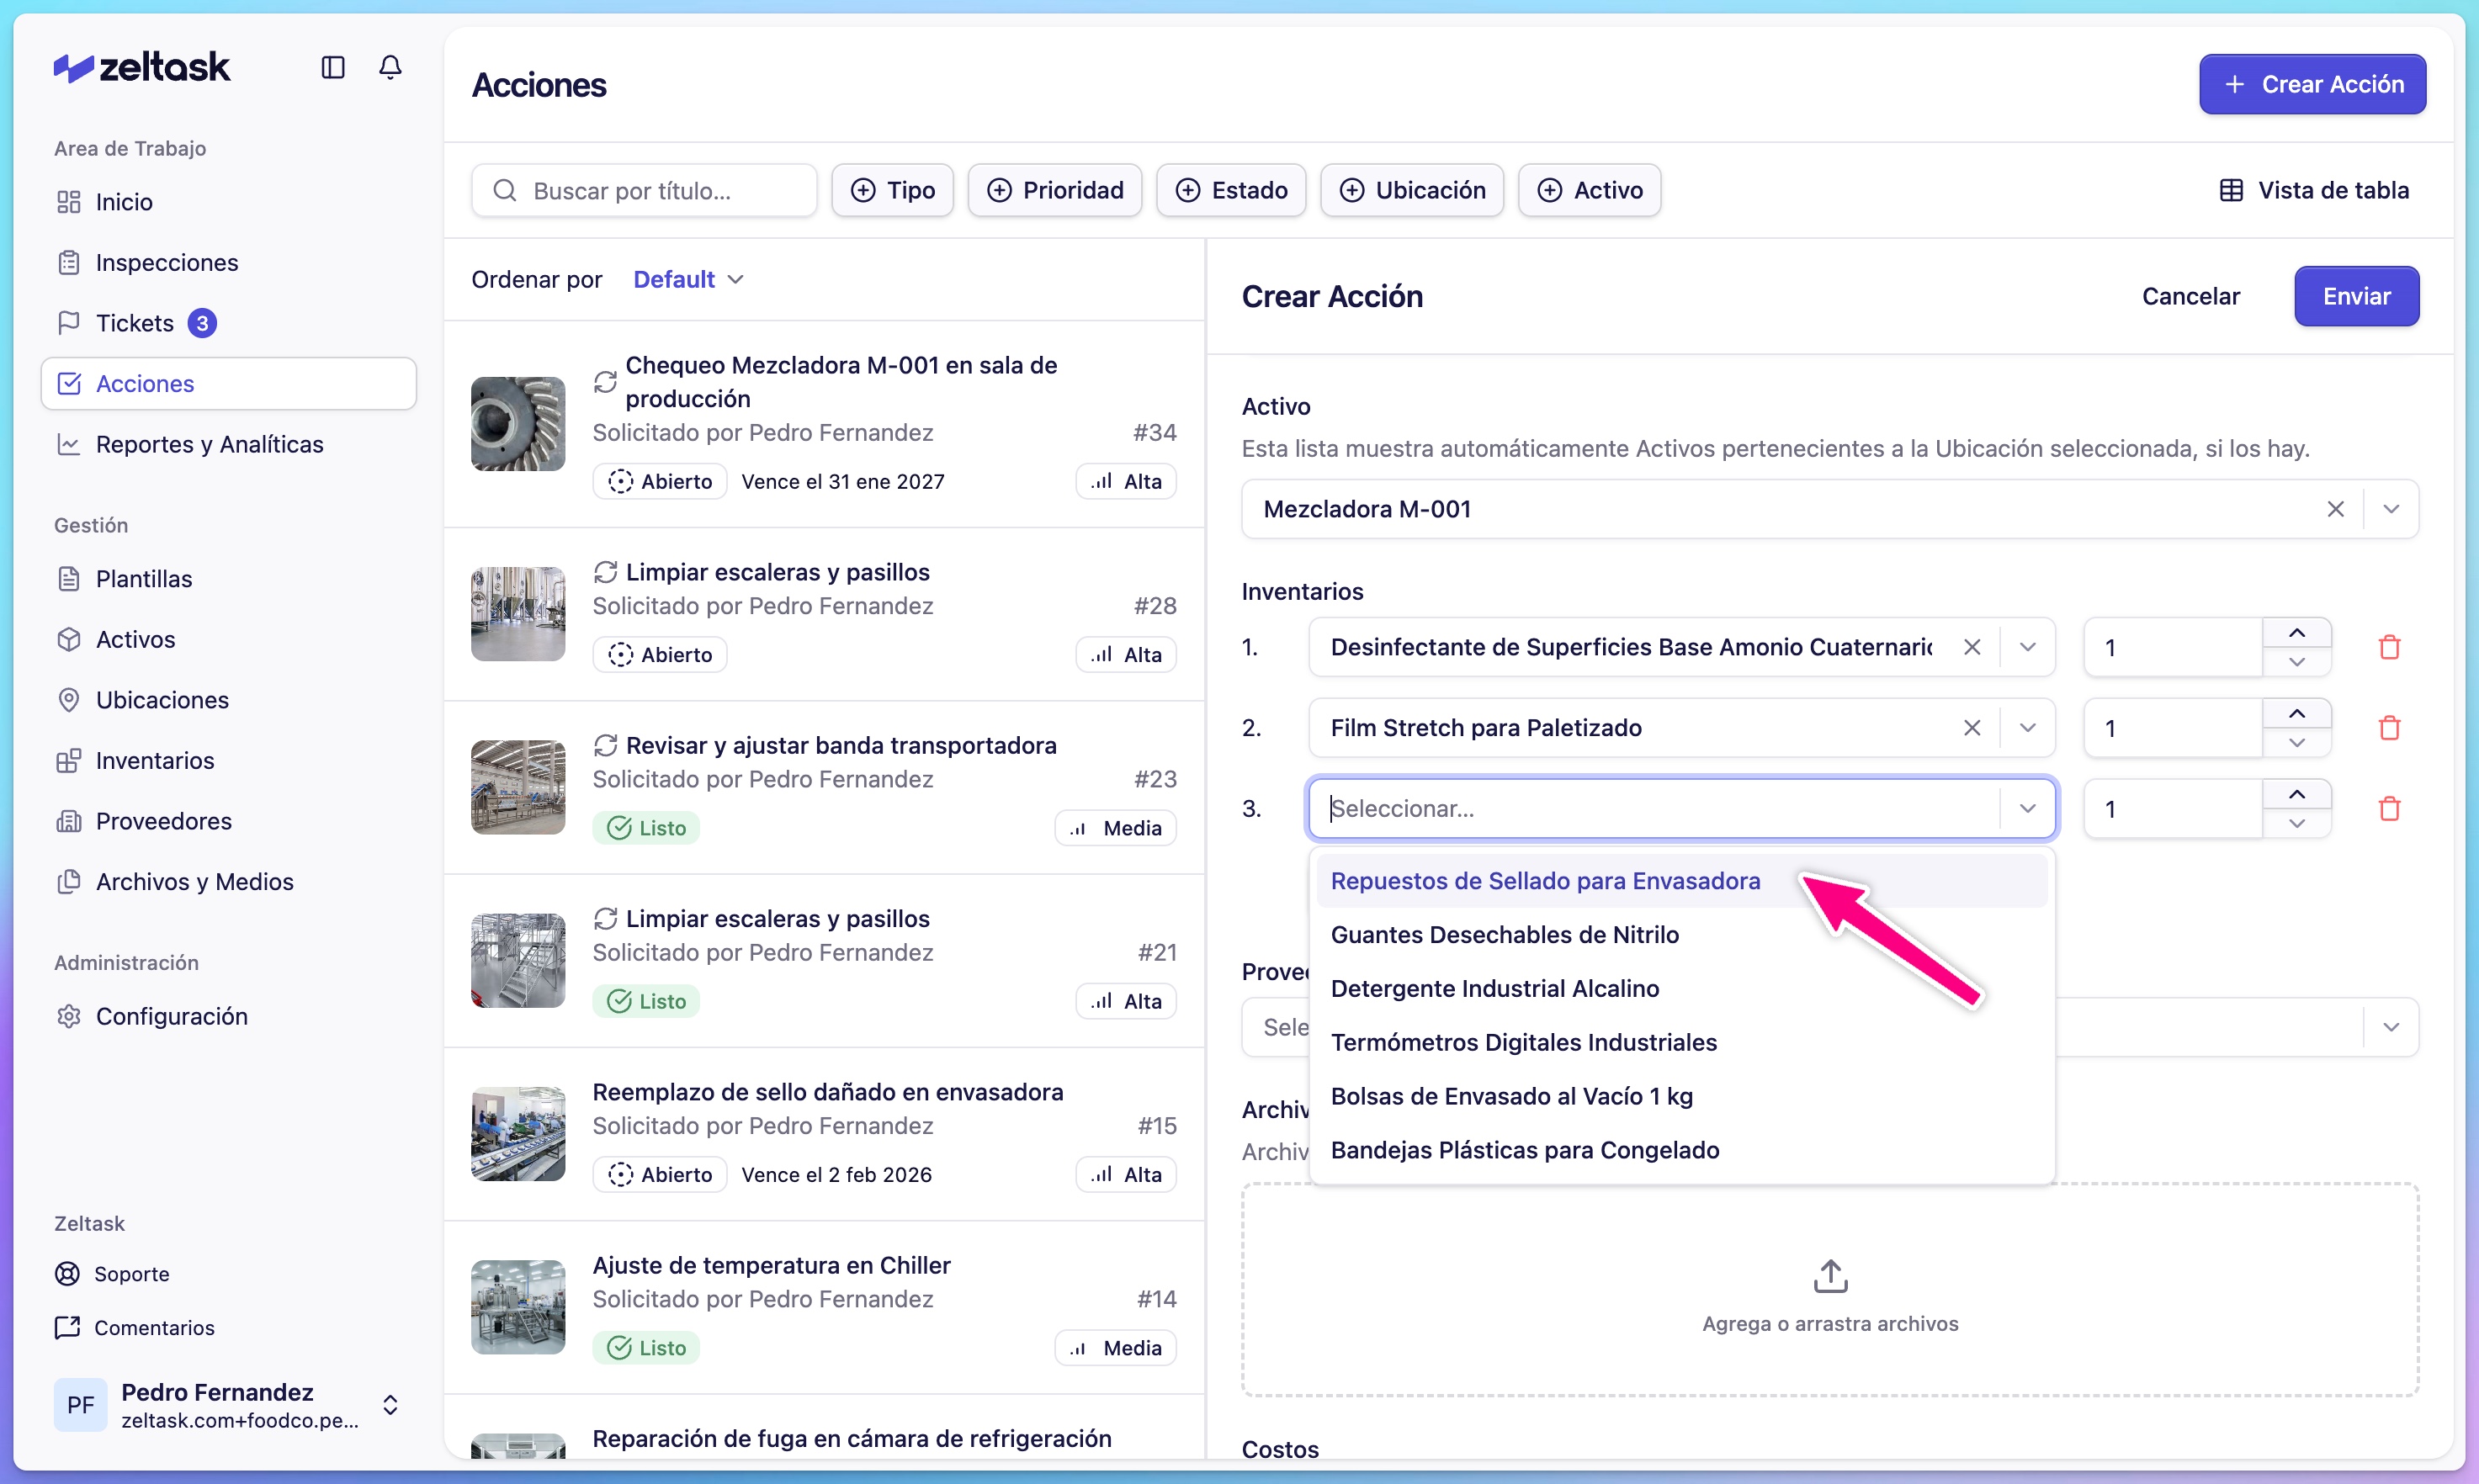
Step 13: Add inventory items (optional)
Specify materials or spare parts needed:
- Click Add Inventory
- Search for the item
- Enter the quantity

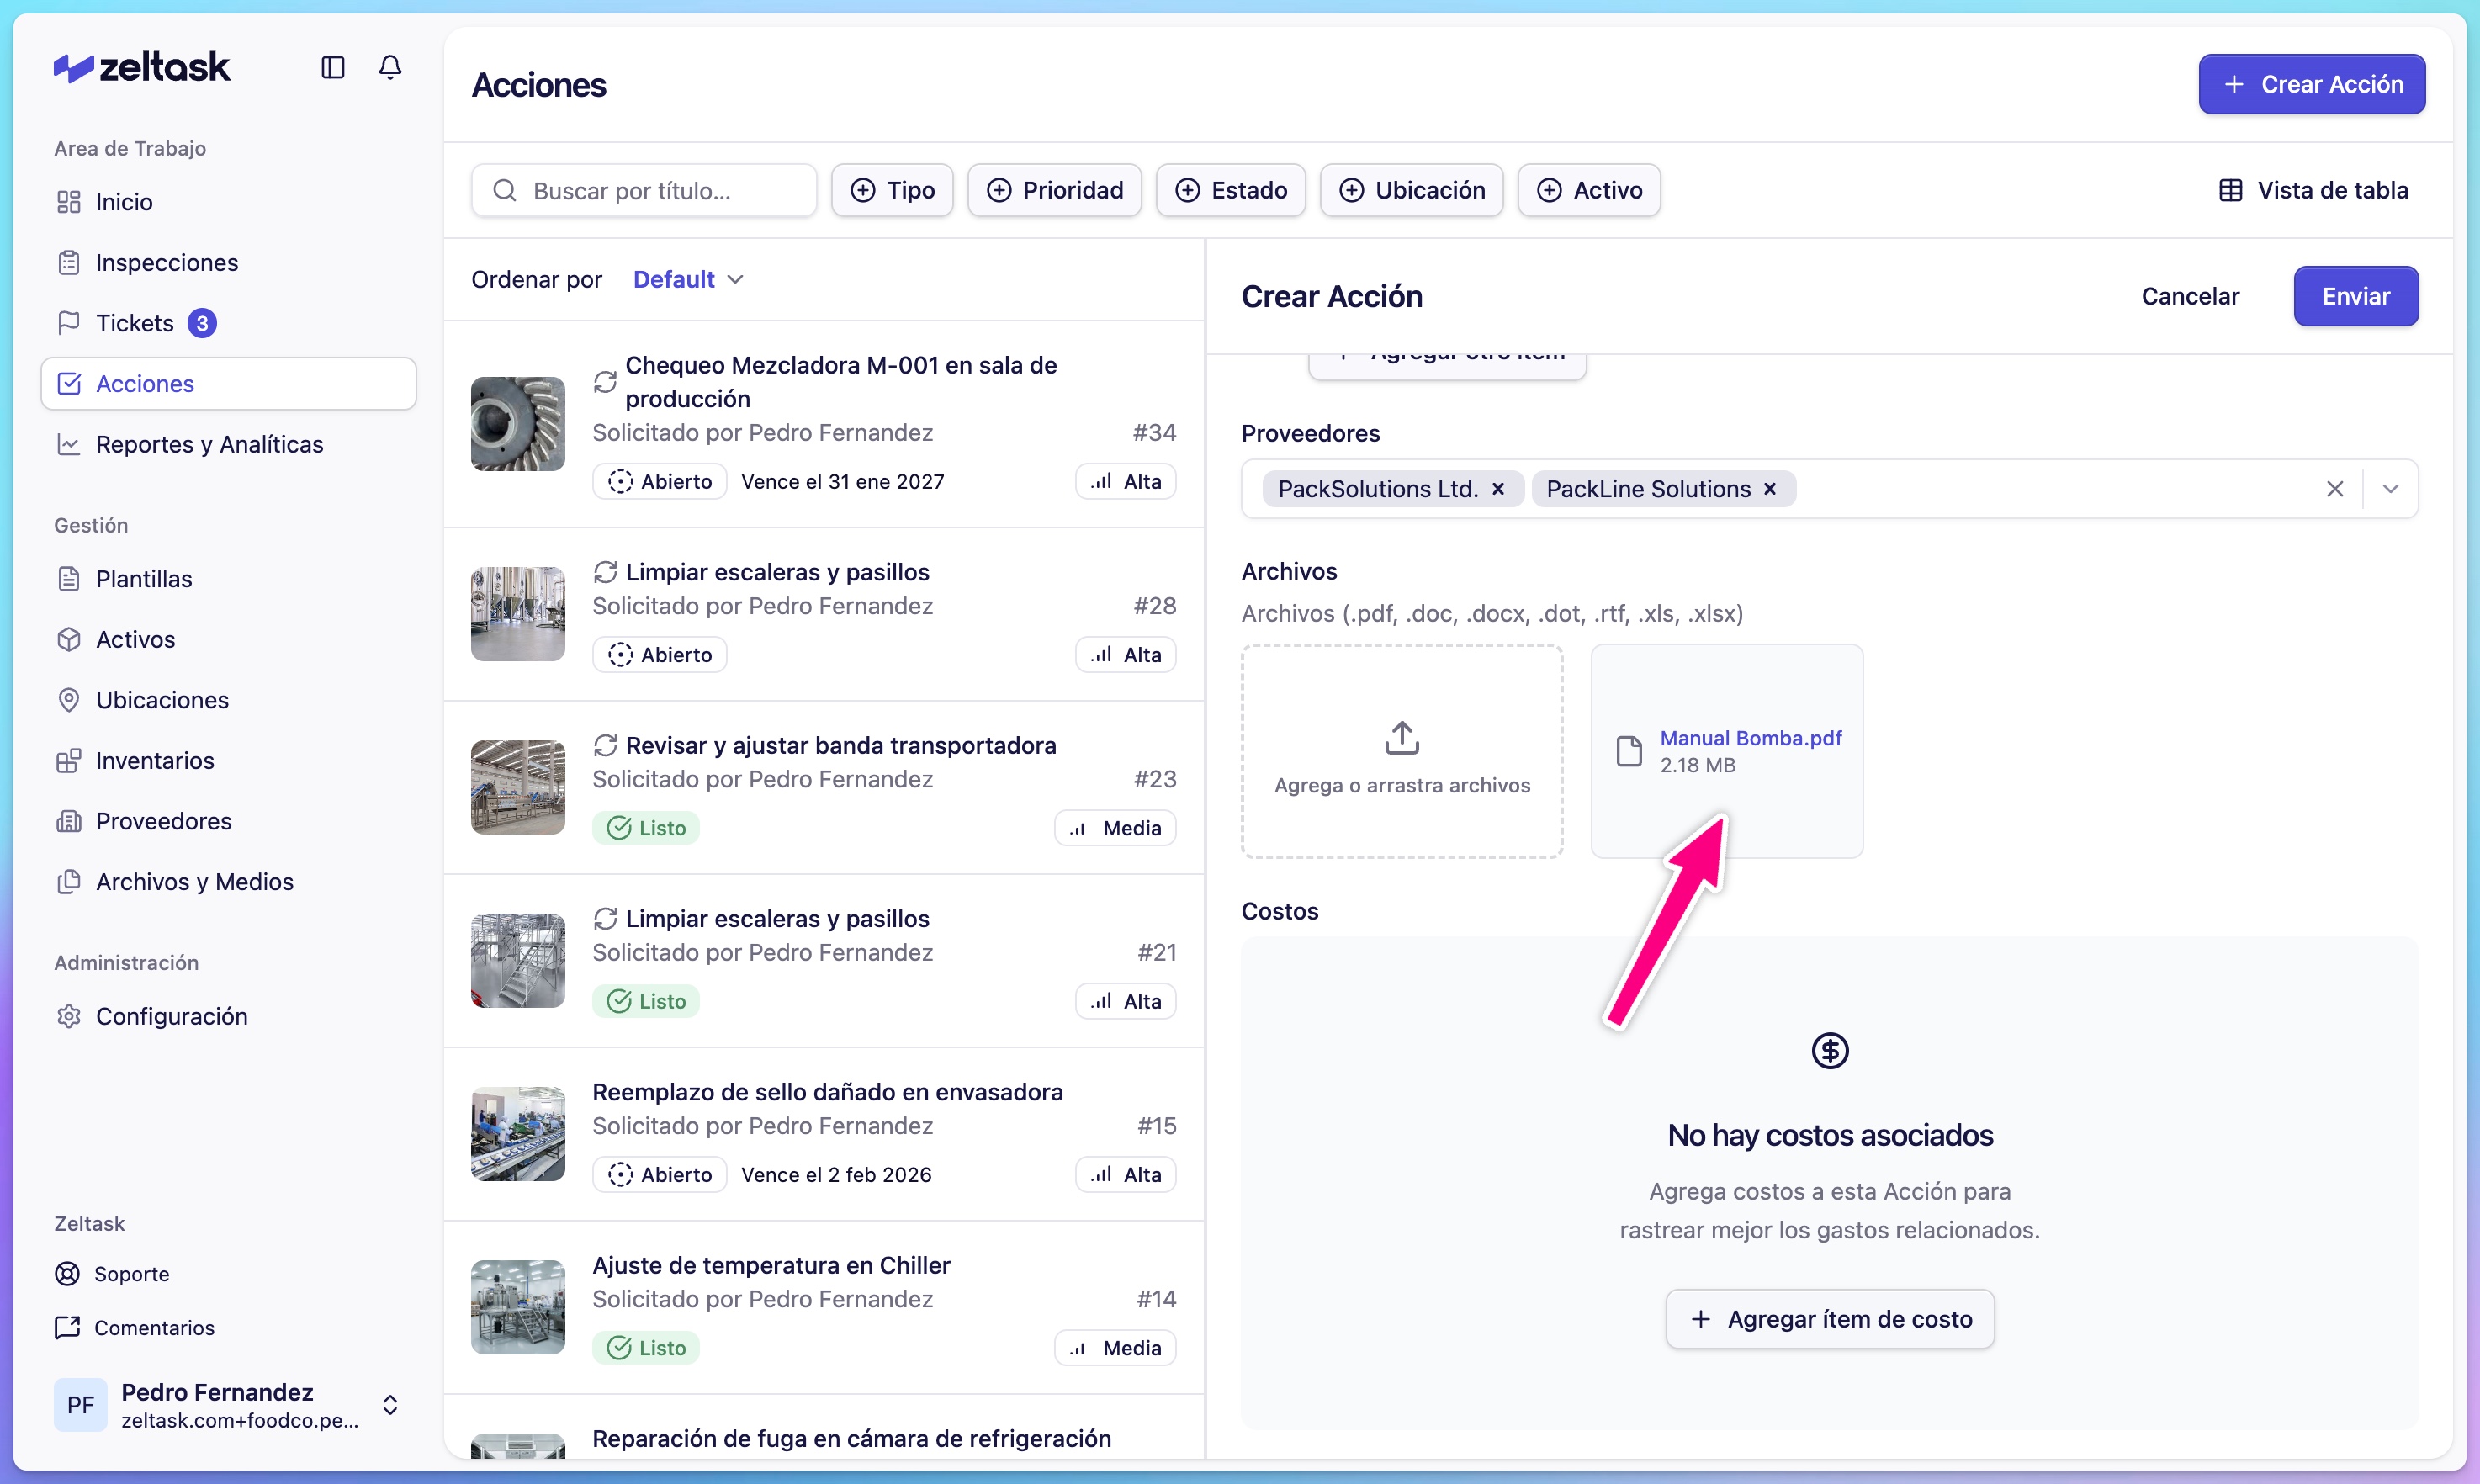
Step 14: Associate a vendor (optional)
If external support is required:
- Click the Vendor dropdown
- Select the service provider
This is useful for contracted maintenance or specialized repairs.
Step 15: Attach documents (optional)
Upload reference materials:
- Procedures or work instructions
- Safety guidelines
- Equipment manuals
- Previous reports
Supported formats: PDF, DOC, DOCX
Step 16: Add cost (optional)
Record budget or expense information for tracking purposes.
Step 17: Submit the action
- Review all fields for accuracy
- Click Submit
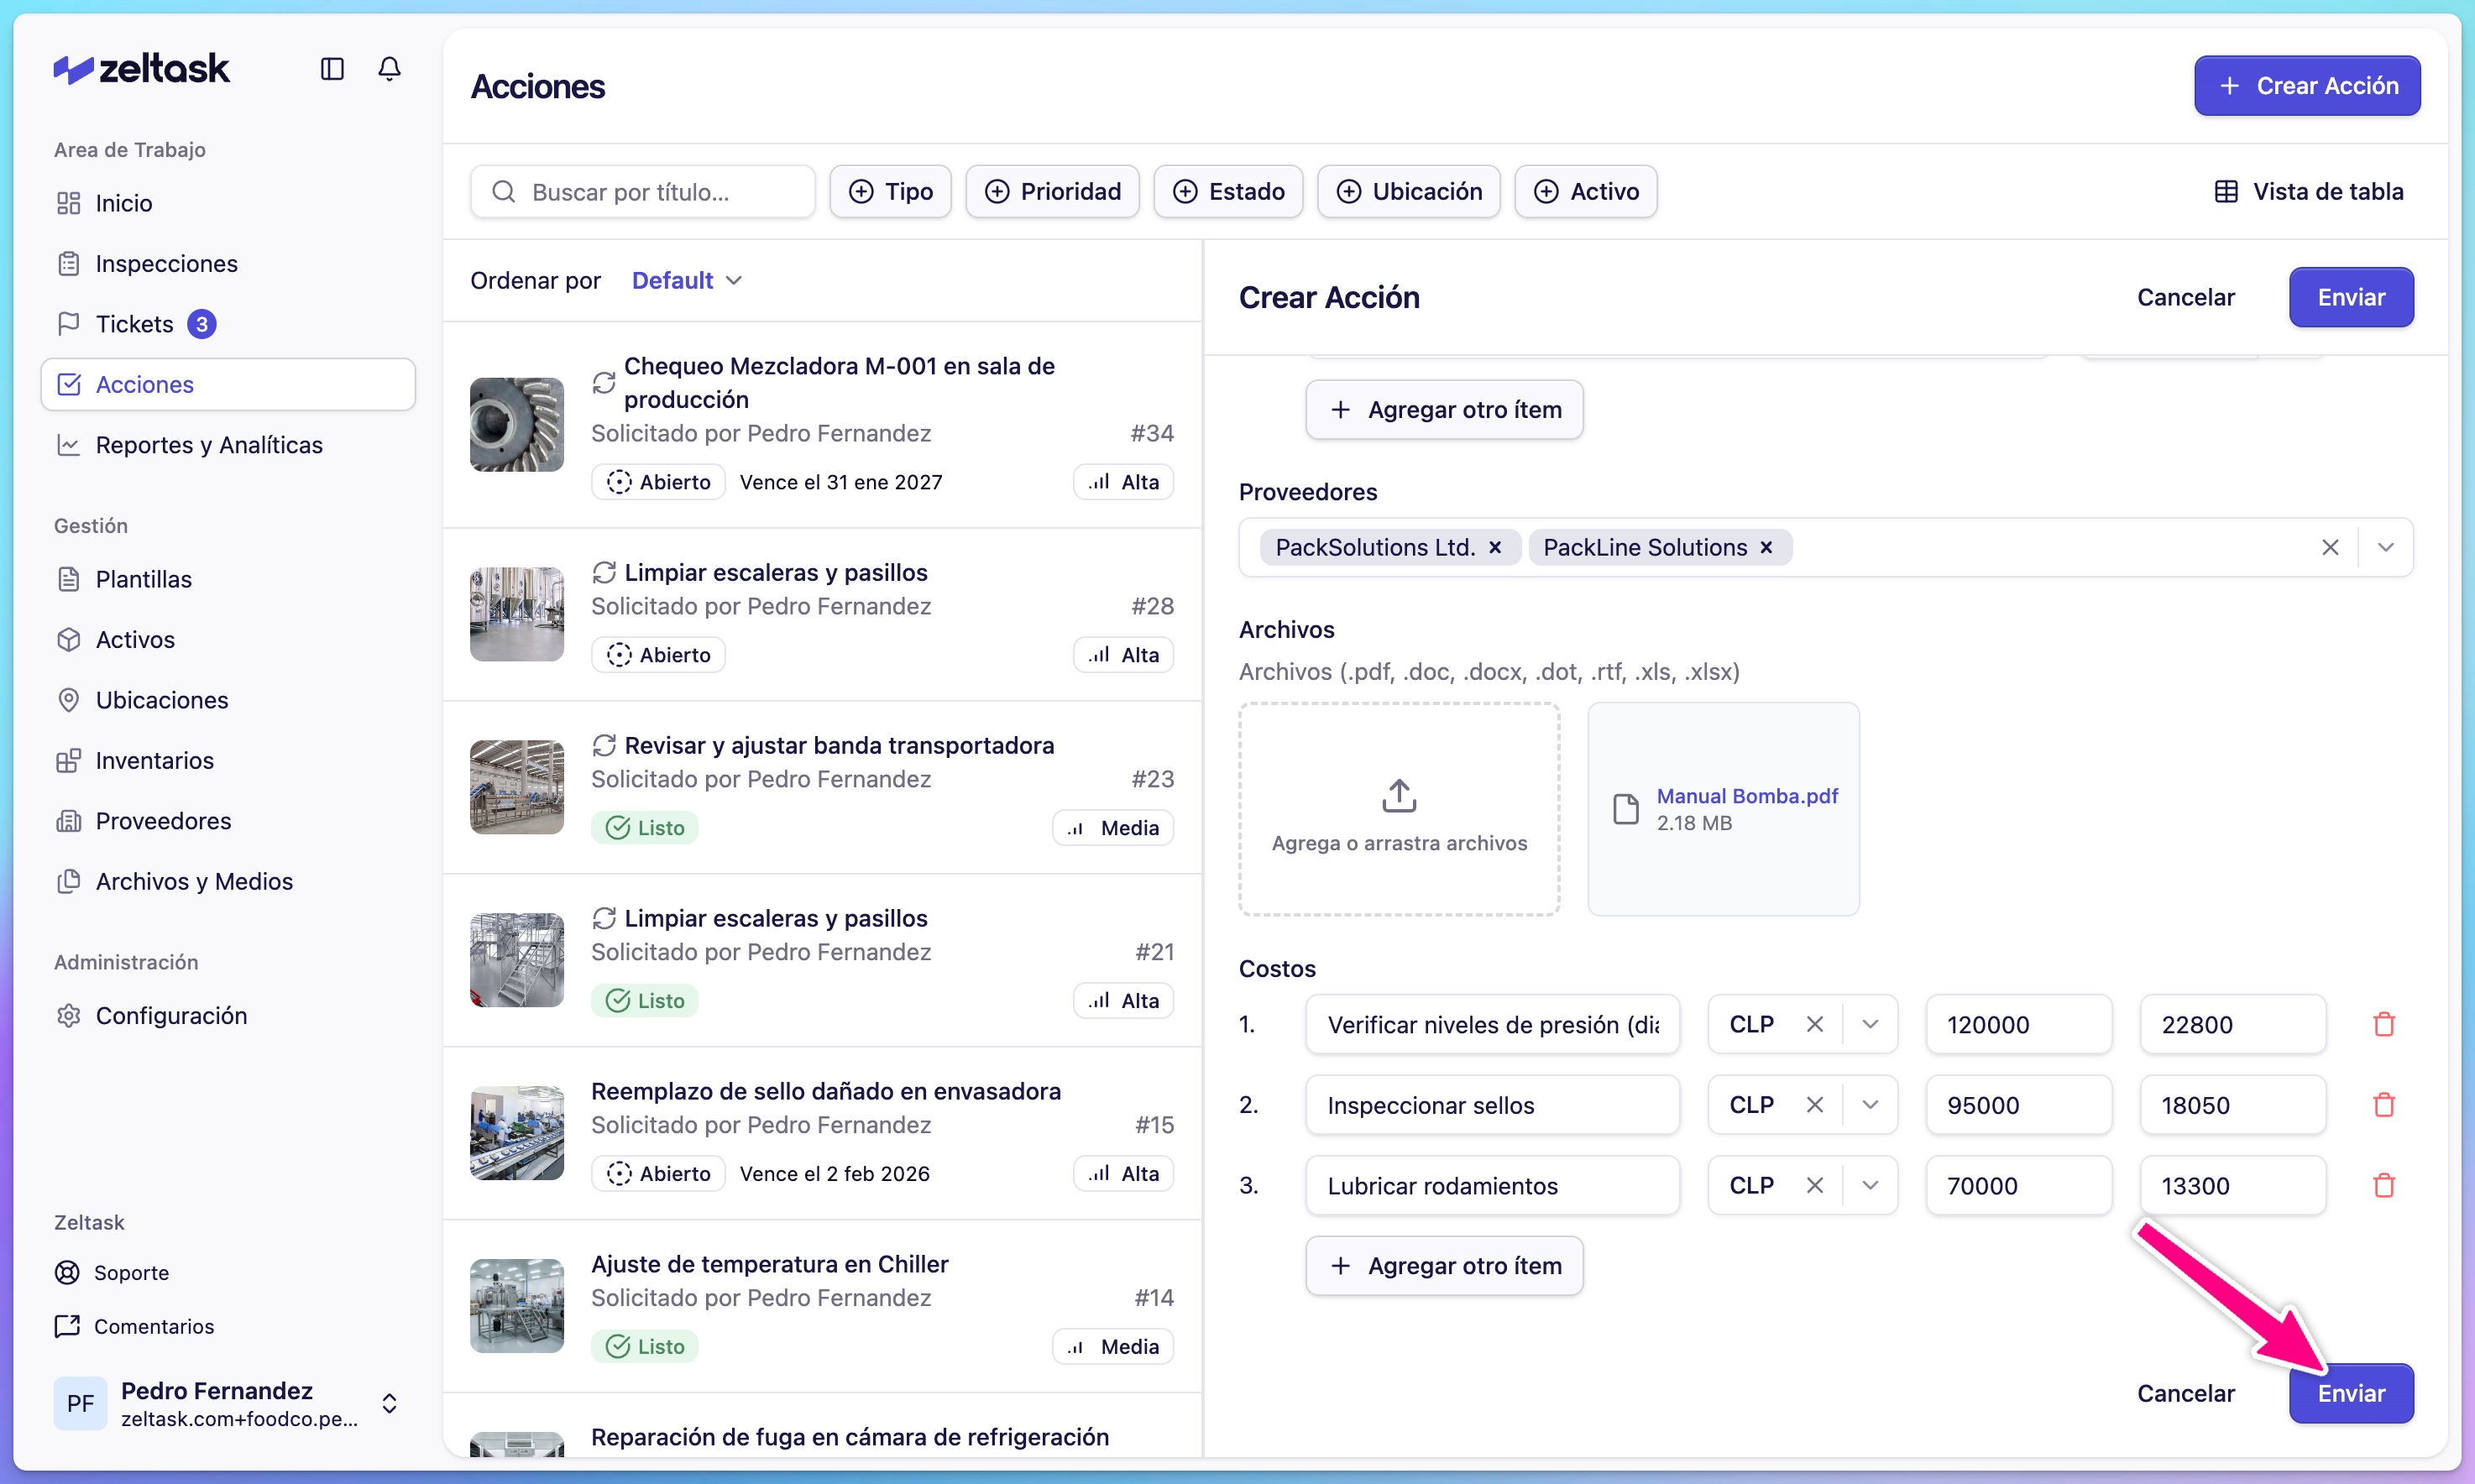
The action is created and the assigned person or team is notified.
Complete Example: Reactive Action
| Field | Value |
|---|---|
| Category | Maintenance |
| Type | Reactive |
| Title | Clean spill in Corridor 3 |
| Description | Oil spill near loading dock. Use absorbent material and dispose properly. |
| Media | Photo of spill |
| Estimated Time | 15 minutes |
| Priority | High |
| Recurrence | None |
| Start Date | Today |
| Due Date | Today |
| Assigned To | Cleaning Team |
| Location | Corridor 3 |
| Asset | Not applicable |
| Inventory | Absorbent material |
Tips
- Write action-oriented titles: "Inspect pump seals" not "Pump"
- Set realistic time estimates to help with workload planning
- For preventive actions, start with simple weekly or monthly schedules
- Link actions to assets to build complete maintenance history
- Add photos when the visual context helps explain the work