Create Your First Checklist
Checklists in Zeltask are called "Inspections." They're based on templates and executed by operators or supervisors. This guide shows you how to run your first inspection.
Before You Start
- You need at least Staff Member permissions to execute inspections
- To schedule inspections for others, you need Manager or Admin permissions
- At least one inspection template must exist in the system
Understanding the Inspection Flow
Inspections in Zeltask follow this process:
- Templates define the checklist structure (created by managers or admins)
- Inspections are executed based on those templates
- Results are recorded and can trigger actions or tickets
Steps to Execute an Inspection
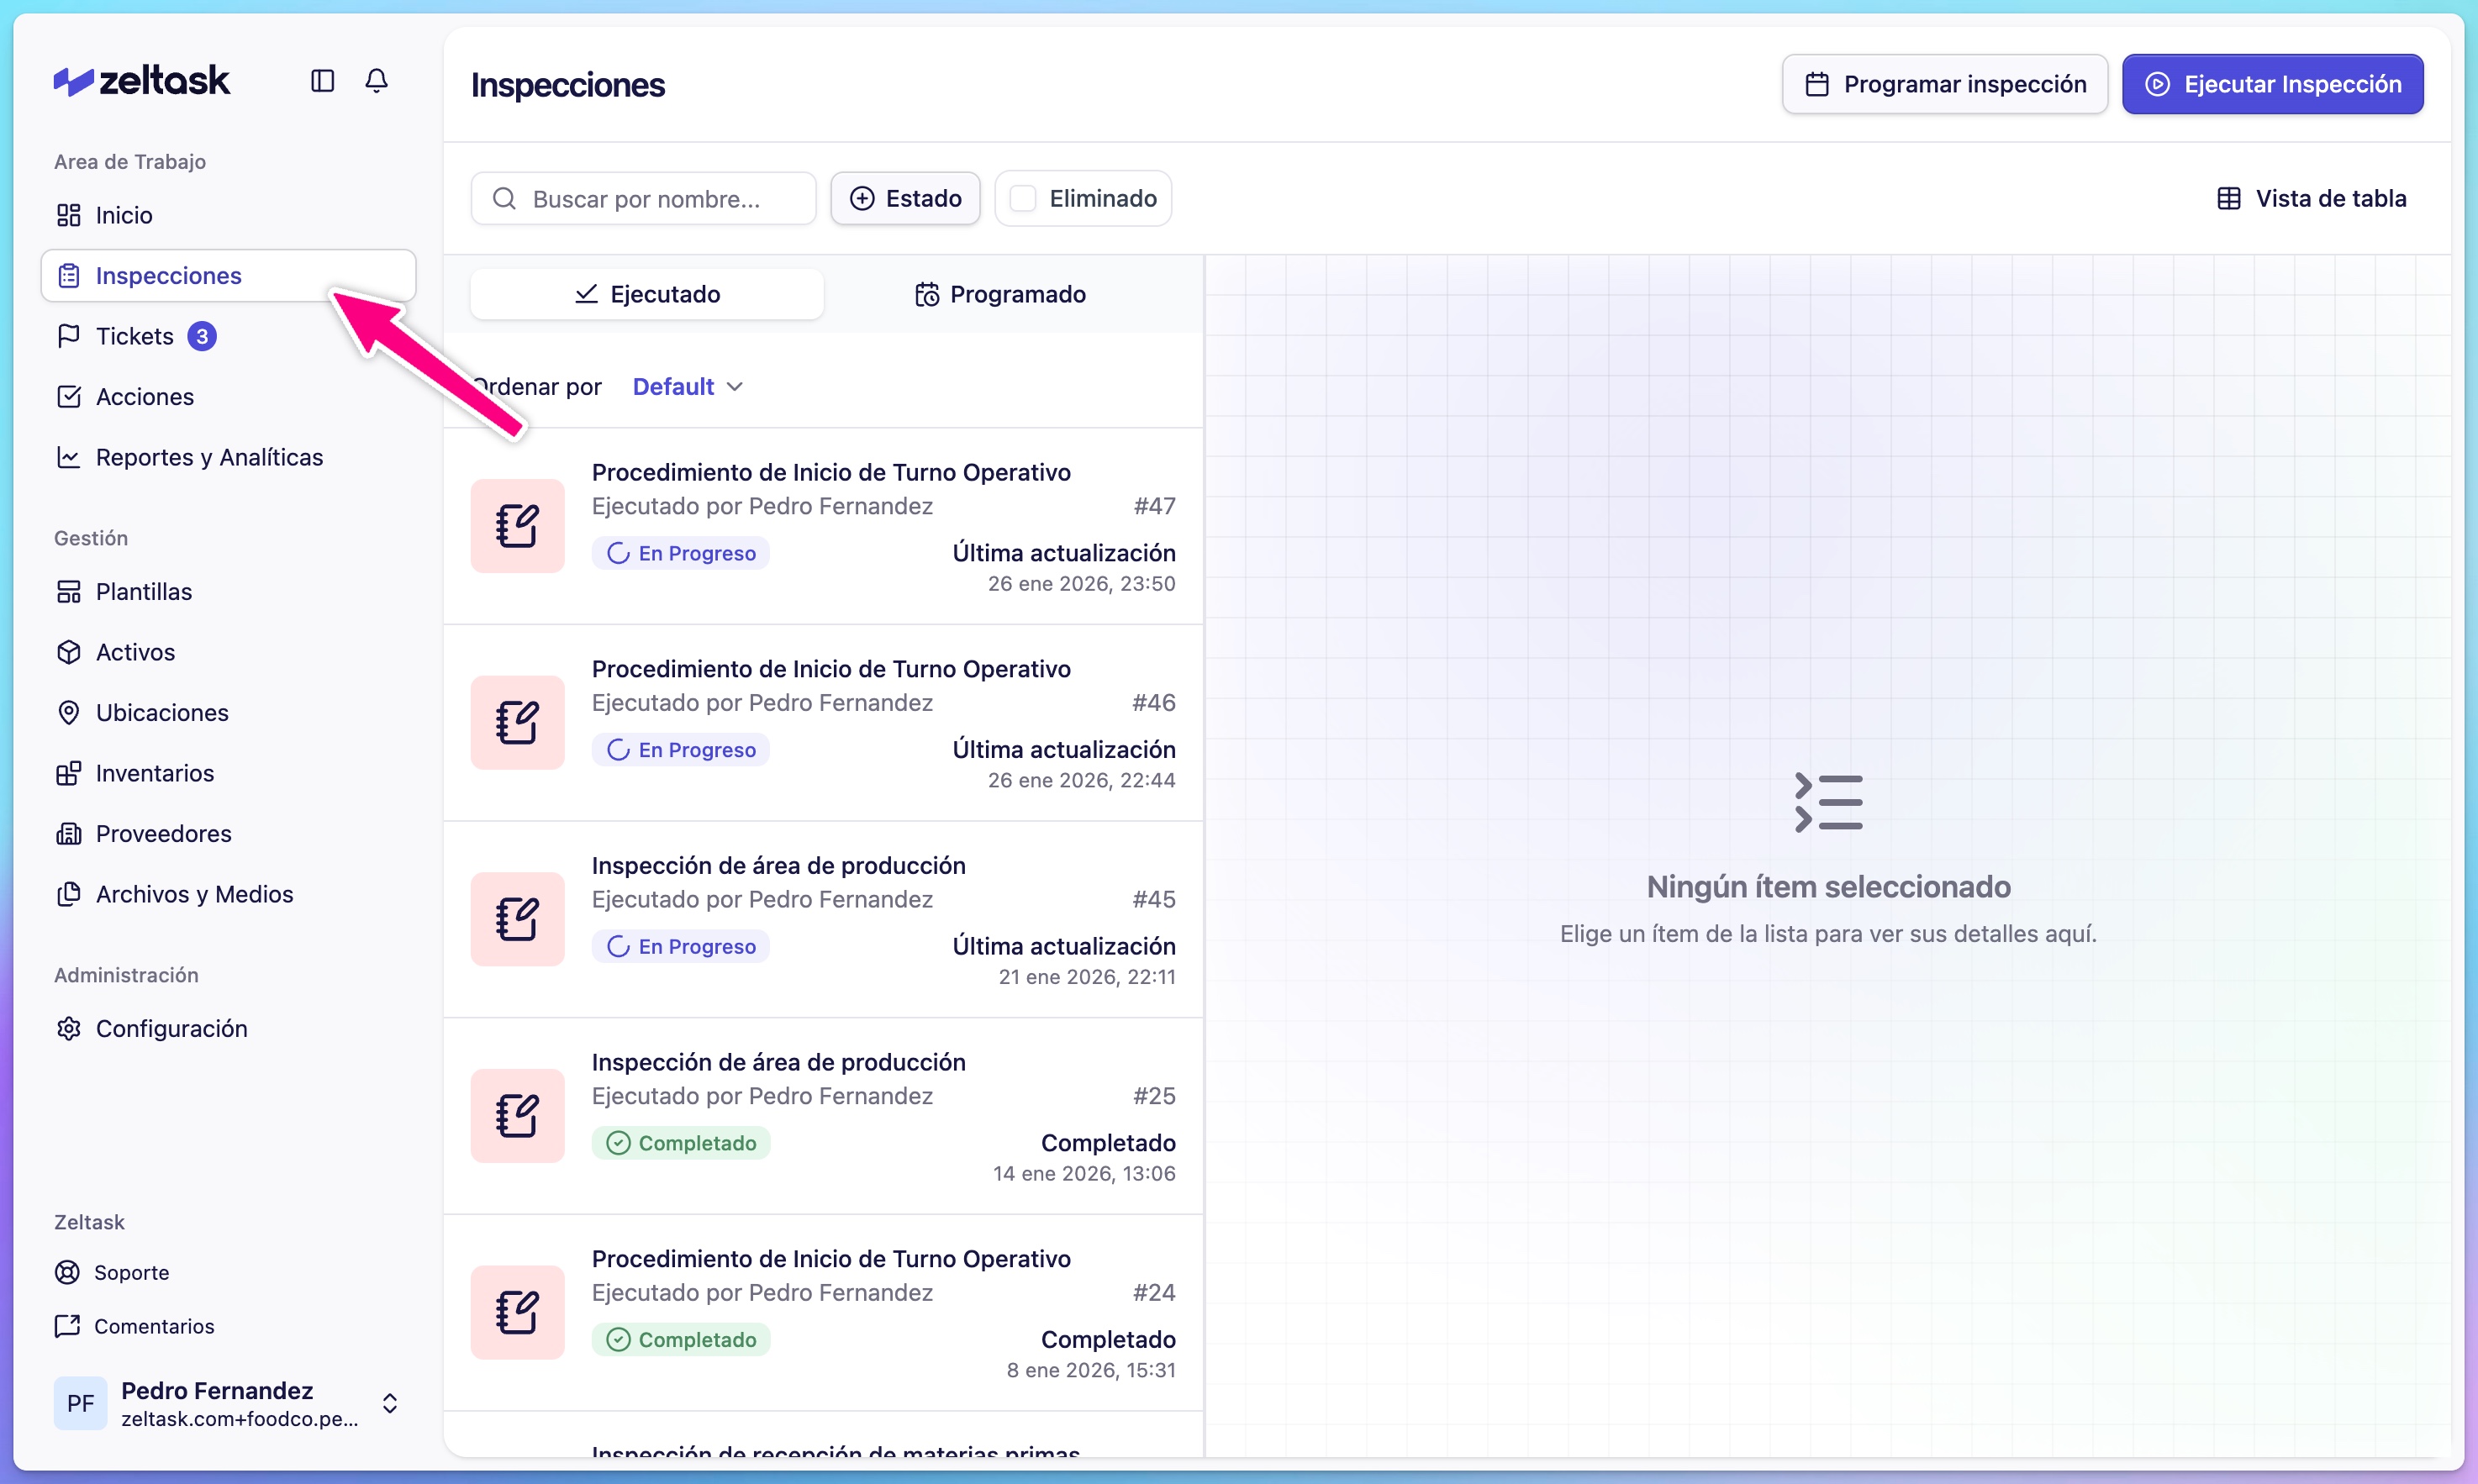
Step 1: Open the Inspections module
- Click Inspections in the left sidebar
- The module loads showing your completed and in-progress inspections
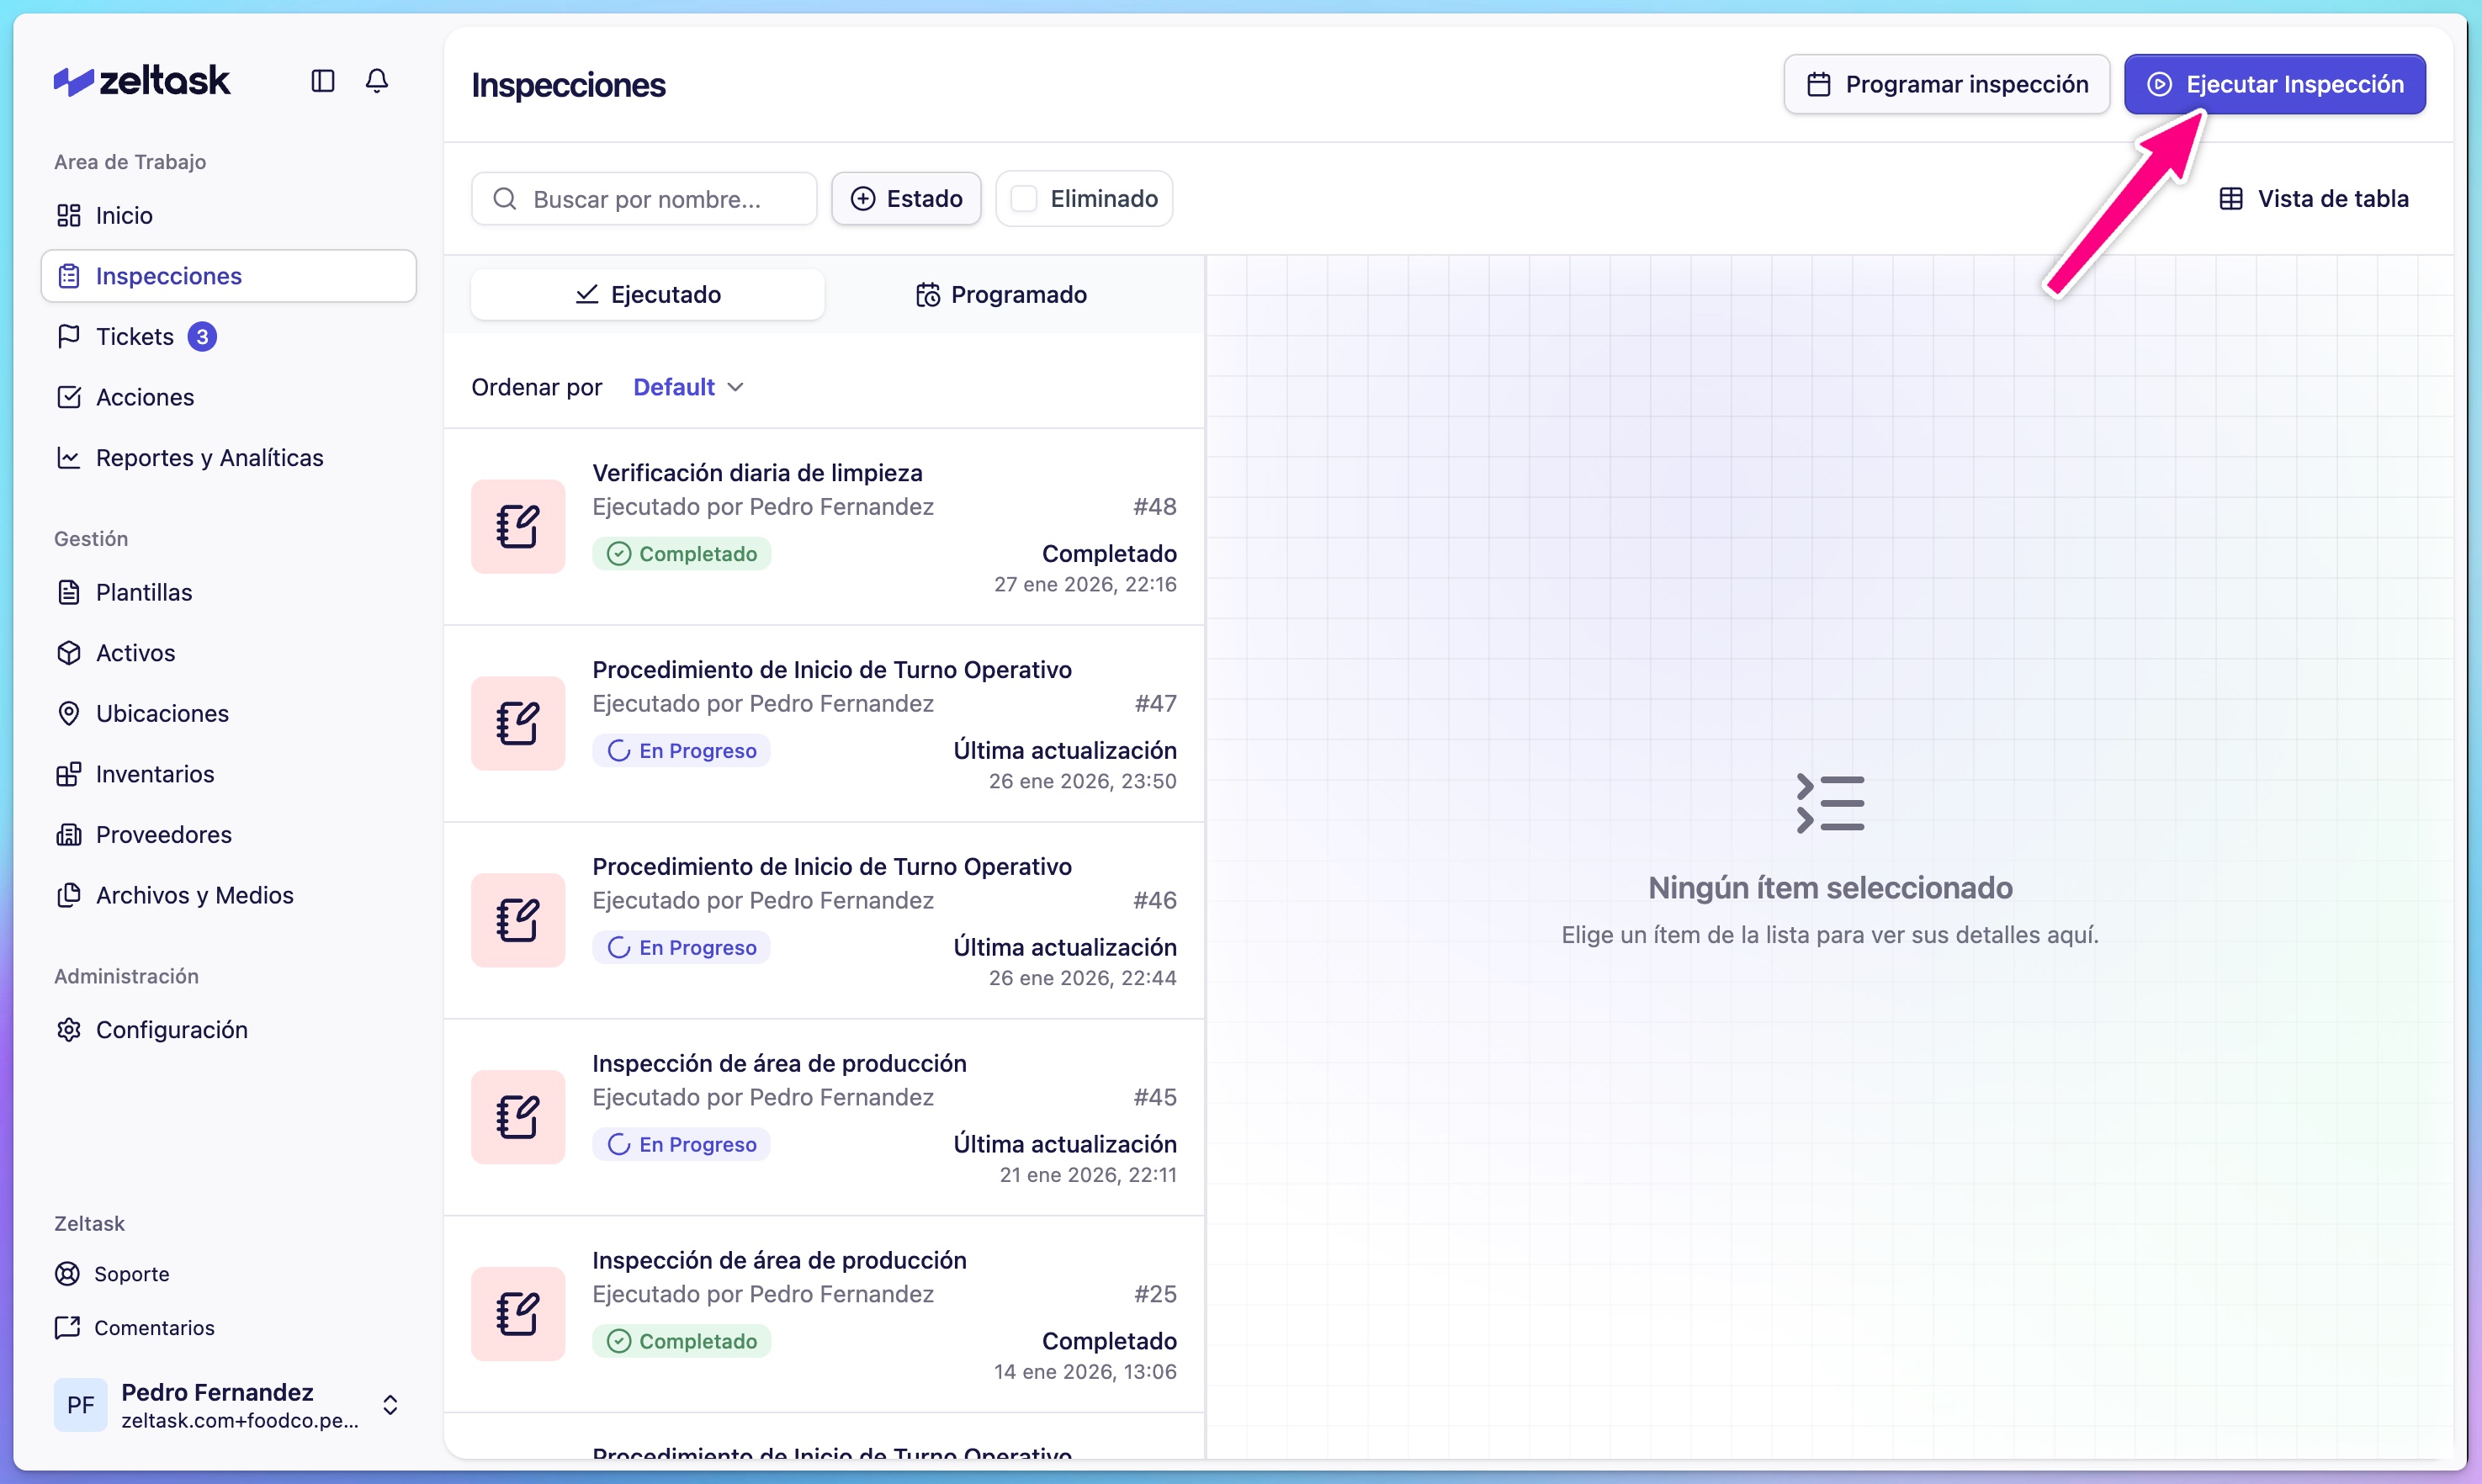
Step 2: Start a new inspection
- Click Execute Inspection
- A modal opens where you select which template to use
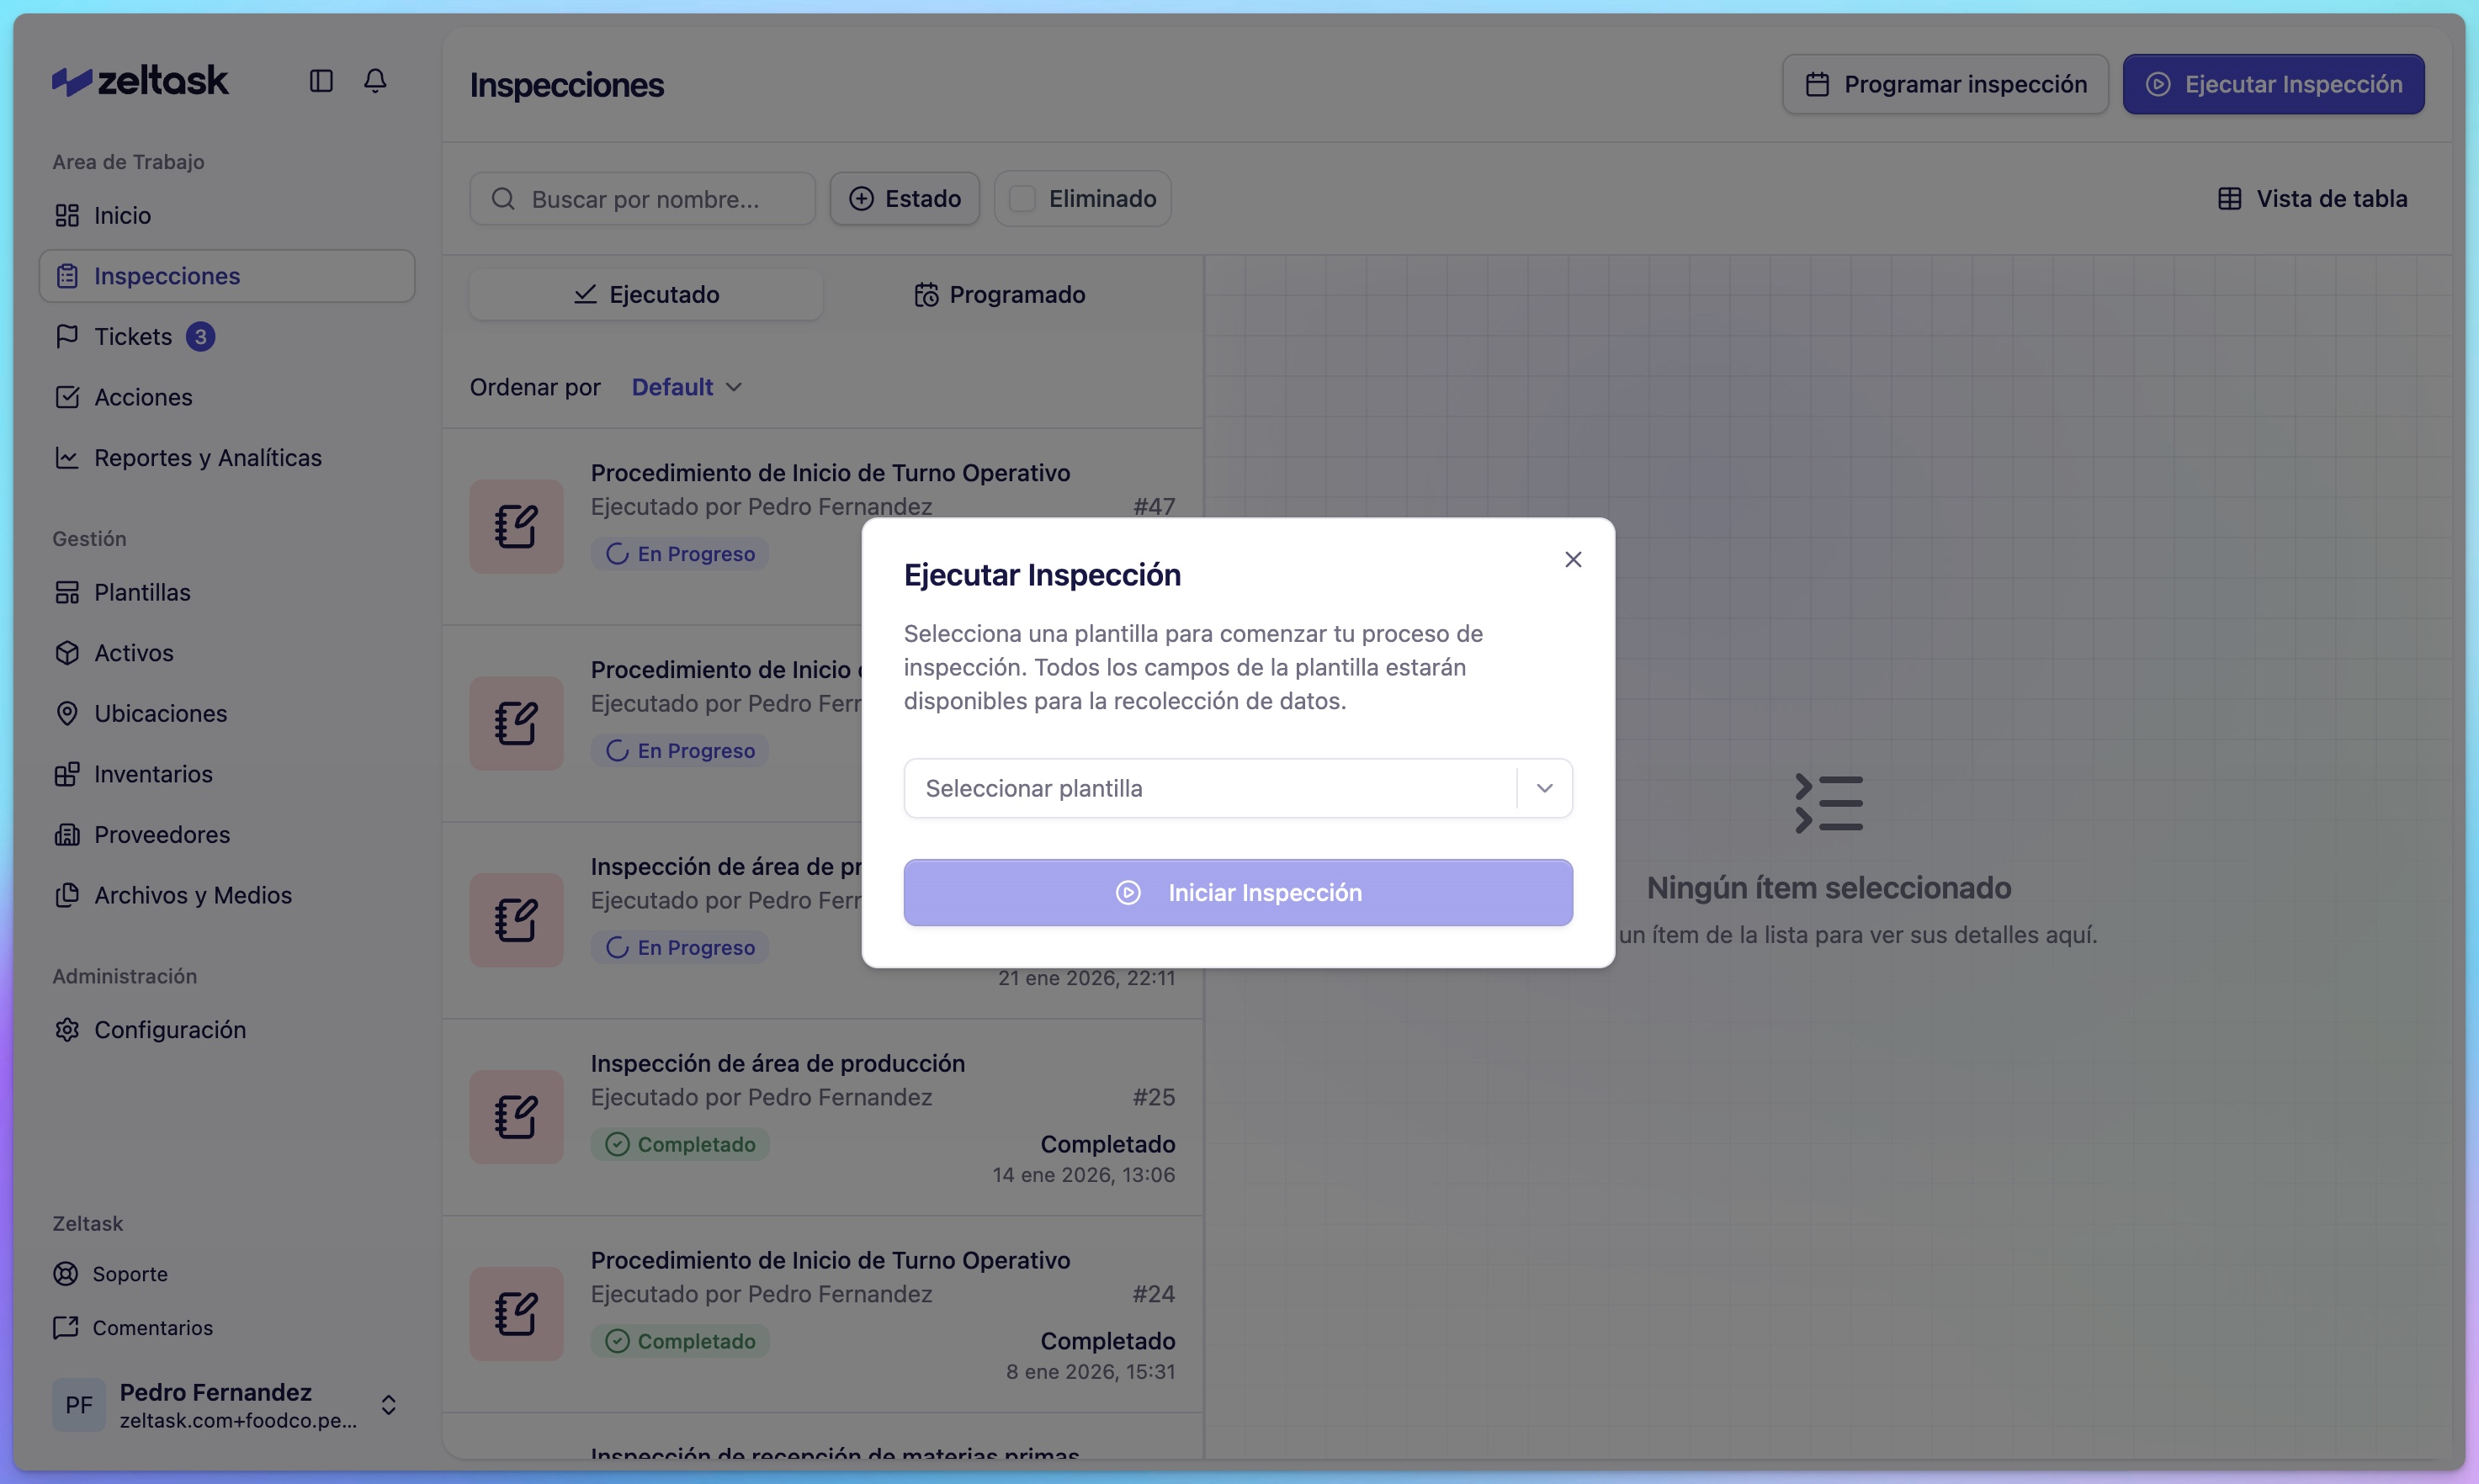
Step 3: Select a template
- Browse the available templates
- Click the template you want to execute
- The inspection form loads
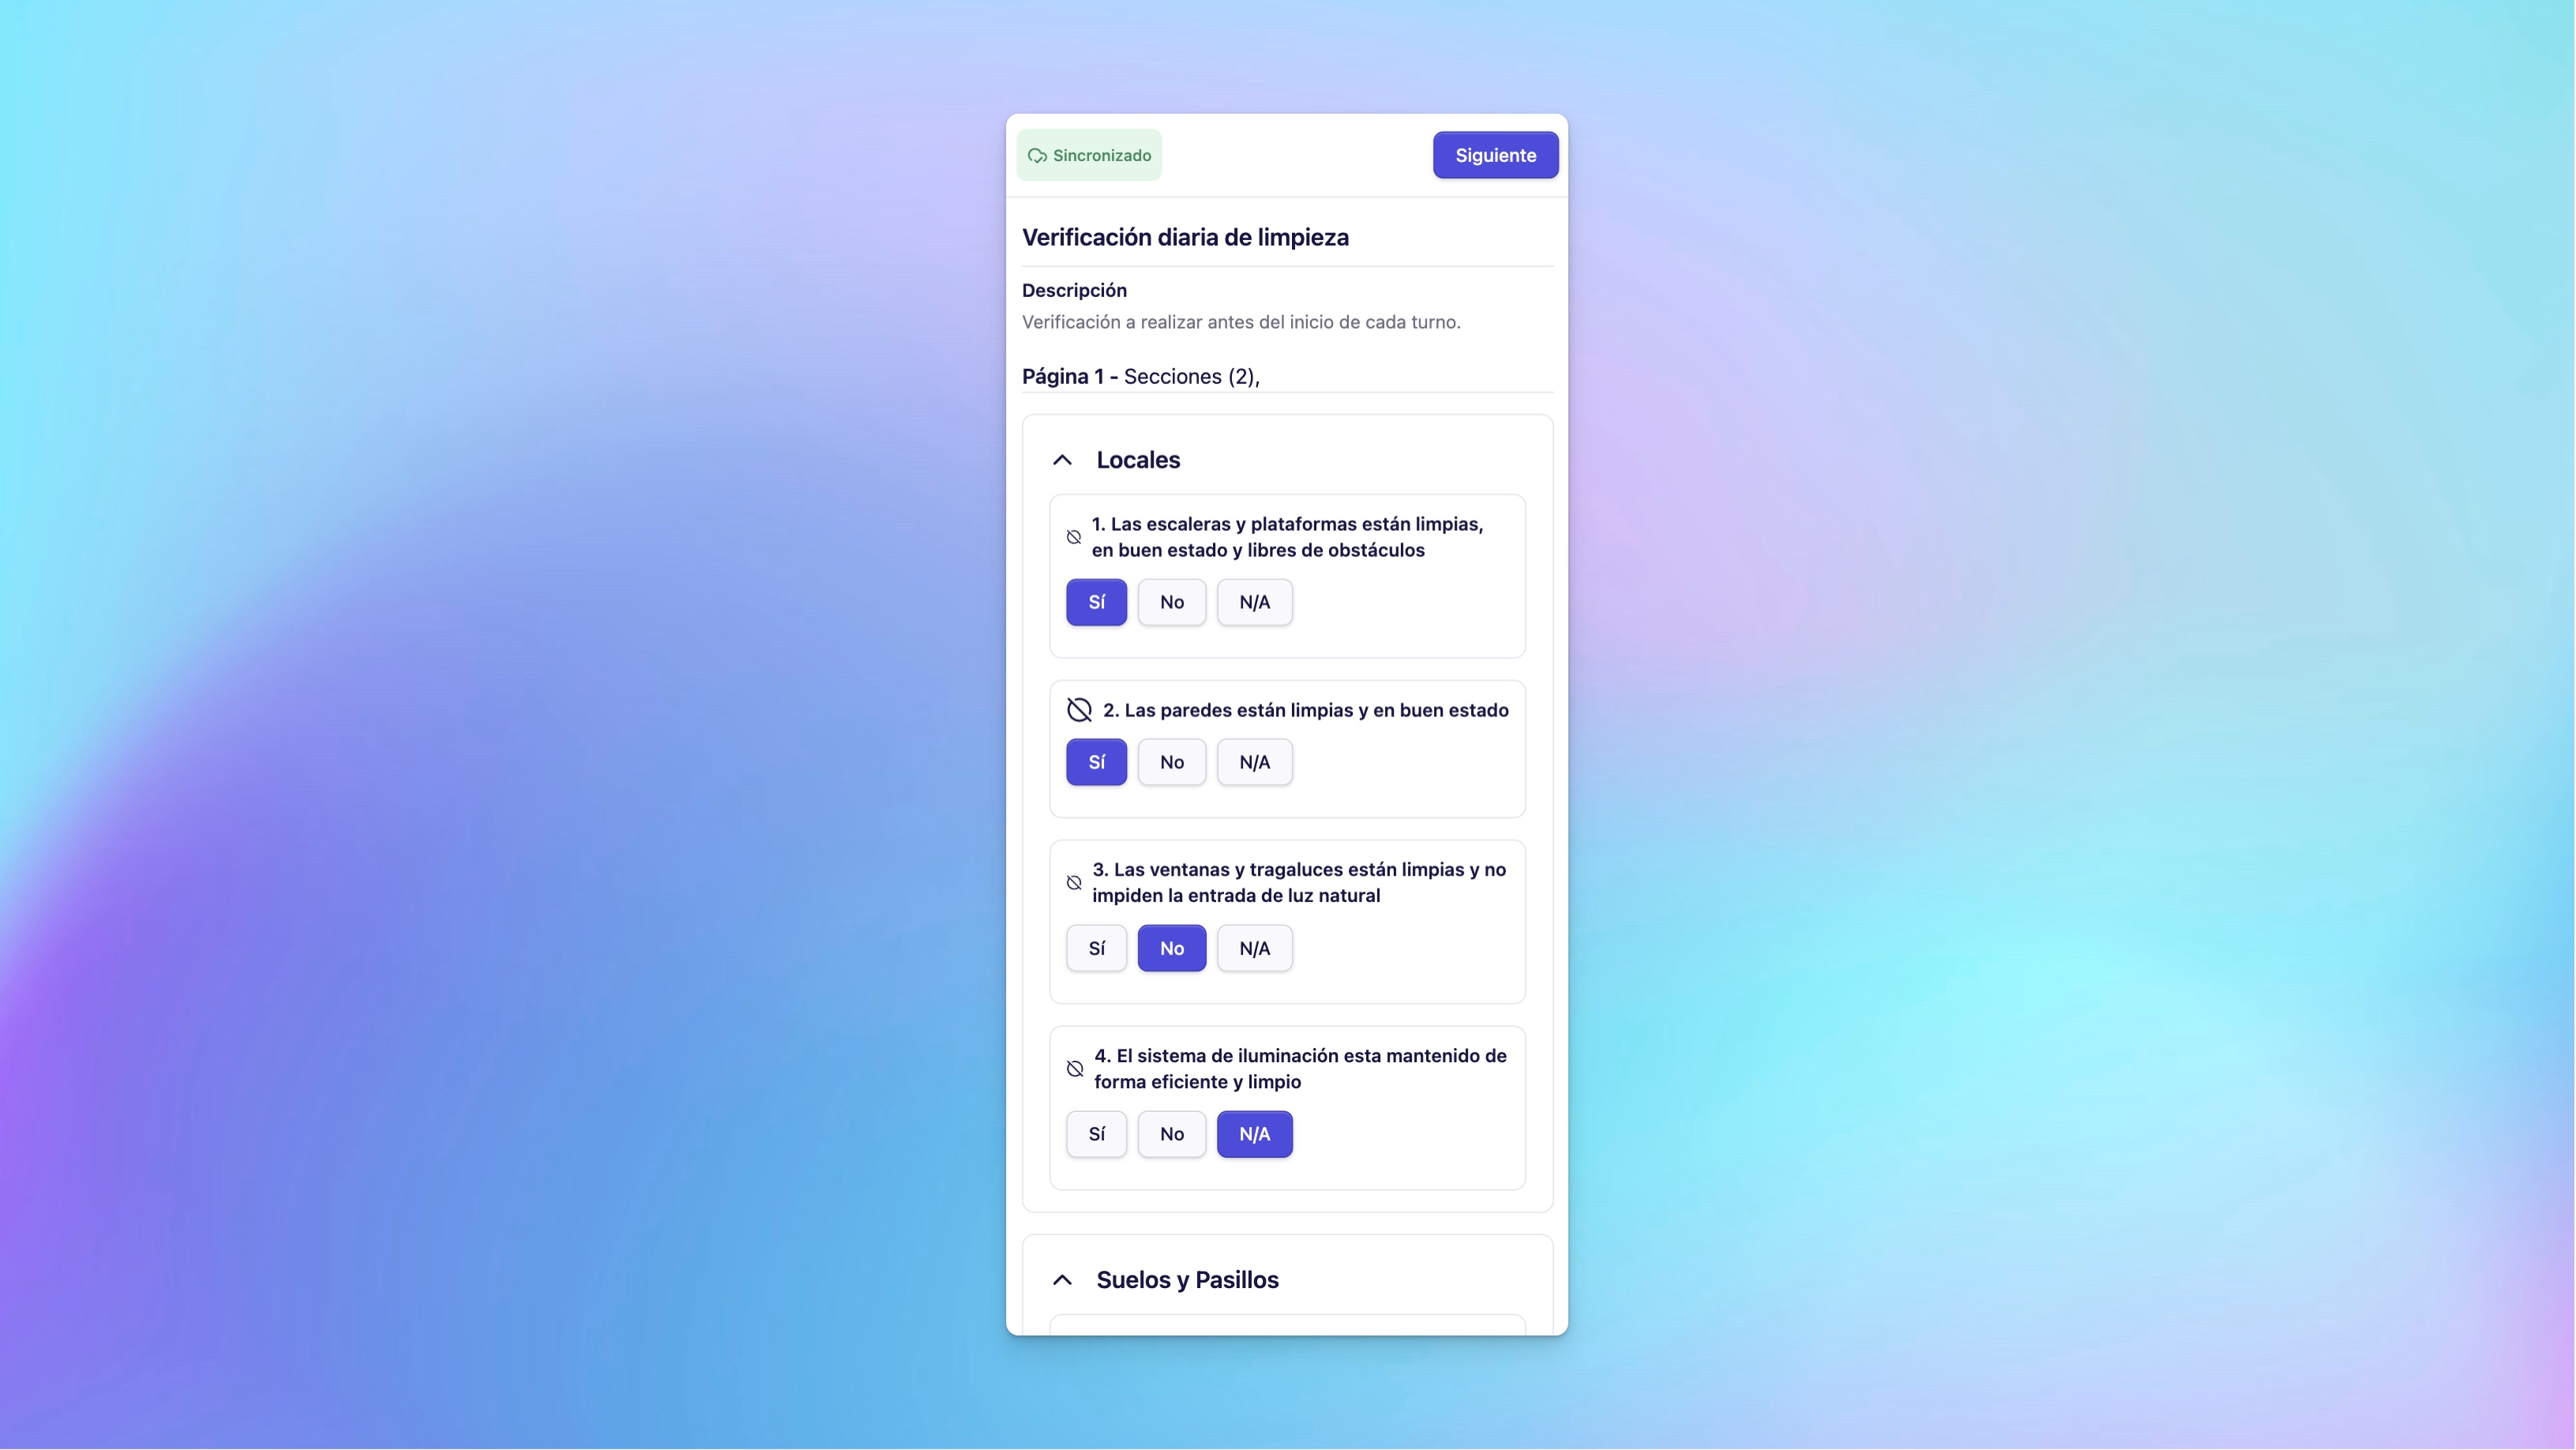
Step 4: Review the inspection structure
Before answering questions, notice:
- Inspection name and description at the top
- Sections that group related questions
- Progress indicator showing completion percentage
- Total number of questions
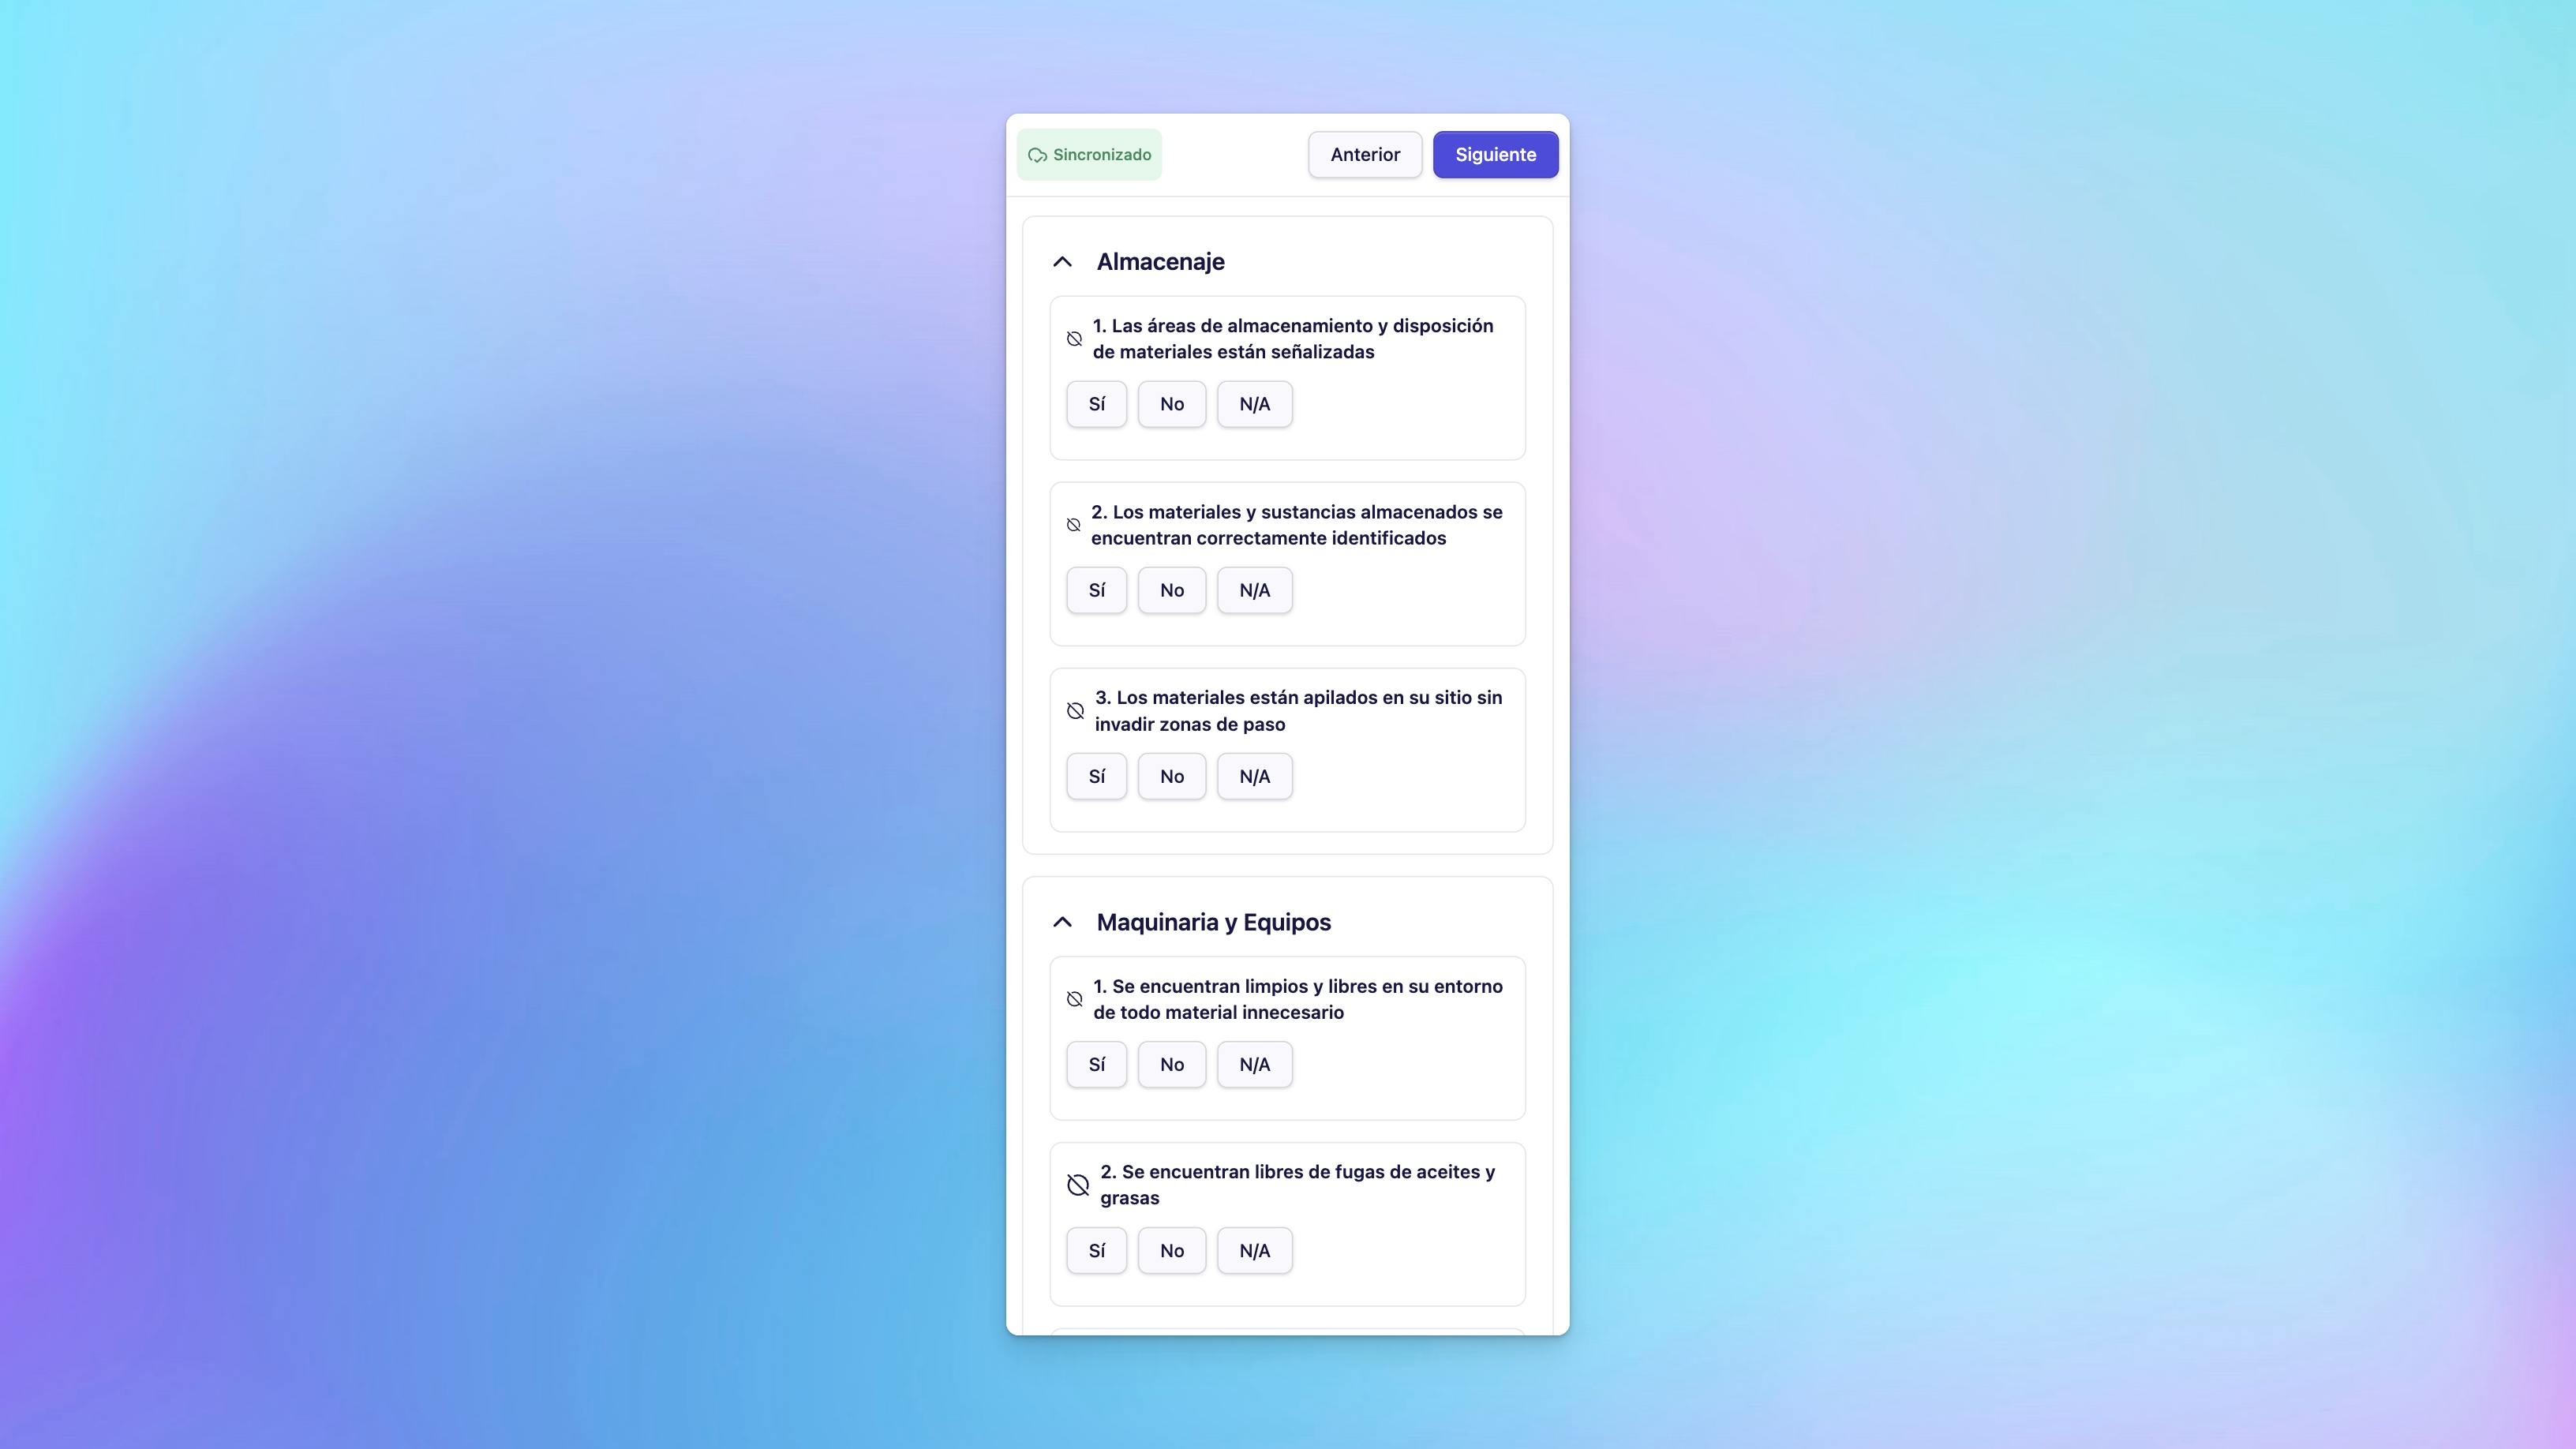
Step 5: Answer the questions
Work through each question in order:
| Question Type | How to Answer |
|---|---|
| Yes/No | Select one option |
| Multiple Choice | Select from available options |
| Text | Type your response |
| Numeric | Enter a number |
| Photo/Video | Capture or upload evidence |
| Signature | Sign on screen |
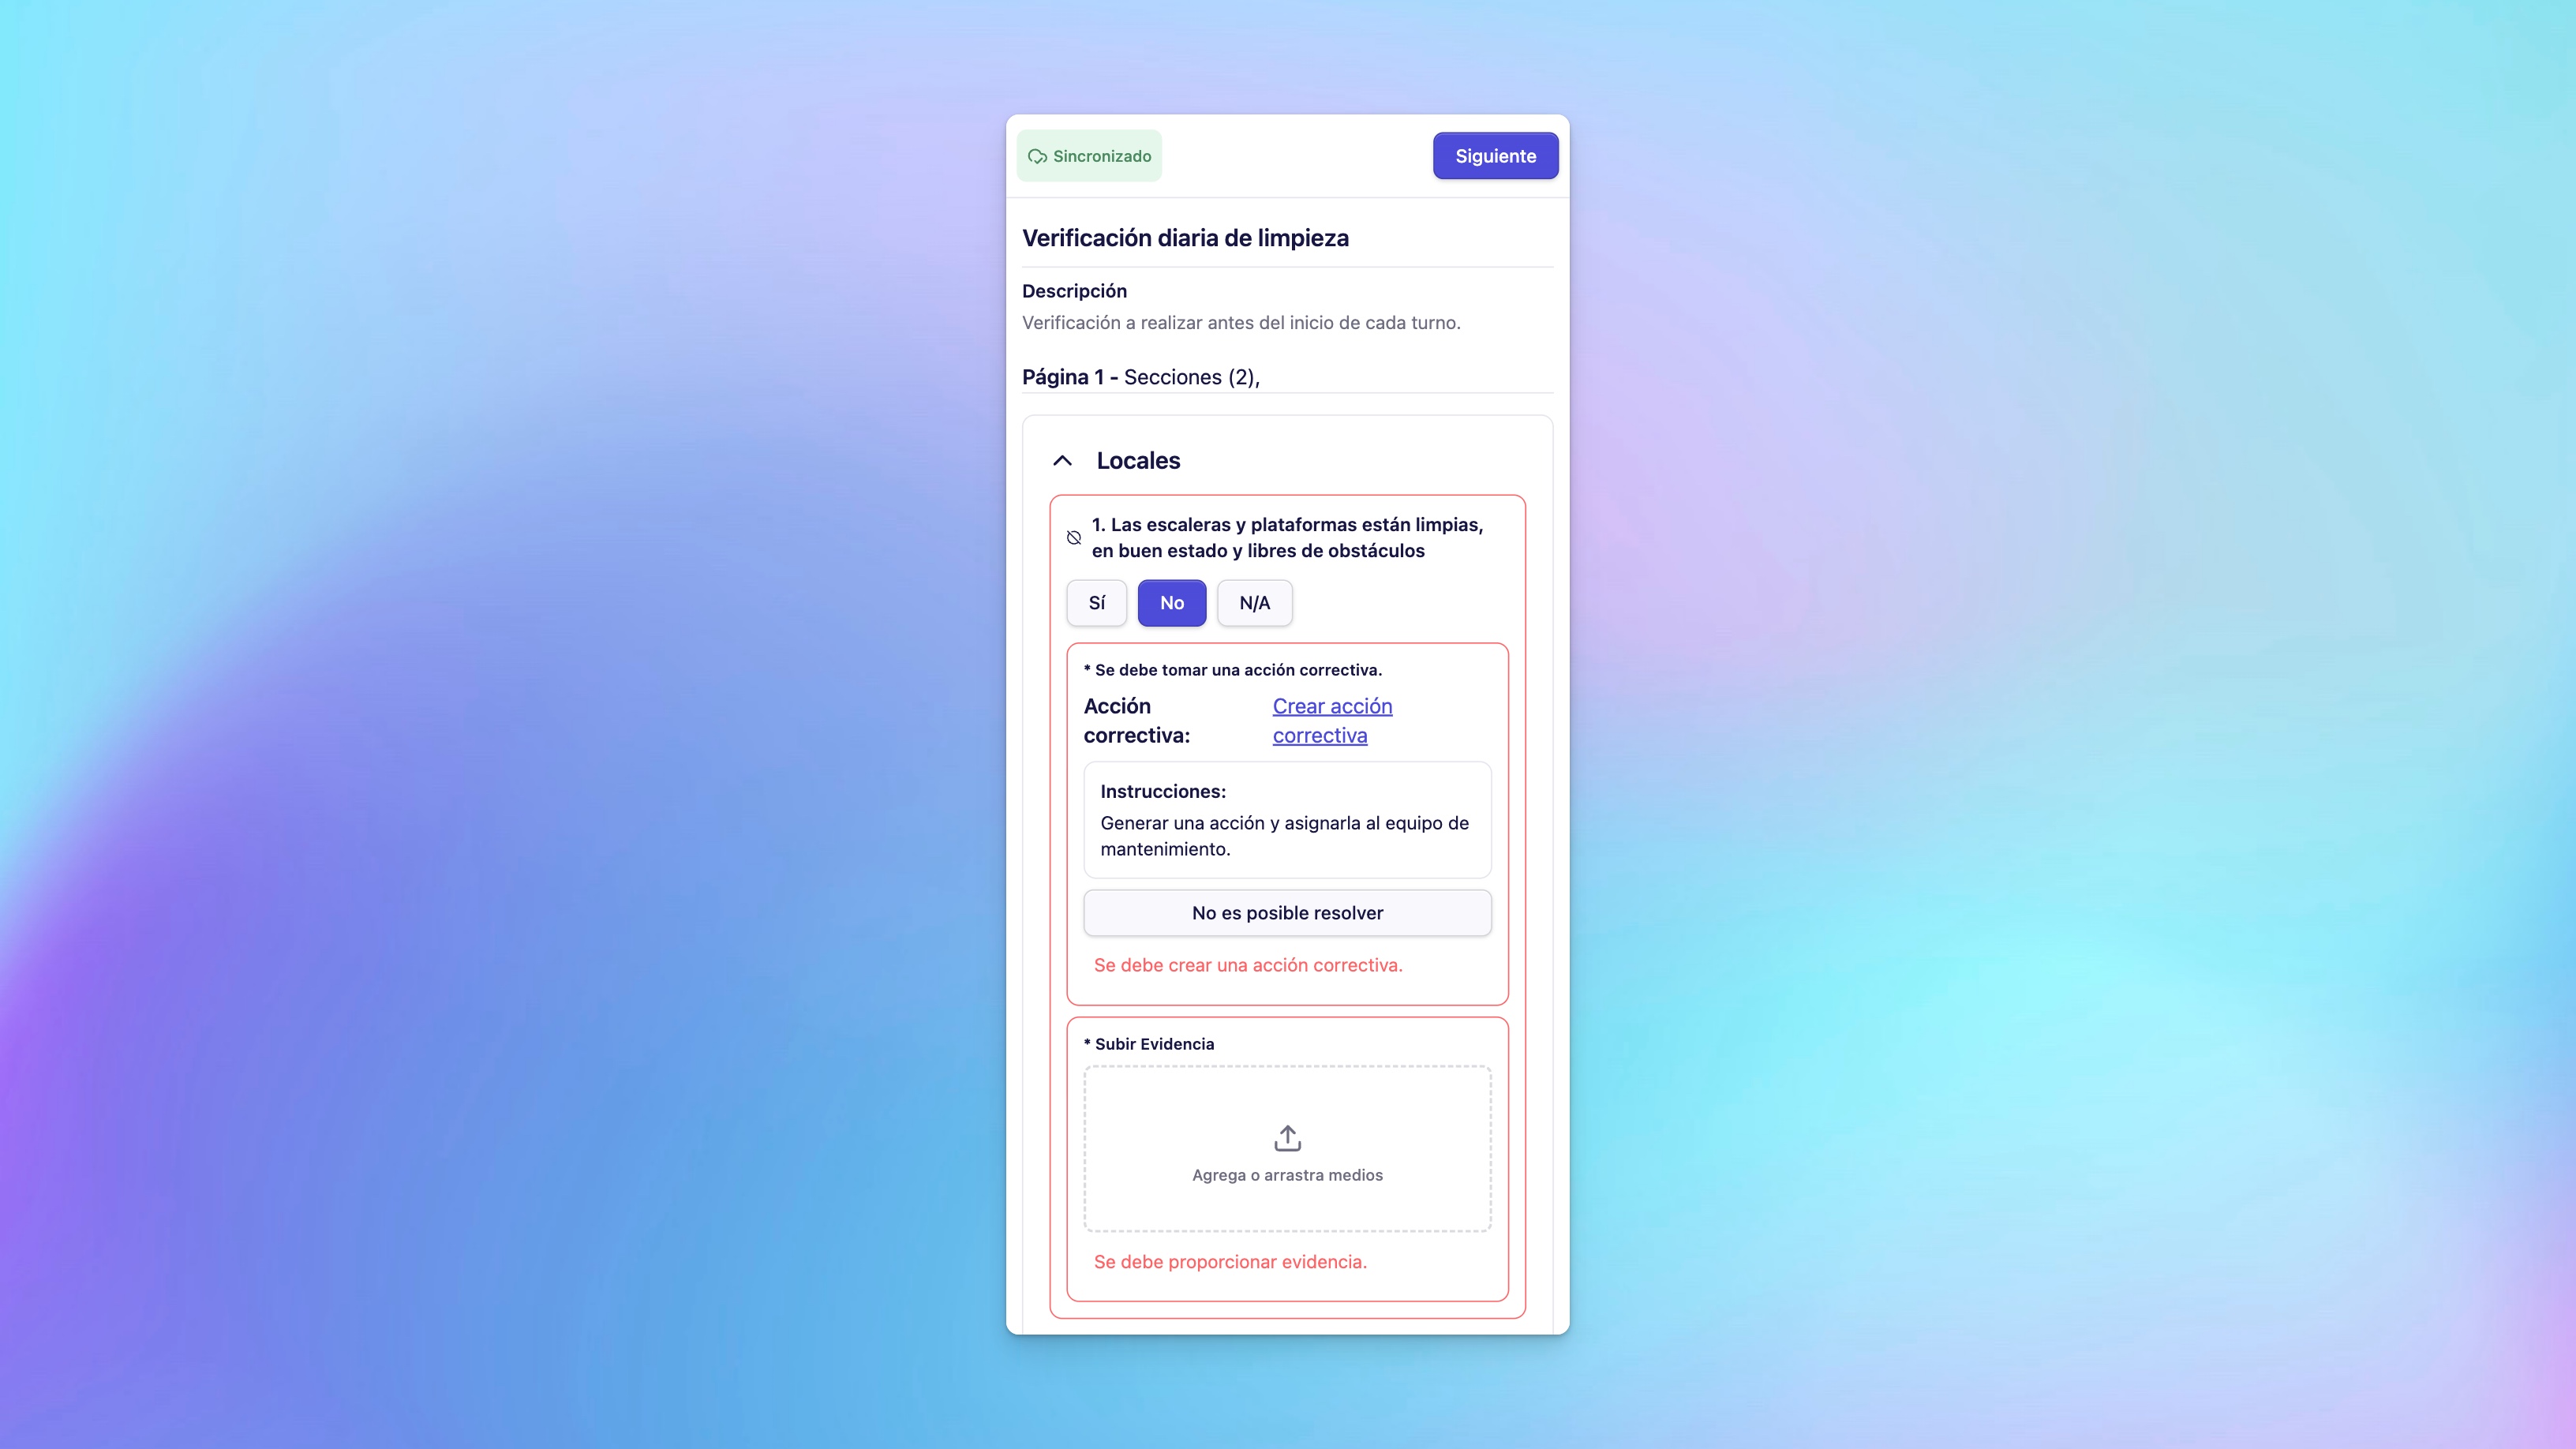
Step 6: Handle triggered conditions
Based on your answers, the template may trigger:
- Notifications — Alerts sent to specific users or teams
- Required Evidence — You must upload a photo or video
- Ticket Creation — Create a ticket to report an issue
If a ticket is triggered, complete the fields:
- Name and description
- Priority and due date
- Assigned person or team
- Location and asset (if applicable)
Step 7: Add comments (optional)
While working through the inspection, you can leave comments to provide context or flag concerns. Comments are visible in the inspection history.
Step 8: Review and submit
- When all questions are answered, click Continue
- The Summary screen shows all your answers
- Review for accuracy
- If you need to change something, click back to edit
- Click Finish to complete the inspection
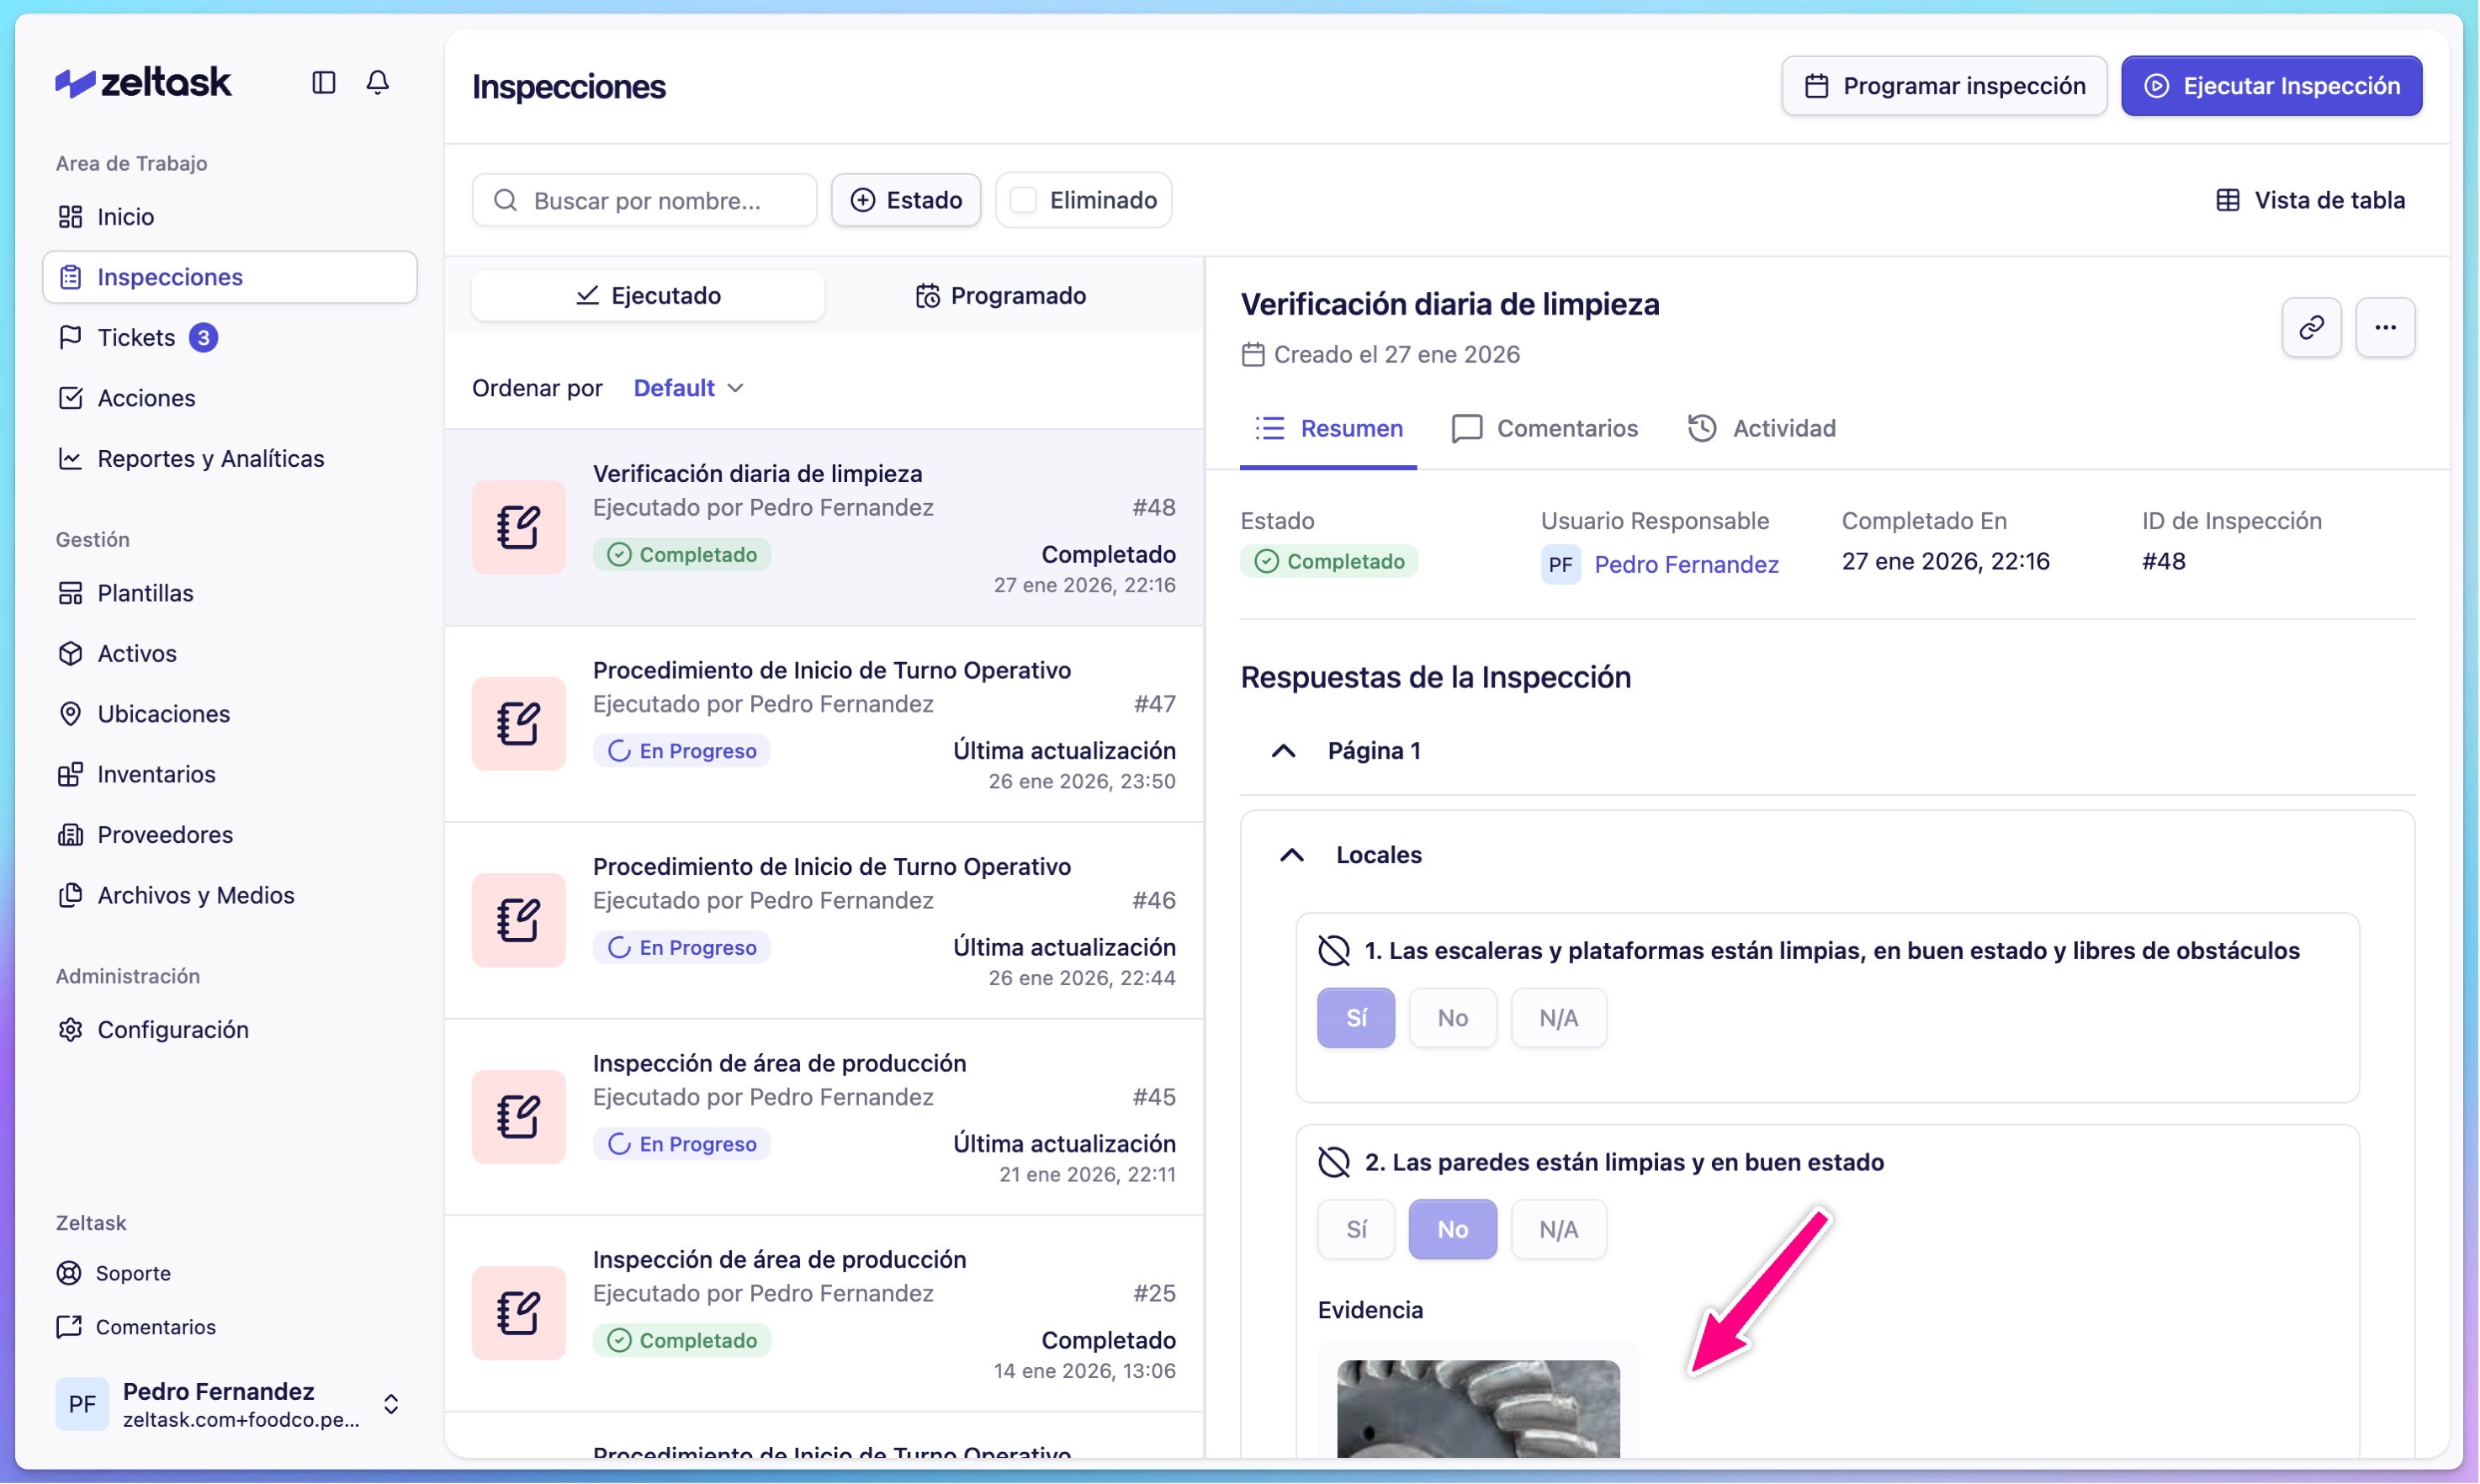
Viewing Completed Inspections
After submission:
- The inspection appears in your completed list
- Click any inspection card to view details
- Download or view the inspection report
Scheduled Inspections (for Managers)
Managers can schedule inspections in advance:
- Click Schedule Inspection
- Select the template
- Set the schedule:
- Start date and due date
- Recurrence (daily, weekly, monthly, yearly)
- Assign to a user or team
- Click Submit
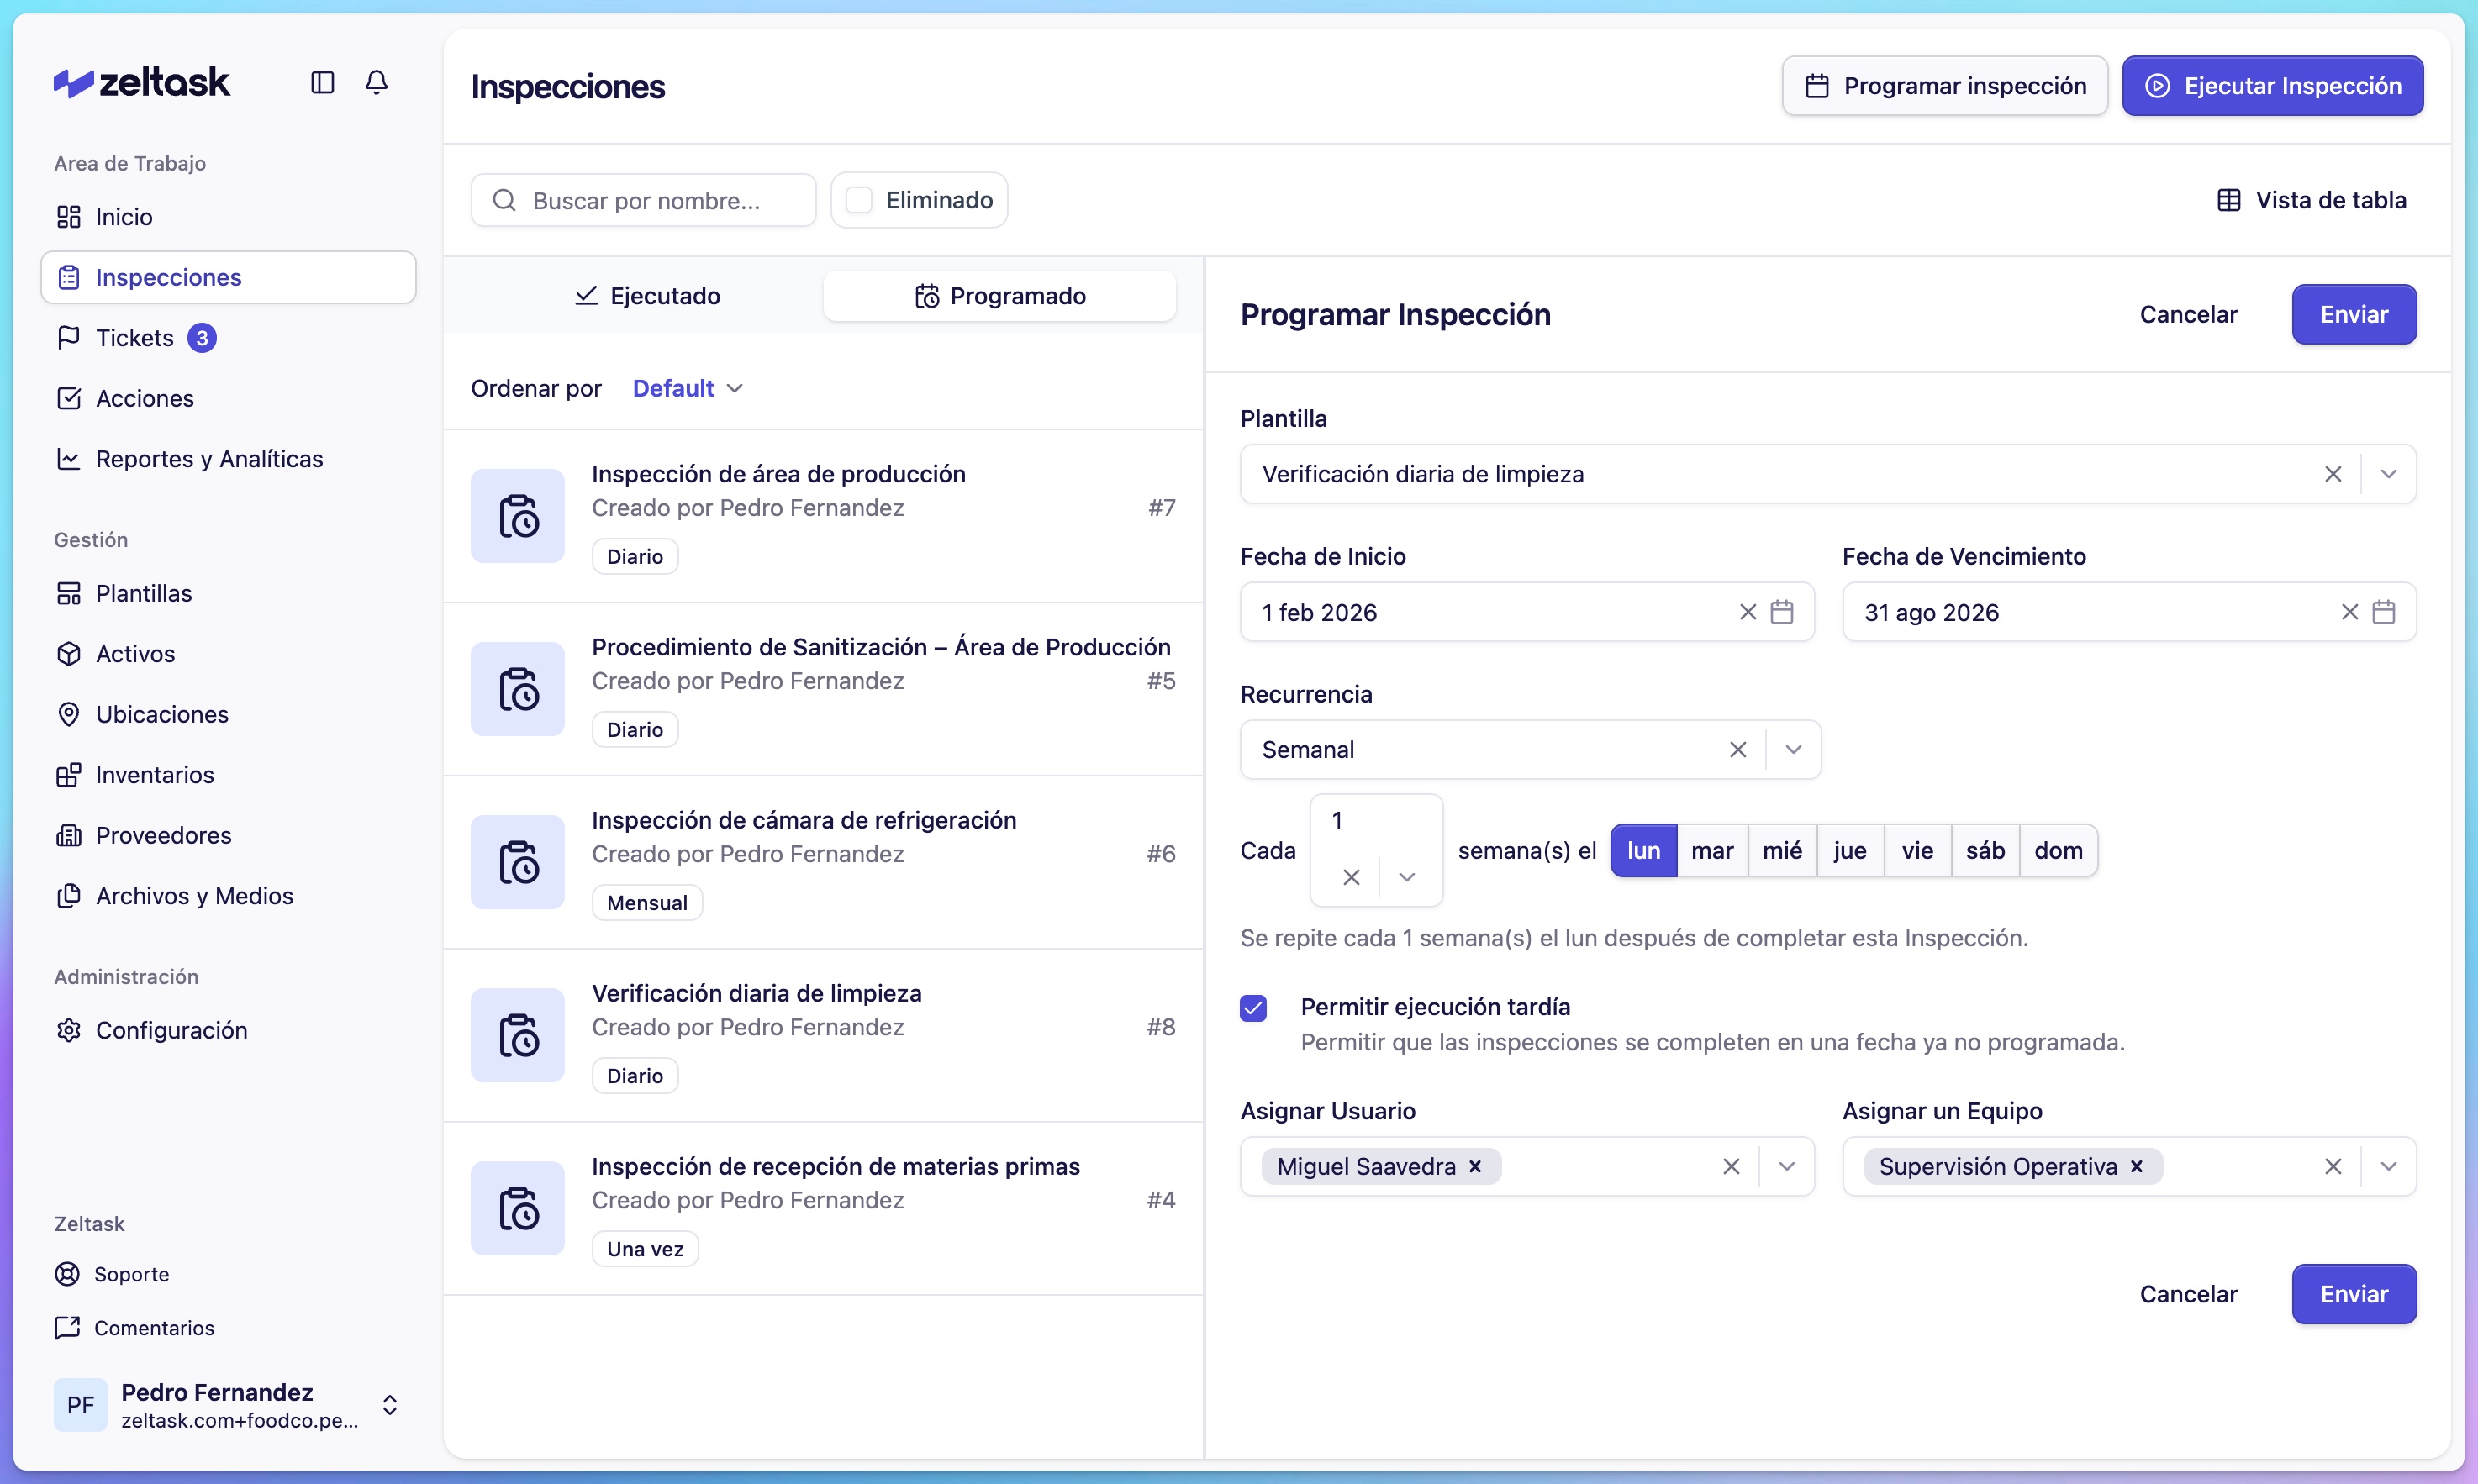
Assigned users receive notifications about scheduled inspections.
Tips
- Complete inspections in order—the template may have conditional logic that depends on previous answers
- Take clear photos when evidence is required
- If you notice an issue, create a ticket immediately rather than waiting until the end
- Use comments to explain unusual findings or provide context