Create Your First Action
Actions are tasks that need to be completed by your team — from preventive maintenance routines to reactive responses triggered by incidents. This guide walks you through creating your first action.
Before You Start
- You need at least Staff Member permissions
- For assignment, users or teams should already exist in the system
- Optionally, have assets and locations created to link to the action
Steps
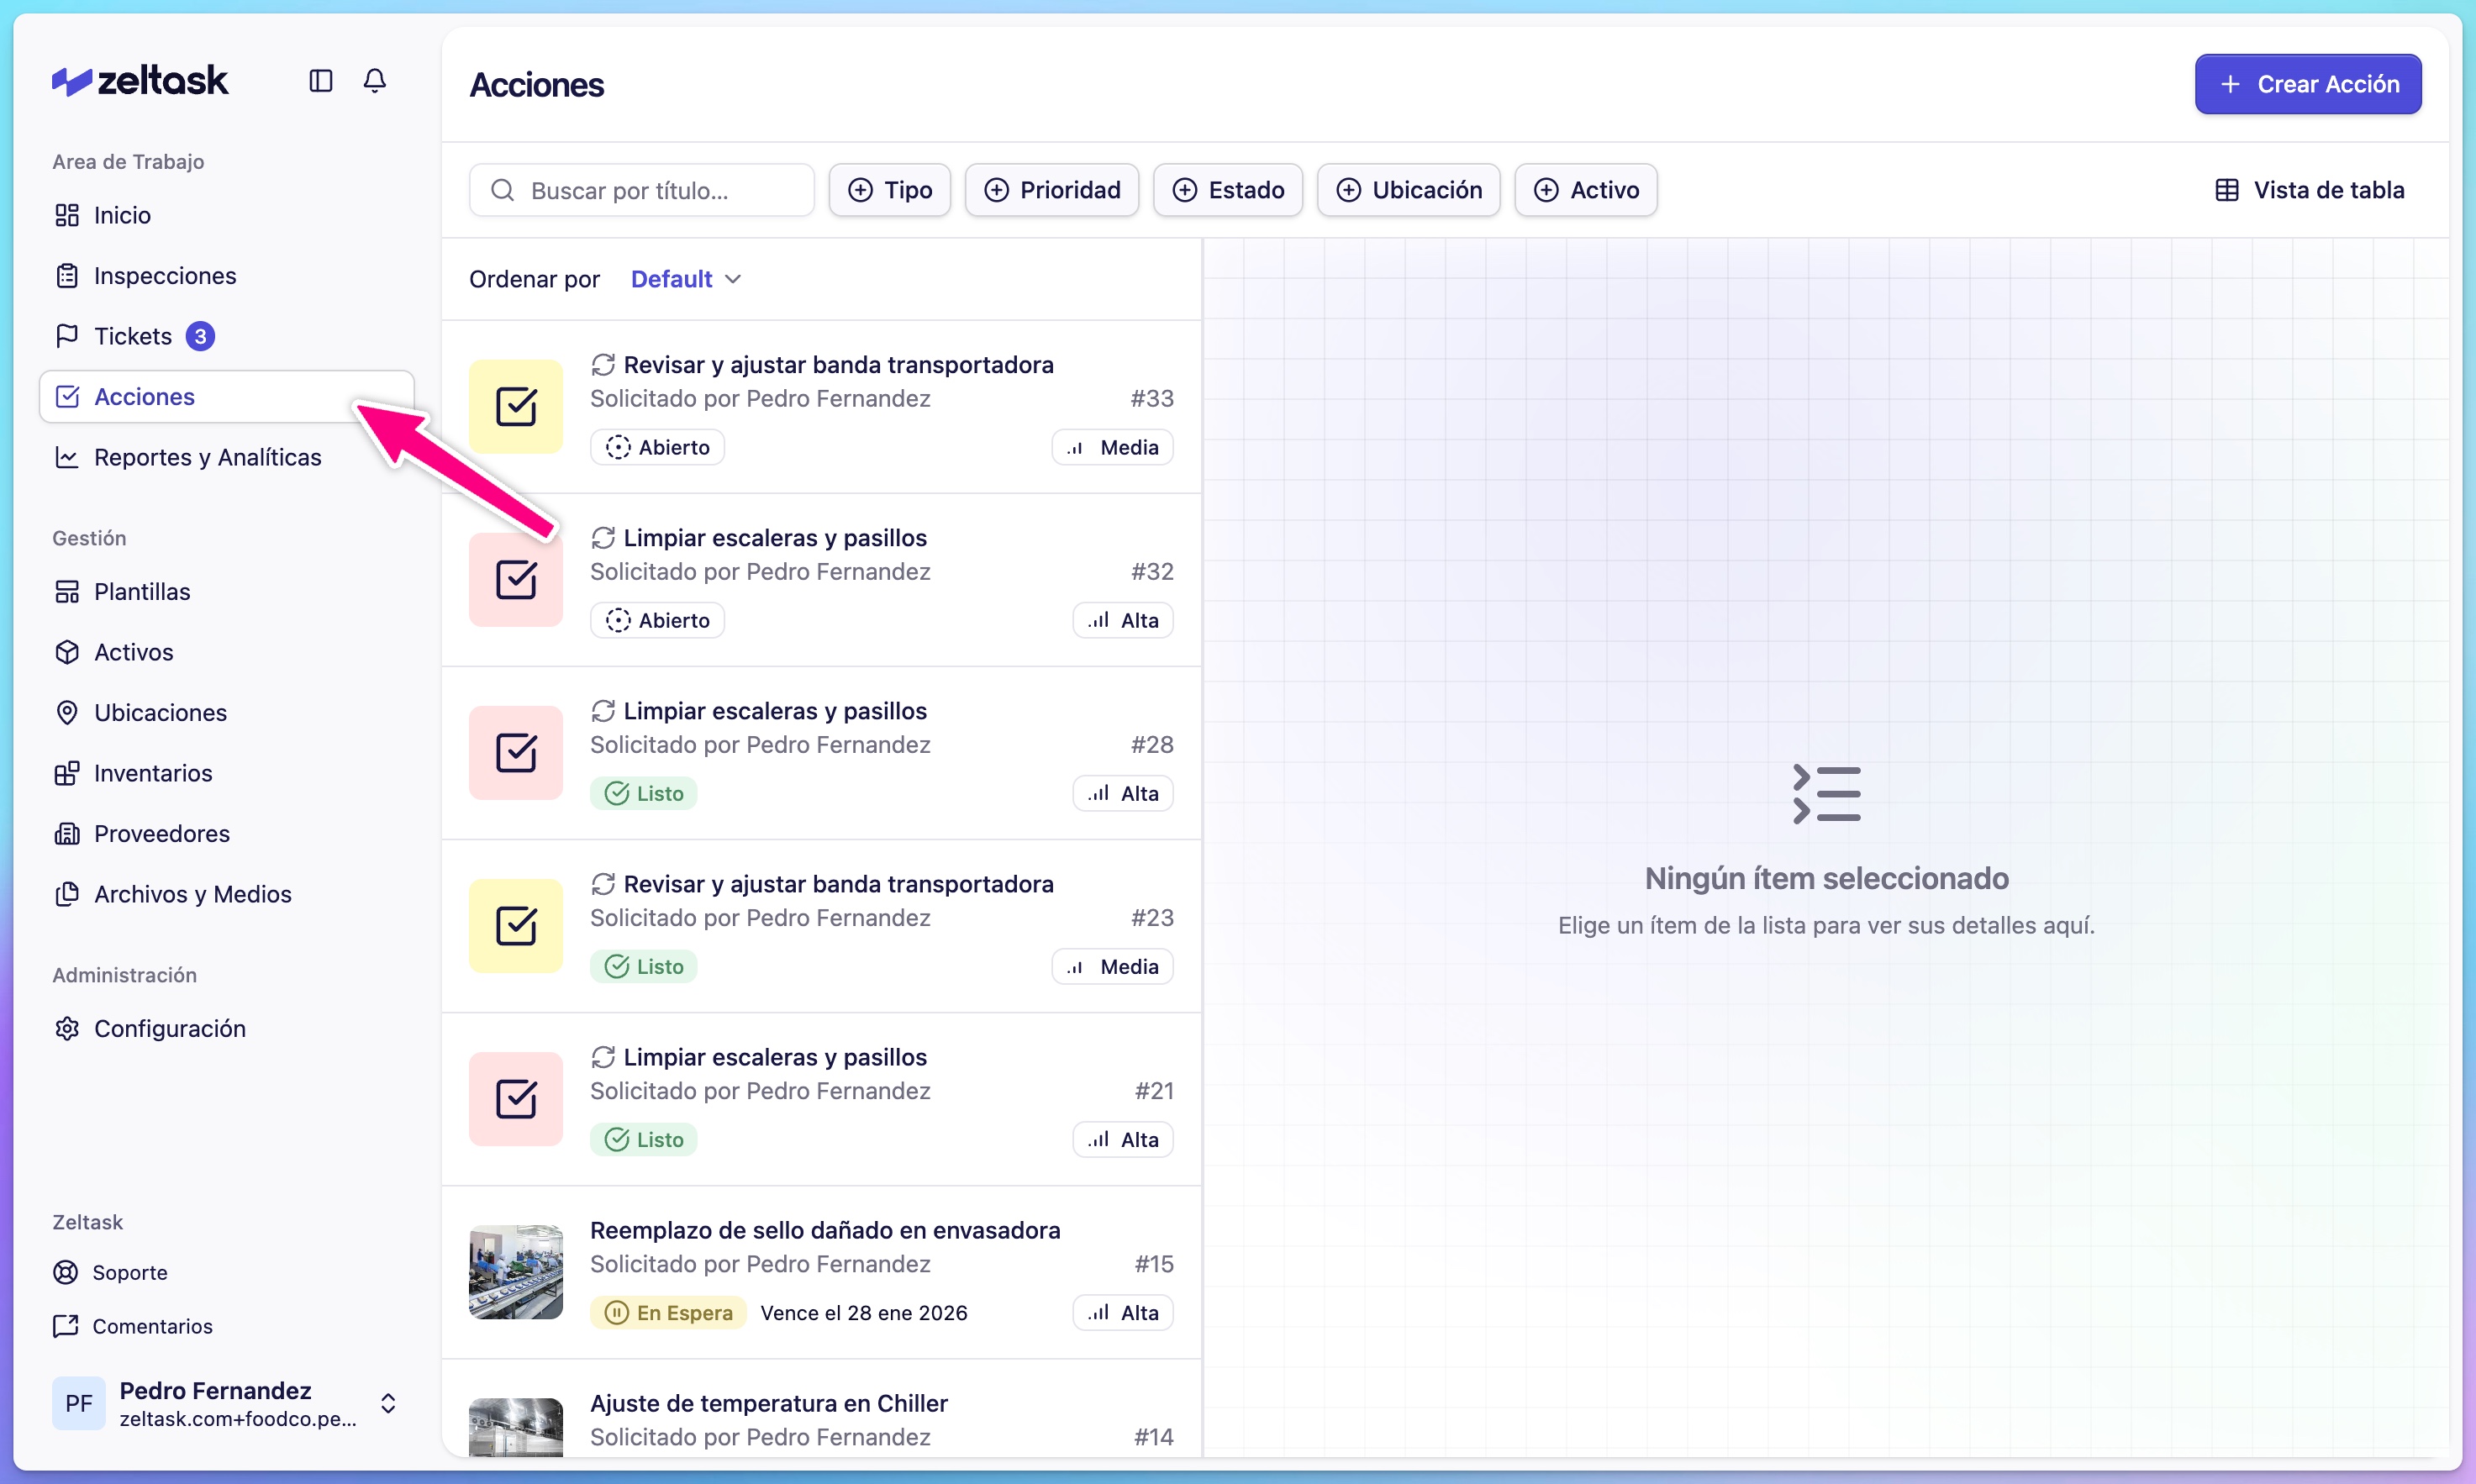
Step 1: Open the Actions module
- Click Actions in the left sidebar
- The actions list loads with any existing actions
Step 2: Start creating an action
- Click Create Action in the top-right corner
- The action creation form opens

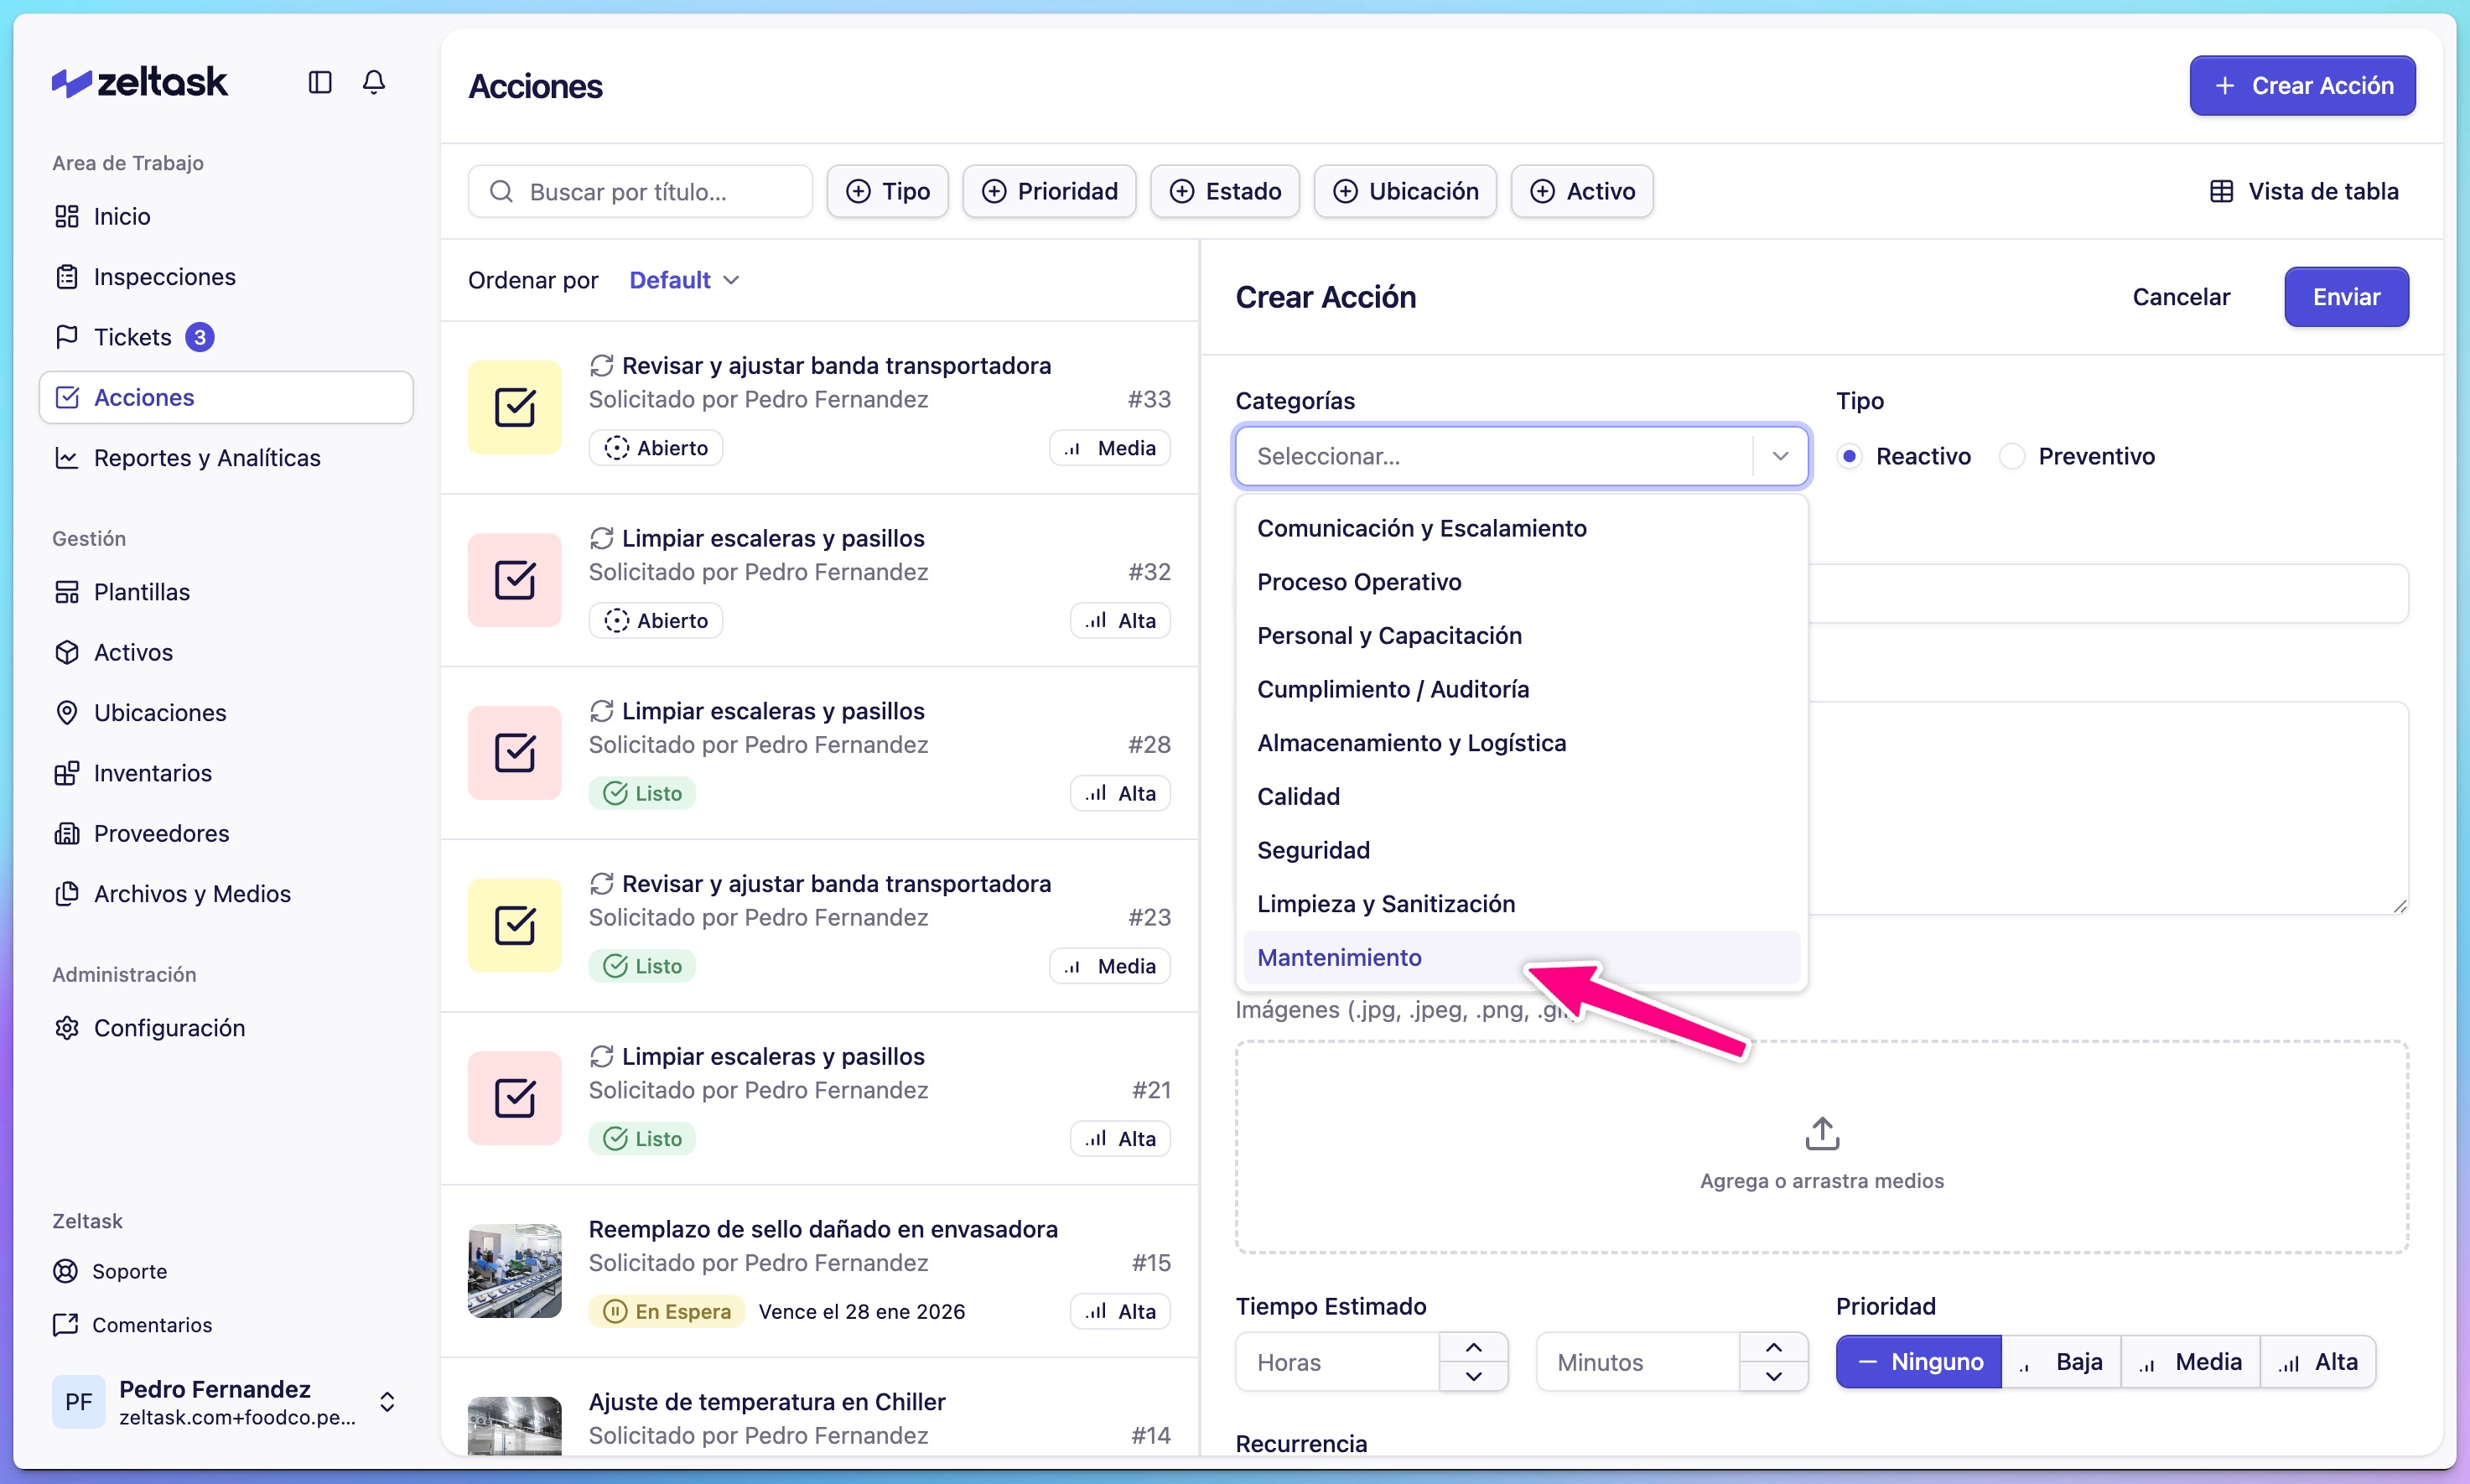
Step 3: Select category and type
-
Choose a Category that matches the work area:
- Maintenance
- Plumbing
- Electrical
-
Select the Type:
- Preventive — Scheduled, recurring maintenance
- Reactive — Response to an issue or urgent need
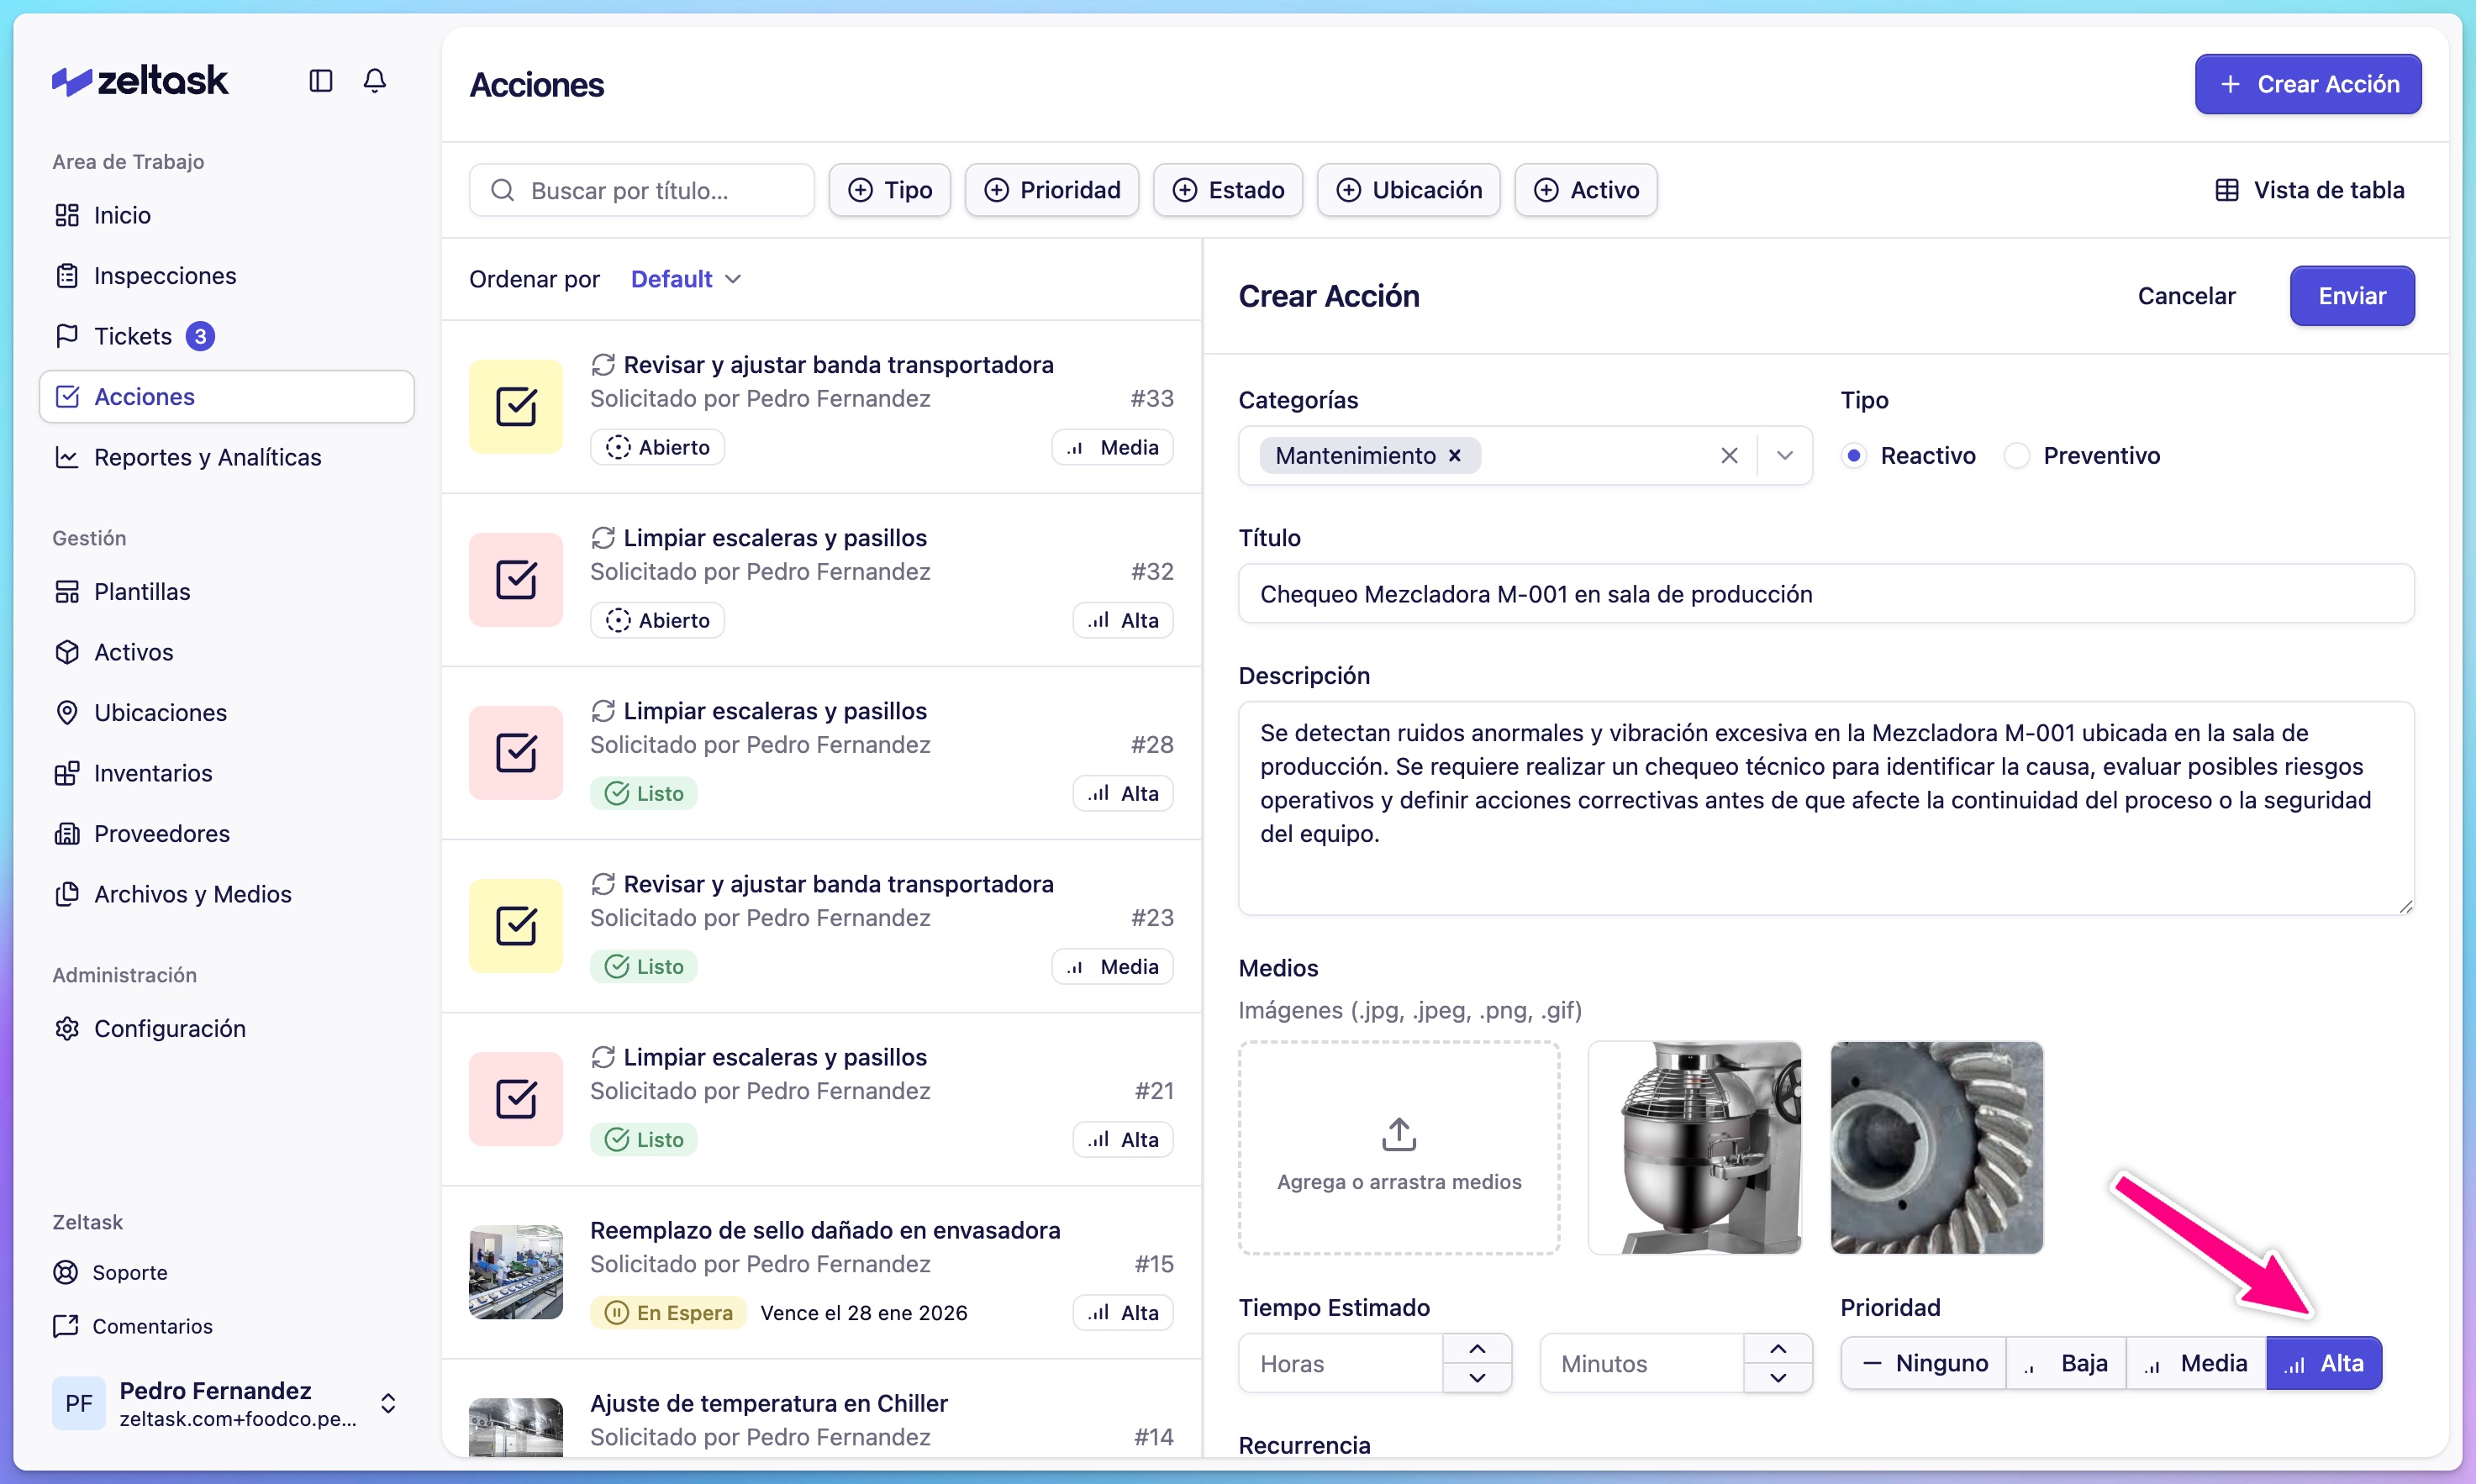
Step 4: Enter title and description
| Field | Purpose | Example |
|---|---|---|
| Title | Brief, clear name for the task | "Monthly pump inspection" |
| Description | Detailed instructions for the technician | "Check pressure levels, inspect seals, lubricate bearings" |

Step 5: Add supporting media (optional)
- Click Add Media to attach photos
- Upload images showing the current condition, location, or specific issue
- Supported formats: JPG, PNG, GIF
Visual references help technicians understand exactly what needs attention.
Step 6: Set time and priority
| Field | Options |
|---|---|
| Estimated Time | How long the task should take |
| Priority | None, Low, Medium, High |
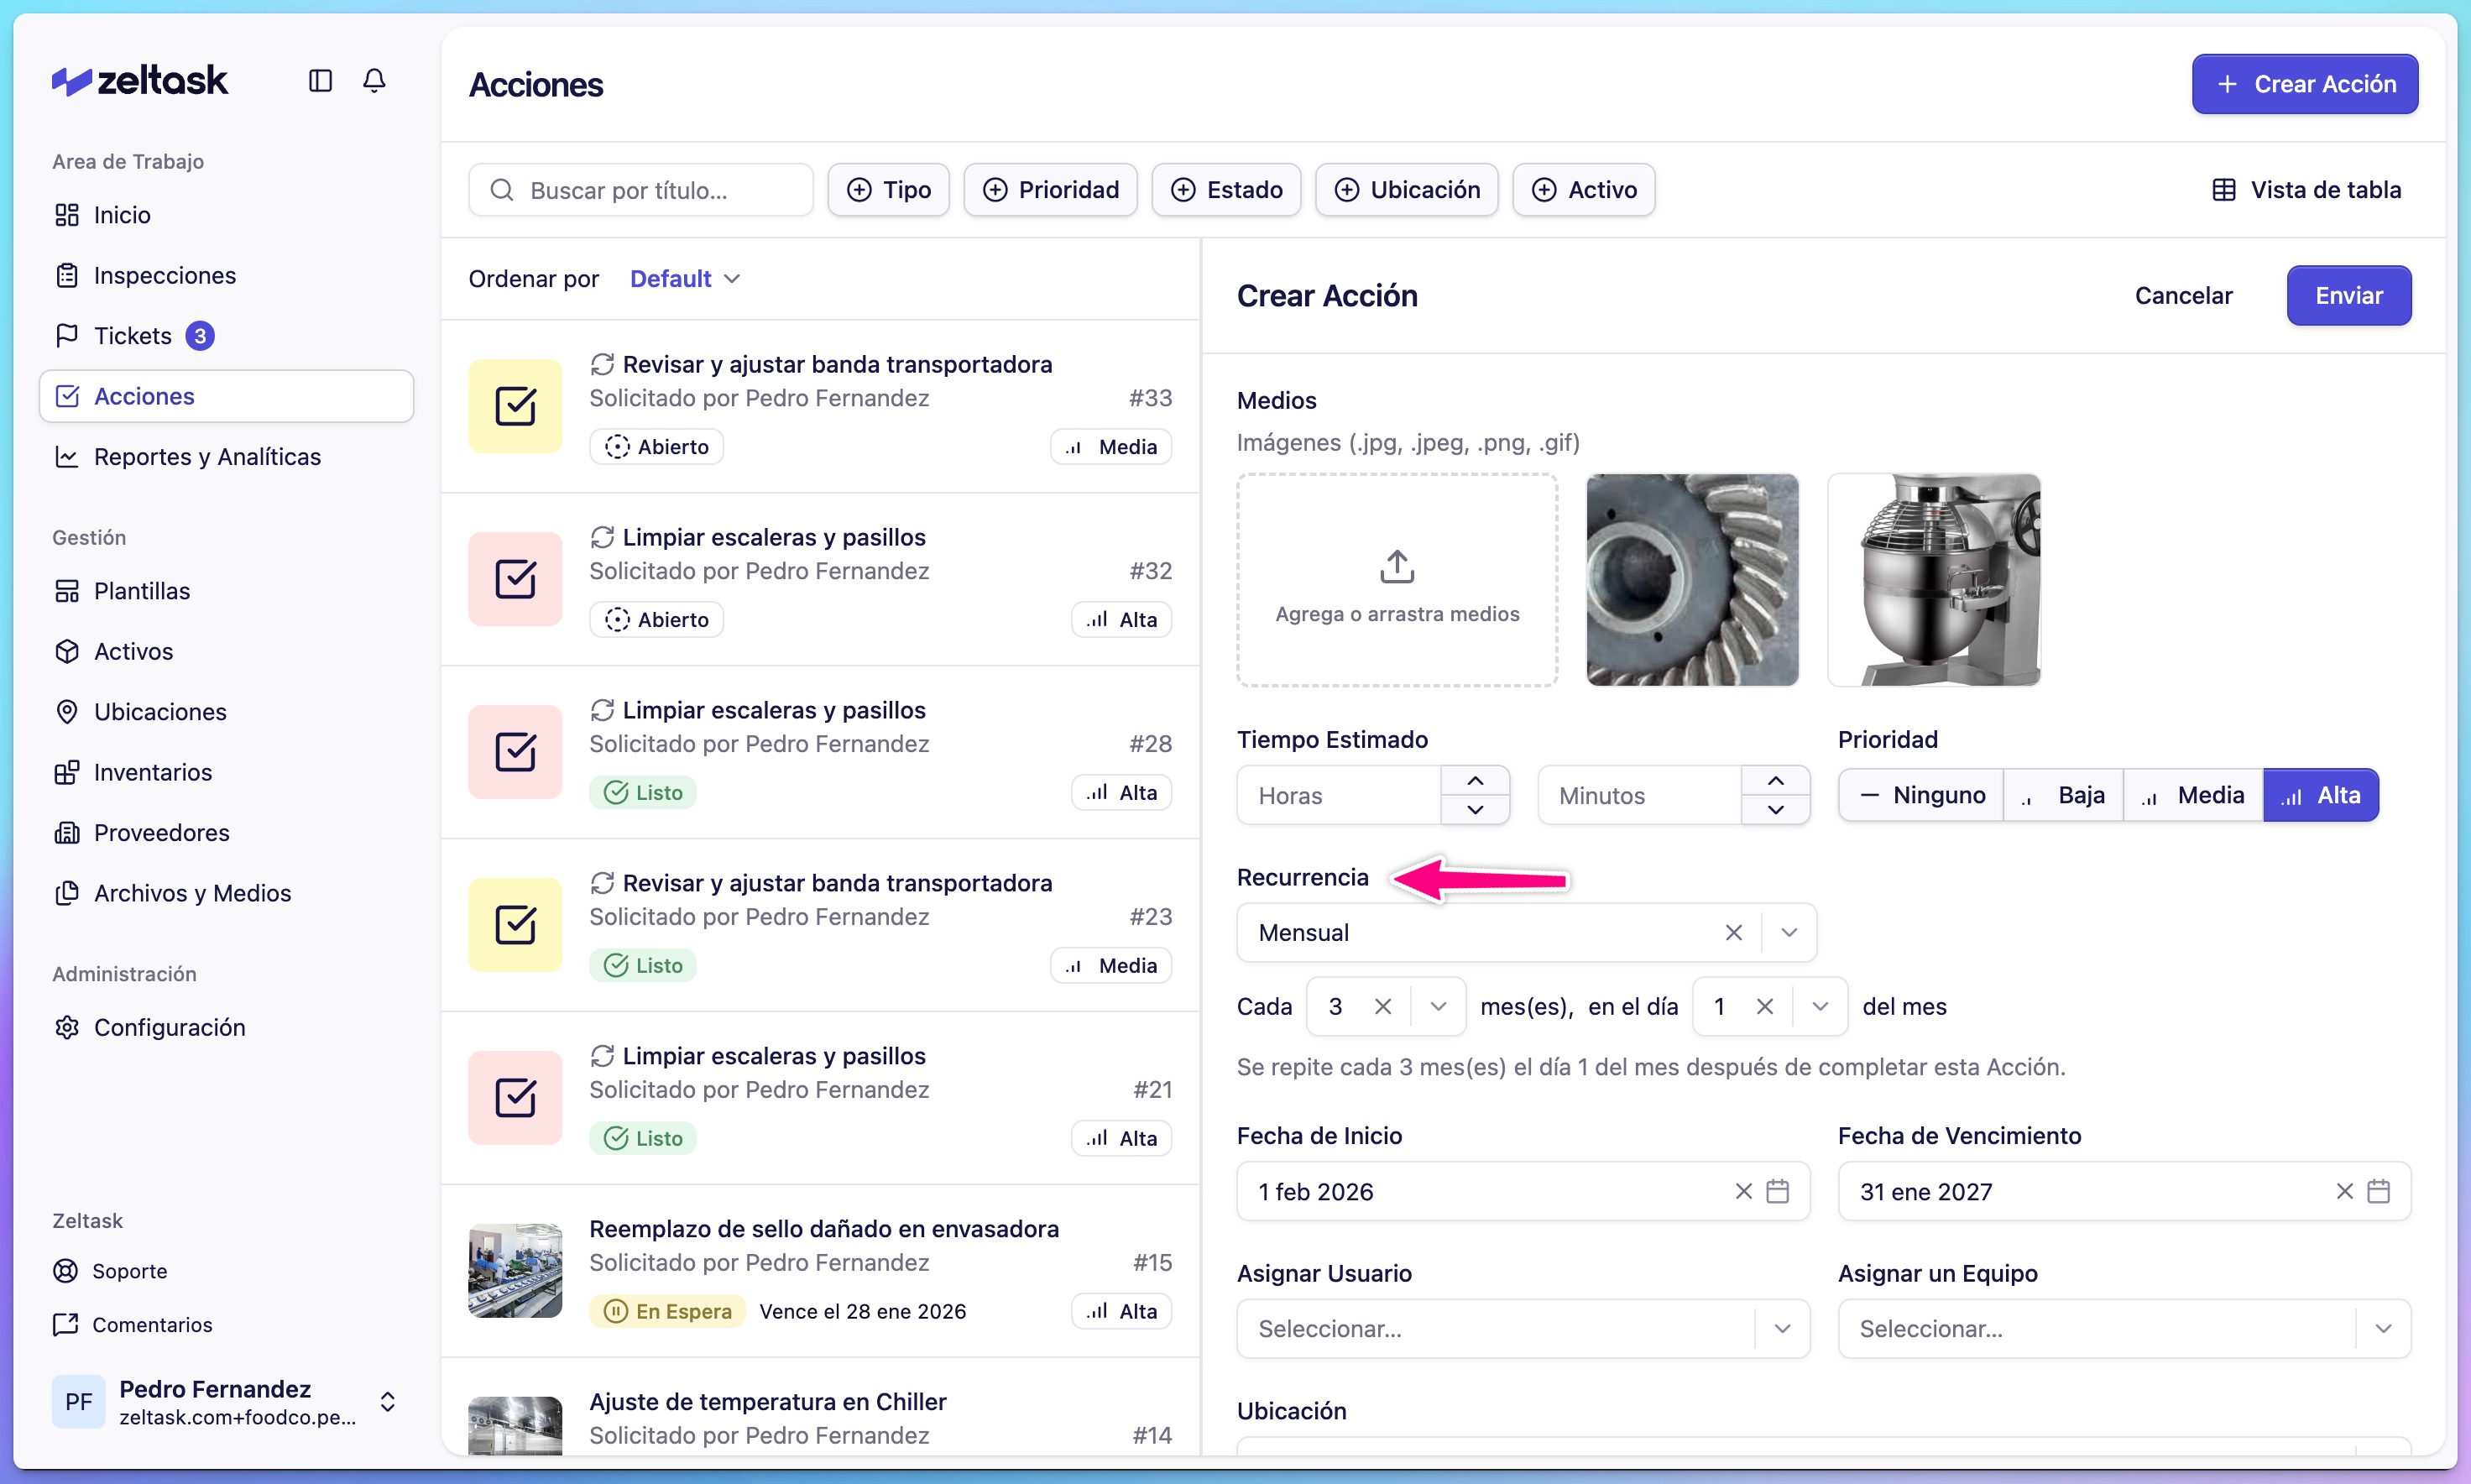
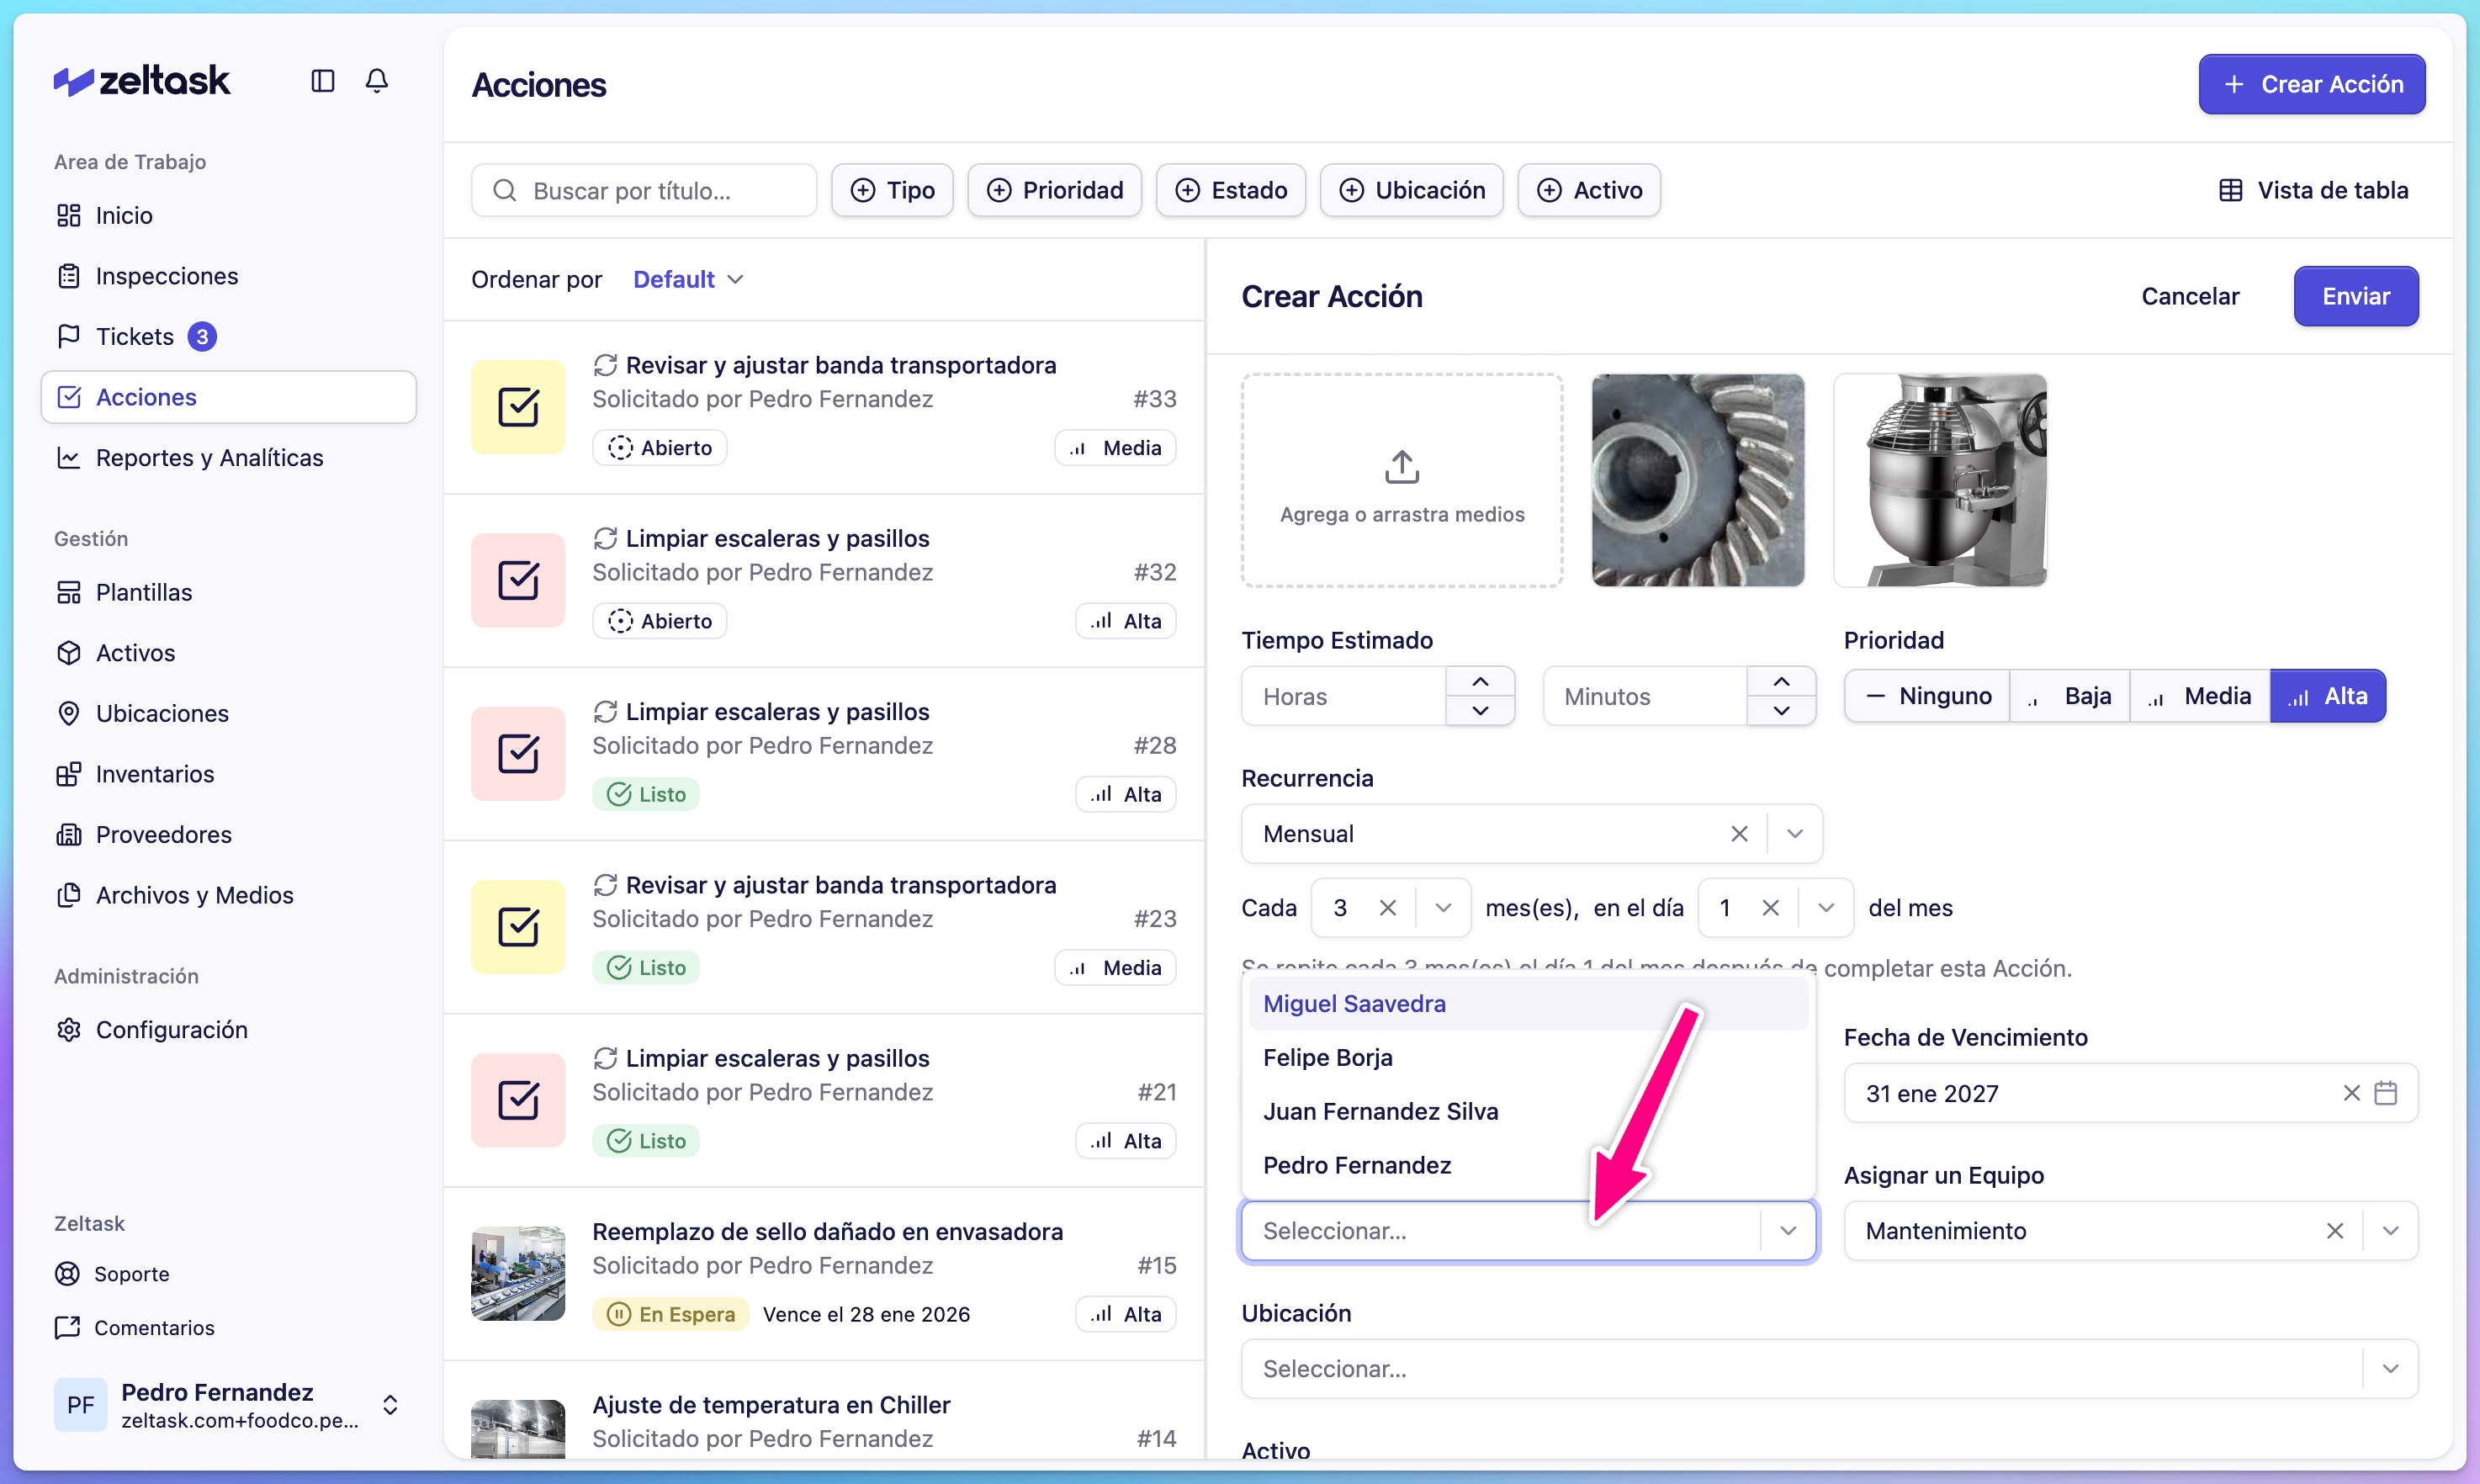
Step 7: Configure schedule (for preventive actions)
For recurring tasks, set up a schedule:
- Select Recurrence: Daily, Weekly, Monthly, or Yearly
- Configure the specific pattern (e.g., every Monday, first day of month)
- Set the Start Date
- Optionally set a Due Date for the first occurrence
Step 8: Assign responsibility
Choose who should complete the work:
- Assign to User — Select a specific person
- Assign to Team — Any team member can pick it up
Step 9: Link to location and asset
| Field | Purpose |
|---|---|
| Location | Where the work should be performed |
| Asset | Which equipment the action relates to |

Linking creates connections for tracking and reporting.
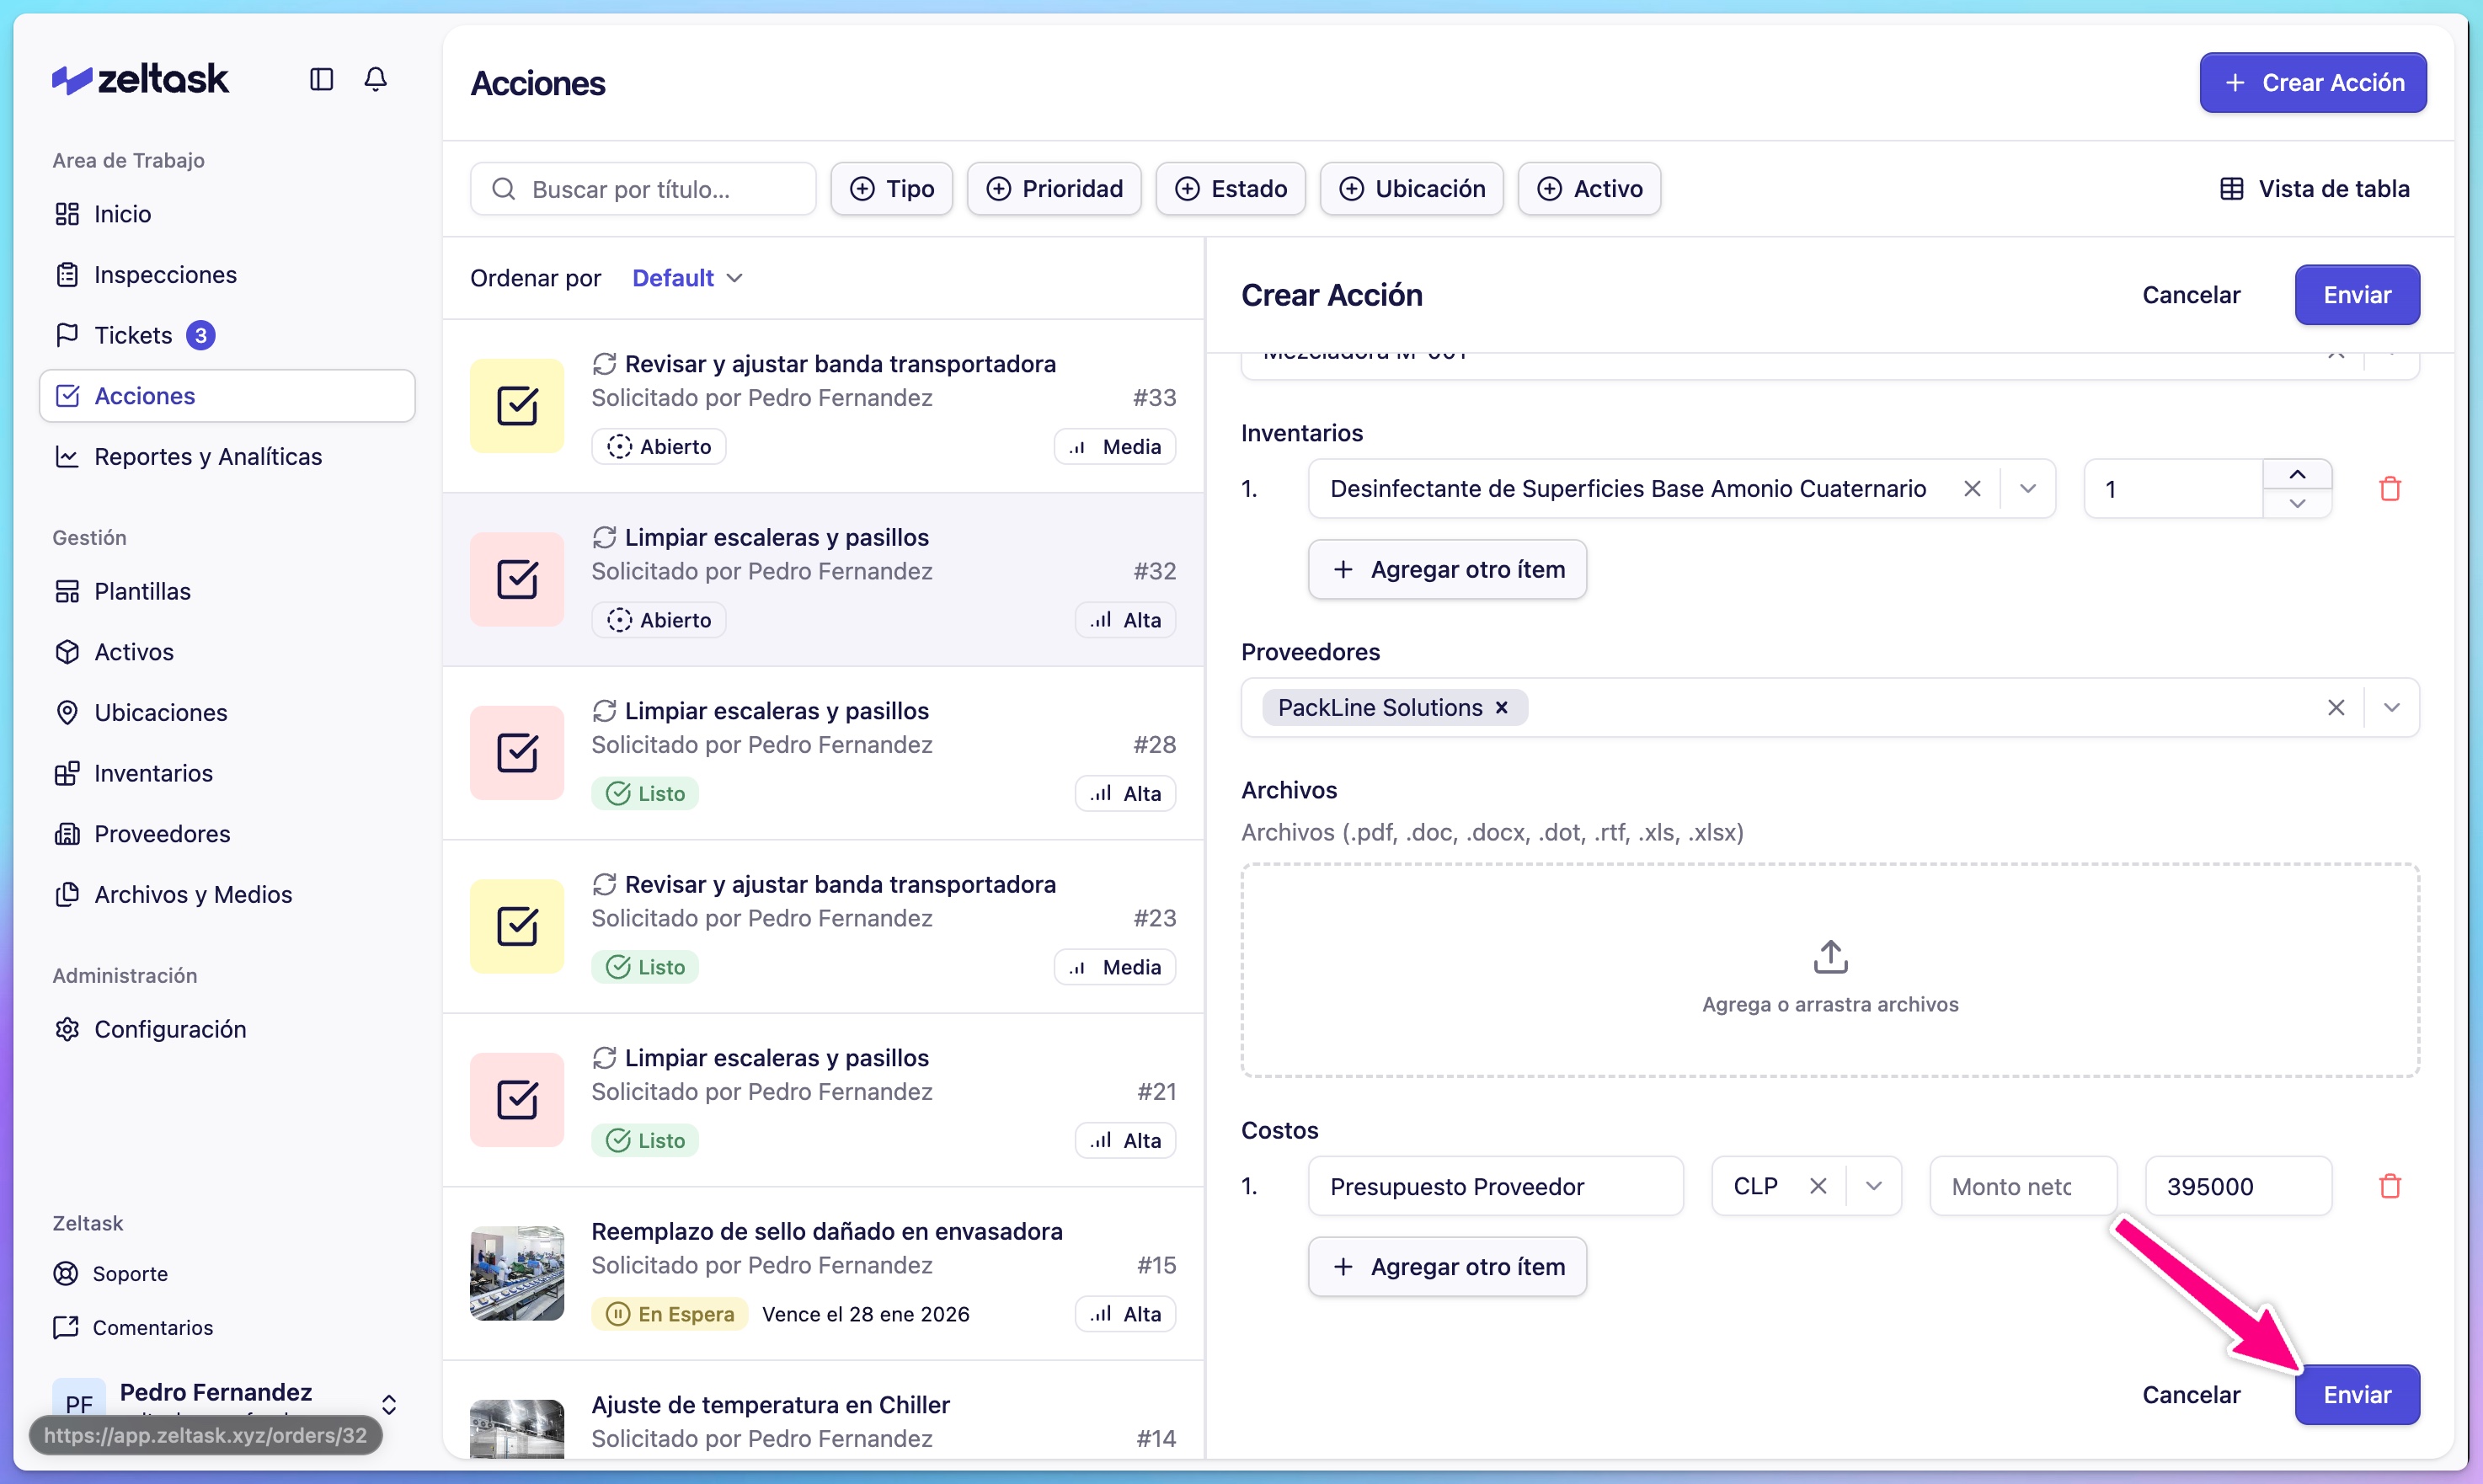
Step 10: Add materials and costs (optional)
| Field | Purpose |
|---|---|
| Inventory | Spare parts or materials needed |
| Vendor | External provider if contractor work is required |
| Attachments | Documents like procedures or manuals |
| Cost | Budget or expense tracking |
Step 11: Submit the action
- Review all fields
- Click Submit
The action is created and assigned. The responsible user or team receives a notification.
Tracking Your Action
After creation, the action moves through states:
| State | Meaning |
|---|---|
| Open | Created, waiting to be started |
| In Progress | Technician is actively working on it |
| On Hold | Temporarily paused |
| Done | Completed |
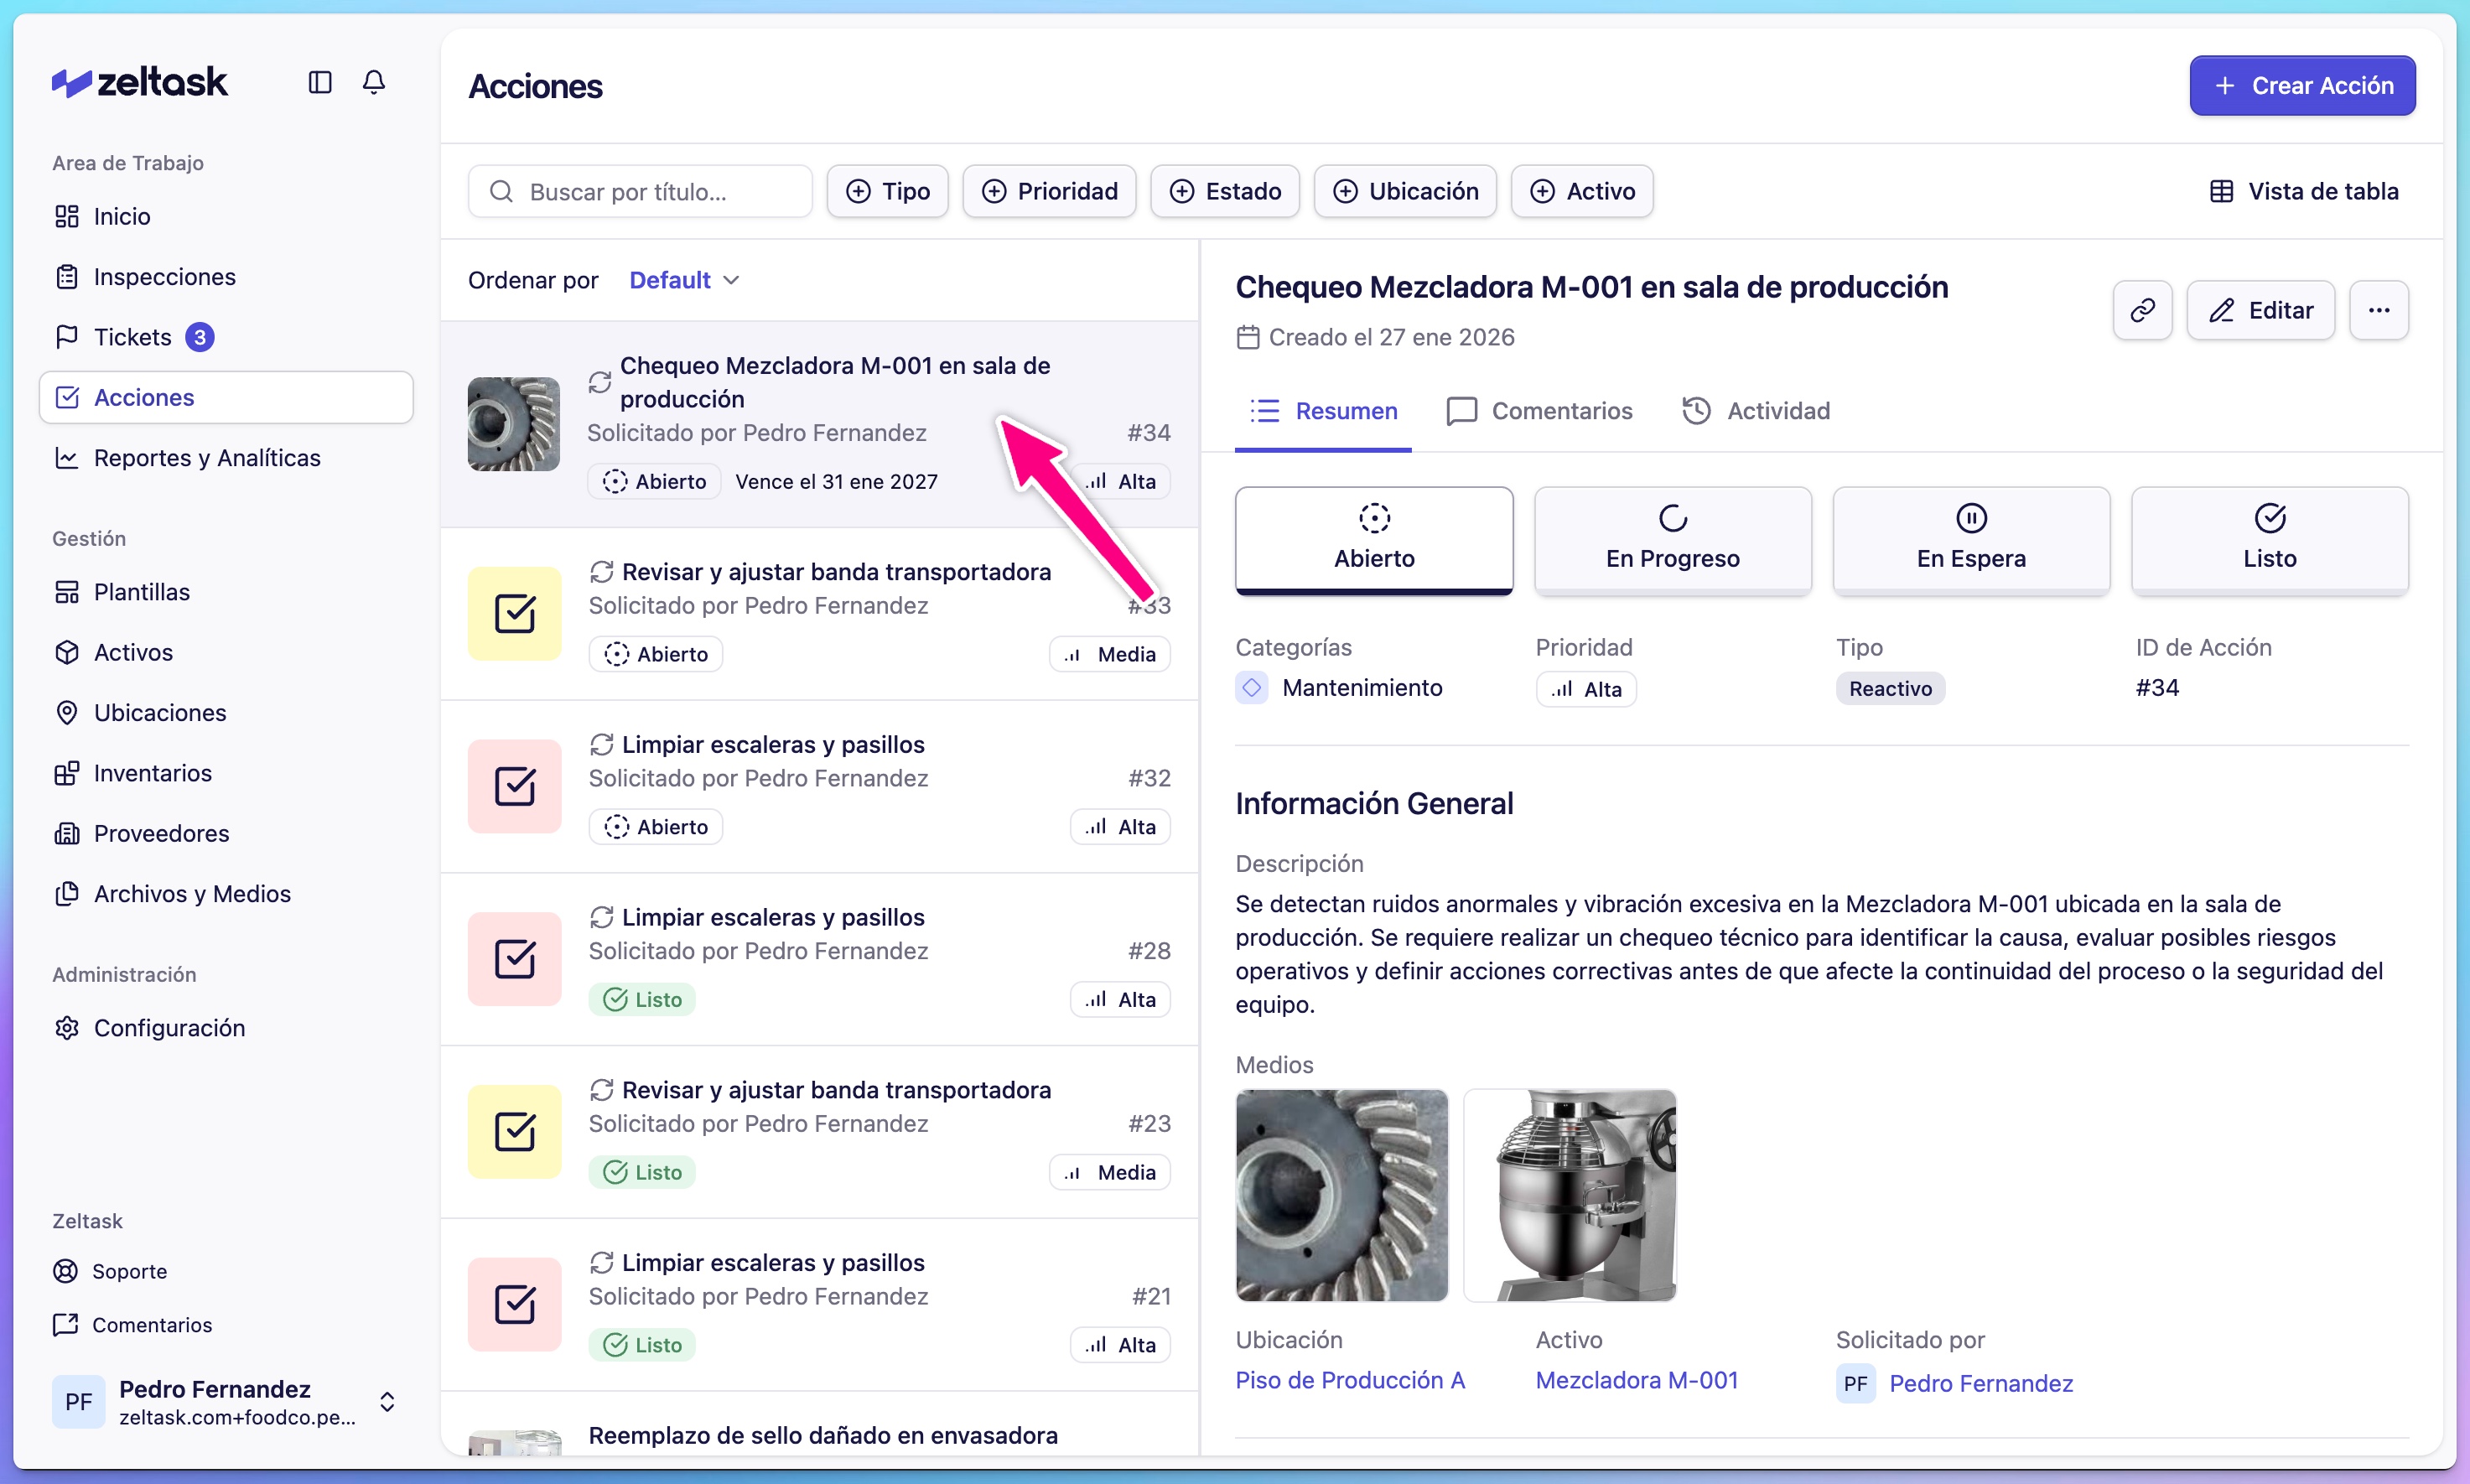
Click any action card to view details, add comments, or check progress.
Example: Reactive Action
Here's a quick example of creating a reactive action:
| Field | Value |
|---|---|
| Category | Maintenance |
| Type | Reactive |
| Title | Clean spill in Corridor 3 |
| Description | Oil spill near loading dock, use absorbent material |
| Priority | High |
| Estimated Time | 15 minutes |
| Assigned To | Cleaning Team |
| Location | Corridor 3 |
Tips
- Use clear, action-oriented titles ("Inspect pump seals" not "Pump")
- Set realistic time estimates to help with workload planning
- For preventive maintenance, start with simple weekly or monthly schedules
- Link actions to assets to build maintenance history