Add Your First Asset
Register your equipment in Zeltask to track maintenance history, schedule preventive work, and build a complete record of each asset's lifecycle.
Before You Start
- You need Admin or Manager permissions to create assets
- Have basic equipment information ready (name, manufacturer, model)
- Optionally, create locations first so you can assign assets to them
Steps
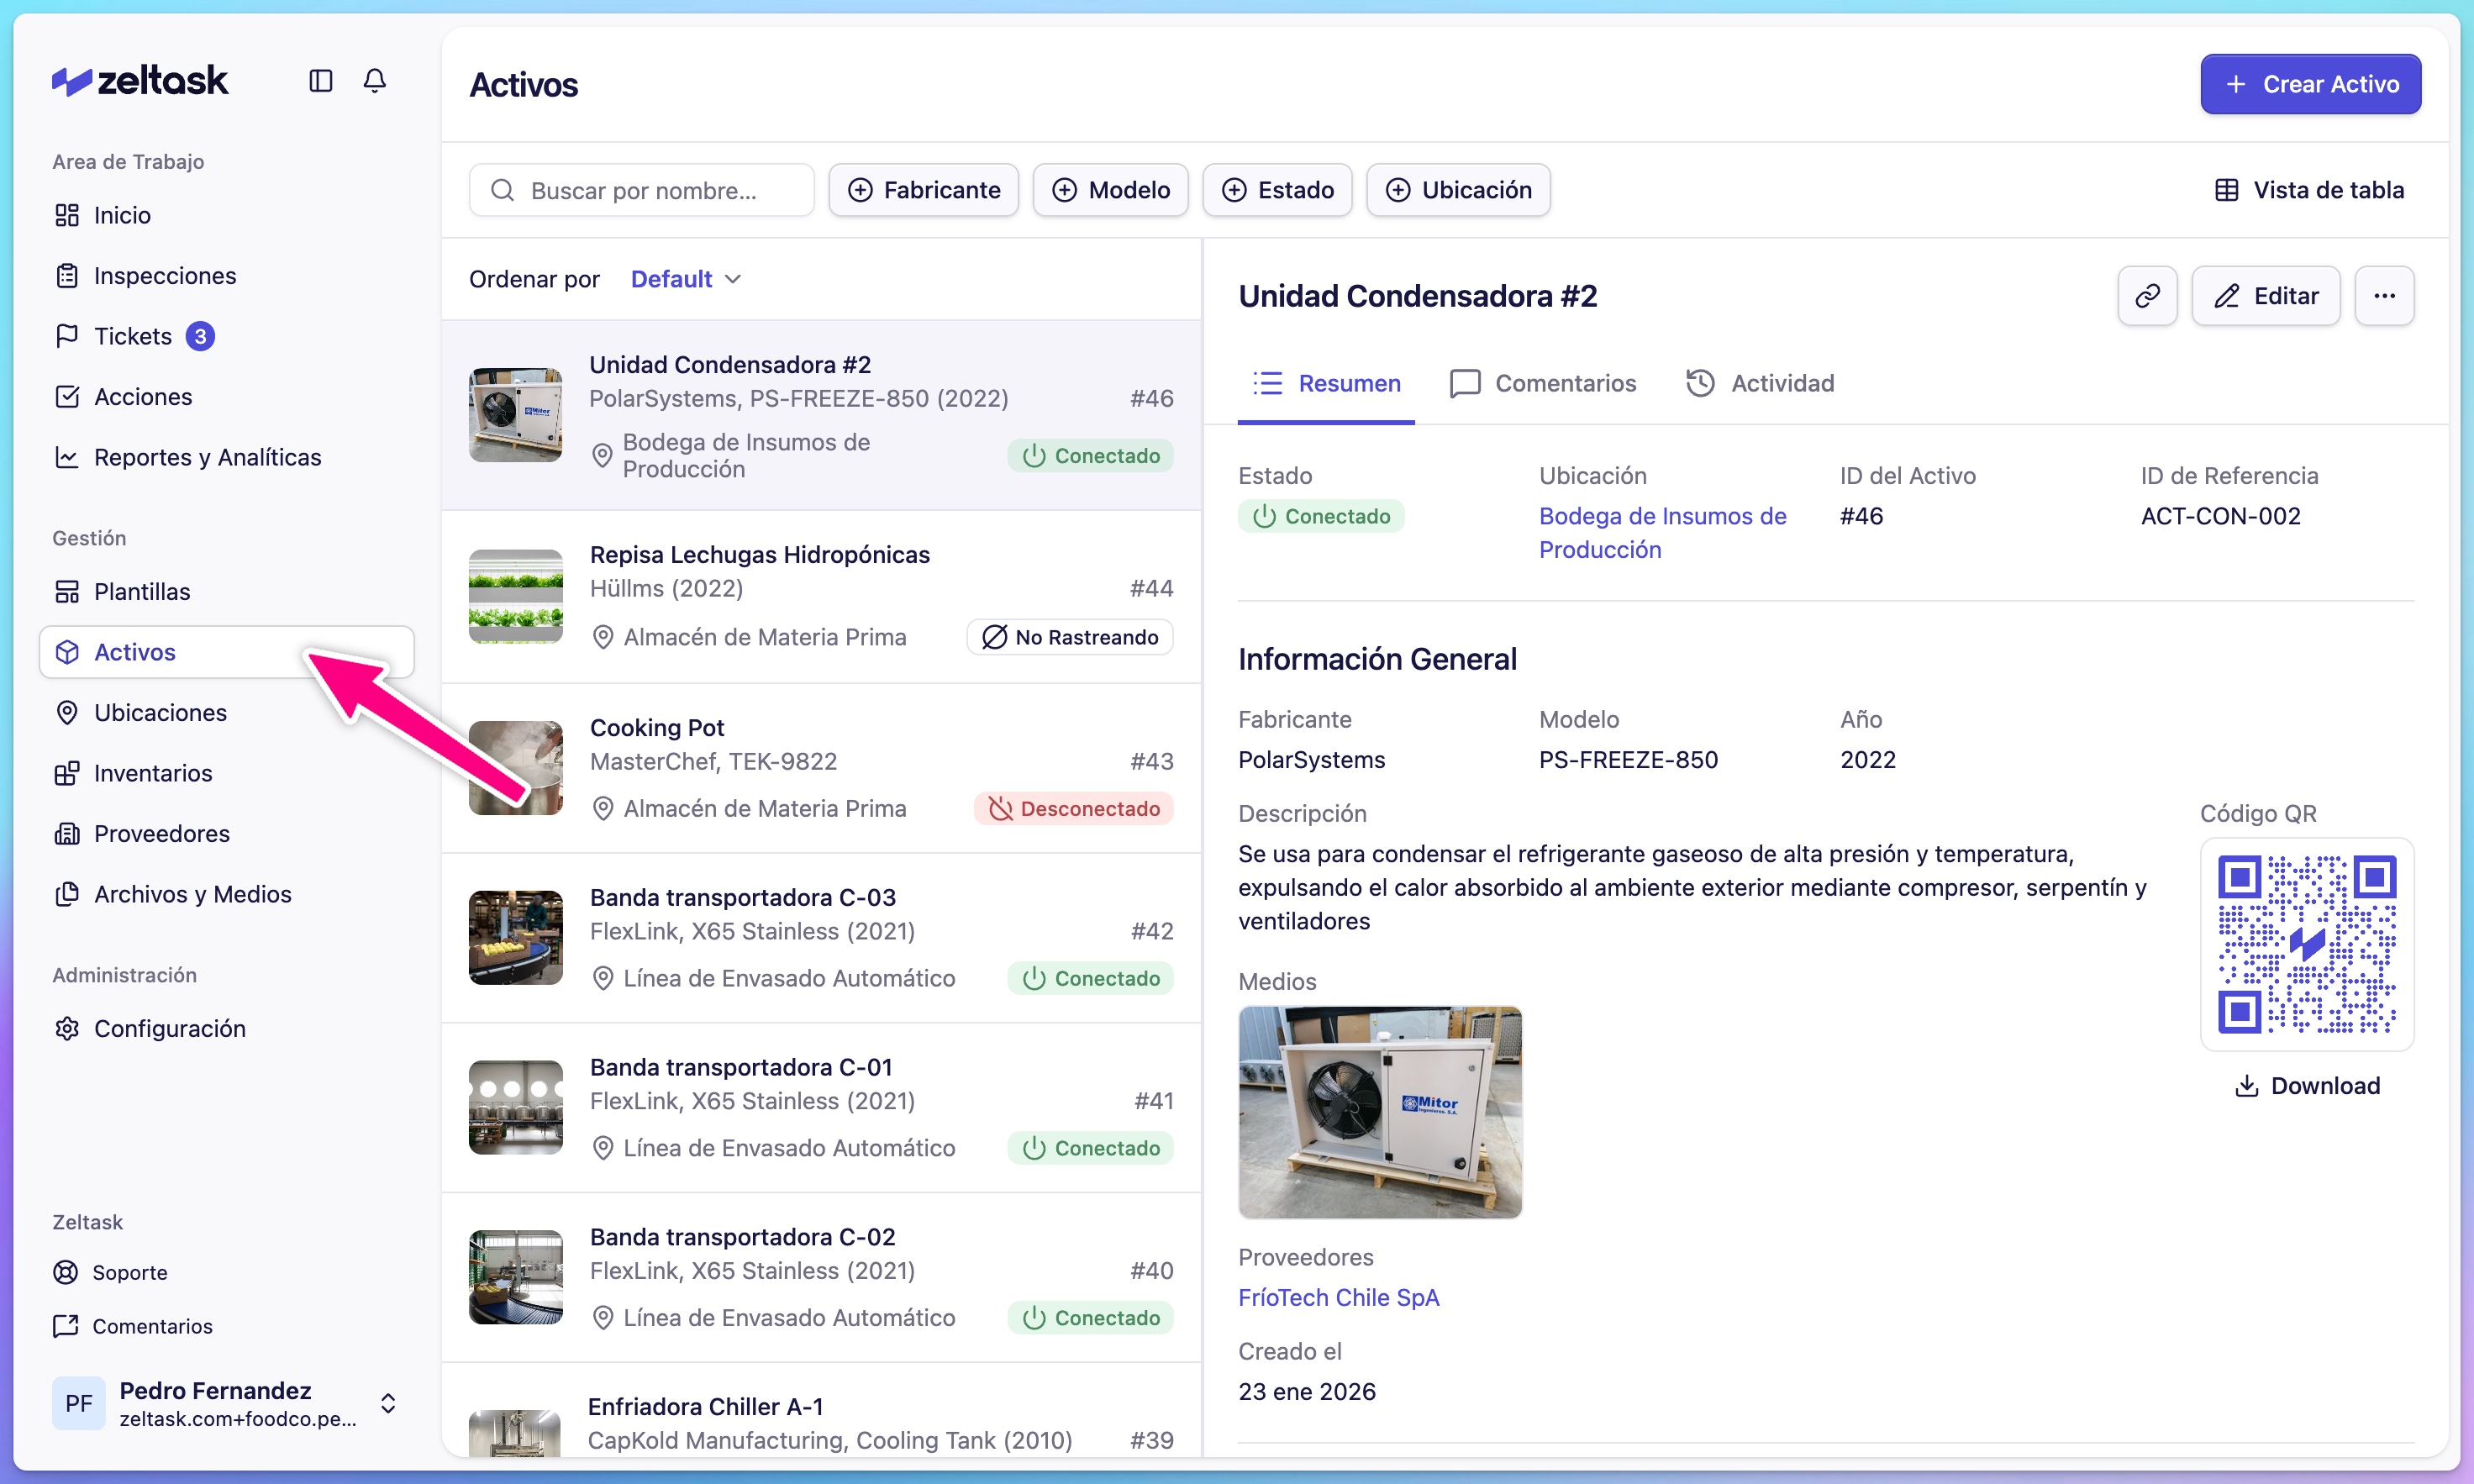
Step 1: Open the Assets module
- Click Assets in the left sidebar
- The asset list loads, showing any existing assets

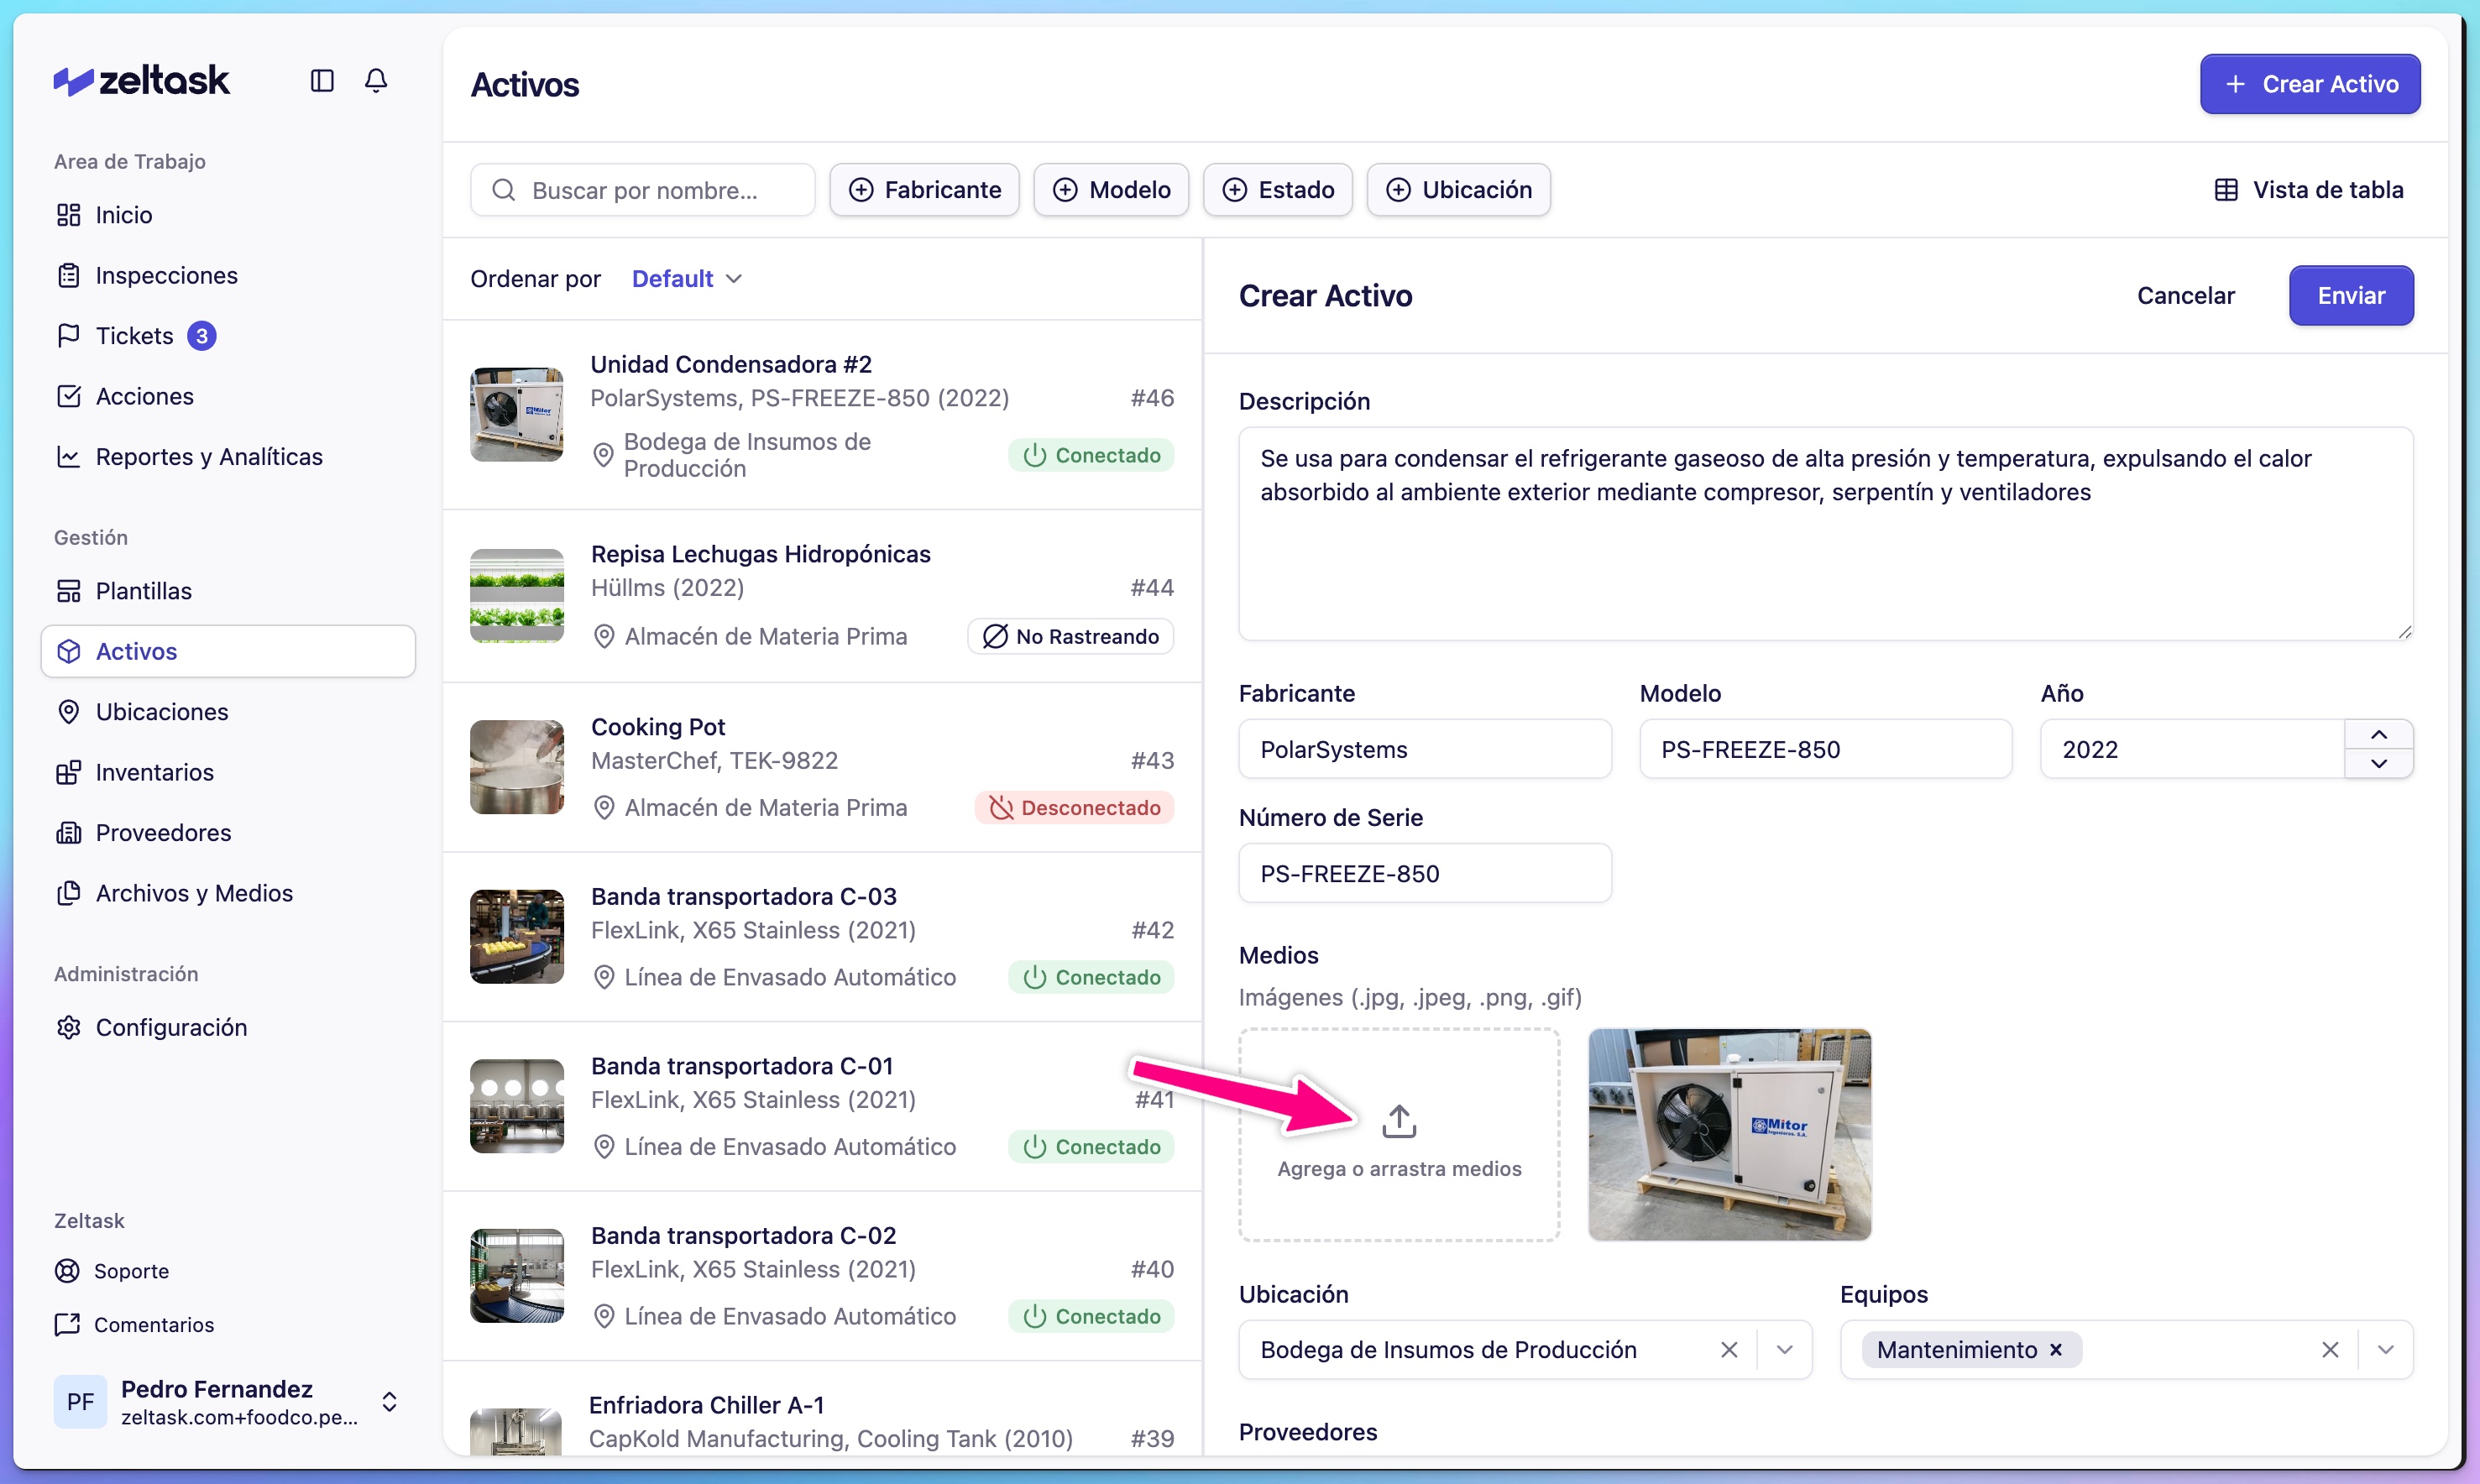
Step 2: Create a new asset
- Click + Create Asset in the top-right corner
- The asset creation form opens
Step 3: Add asset photos
- Click Upload Images at the top of the form
- Select one or more photos of the equipment
- Photos help identify the asset and document its condition
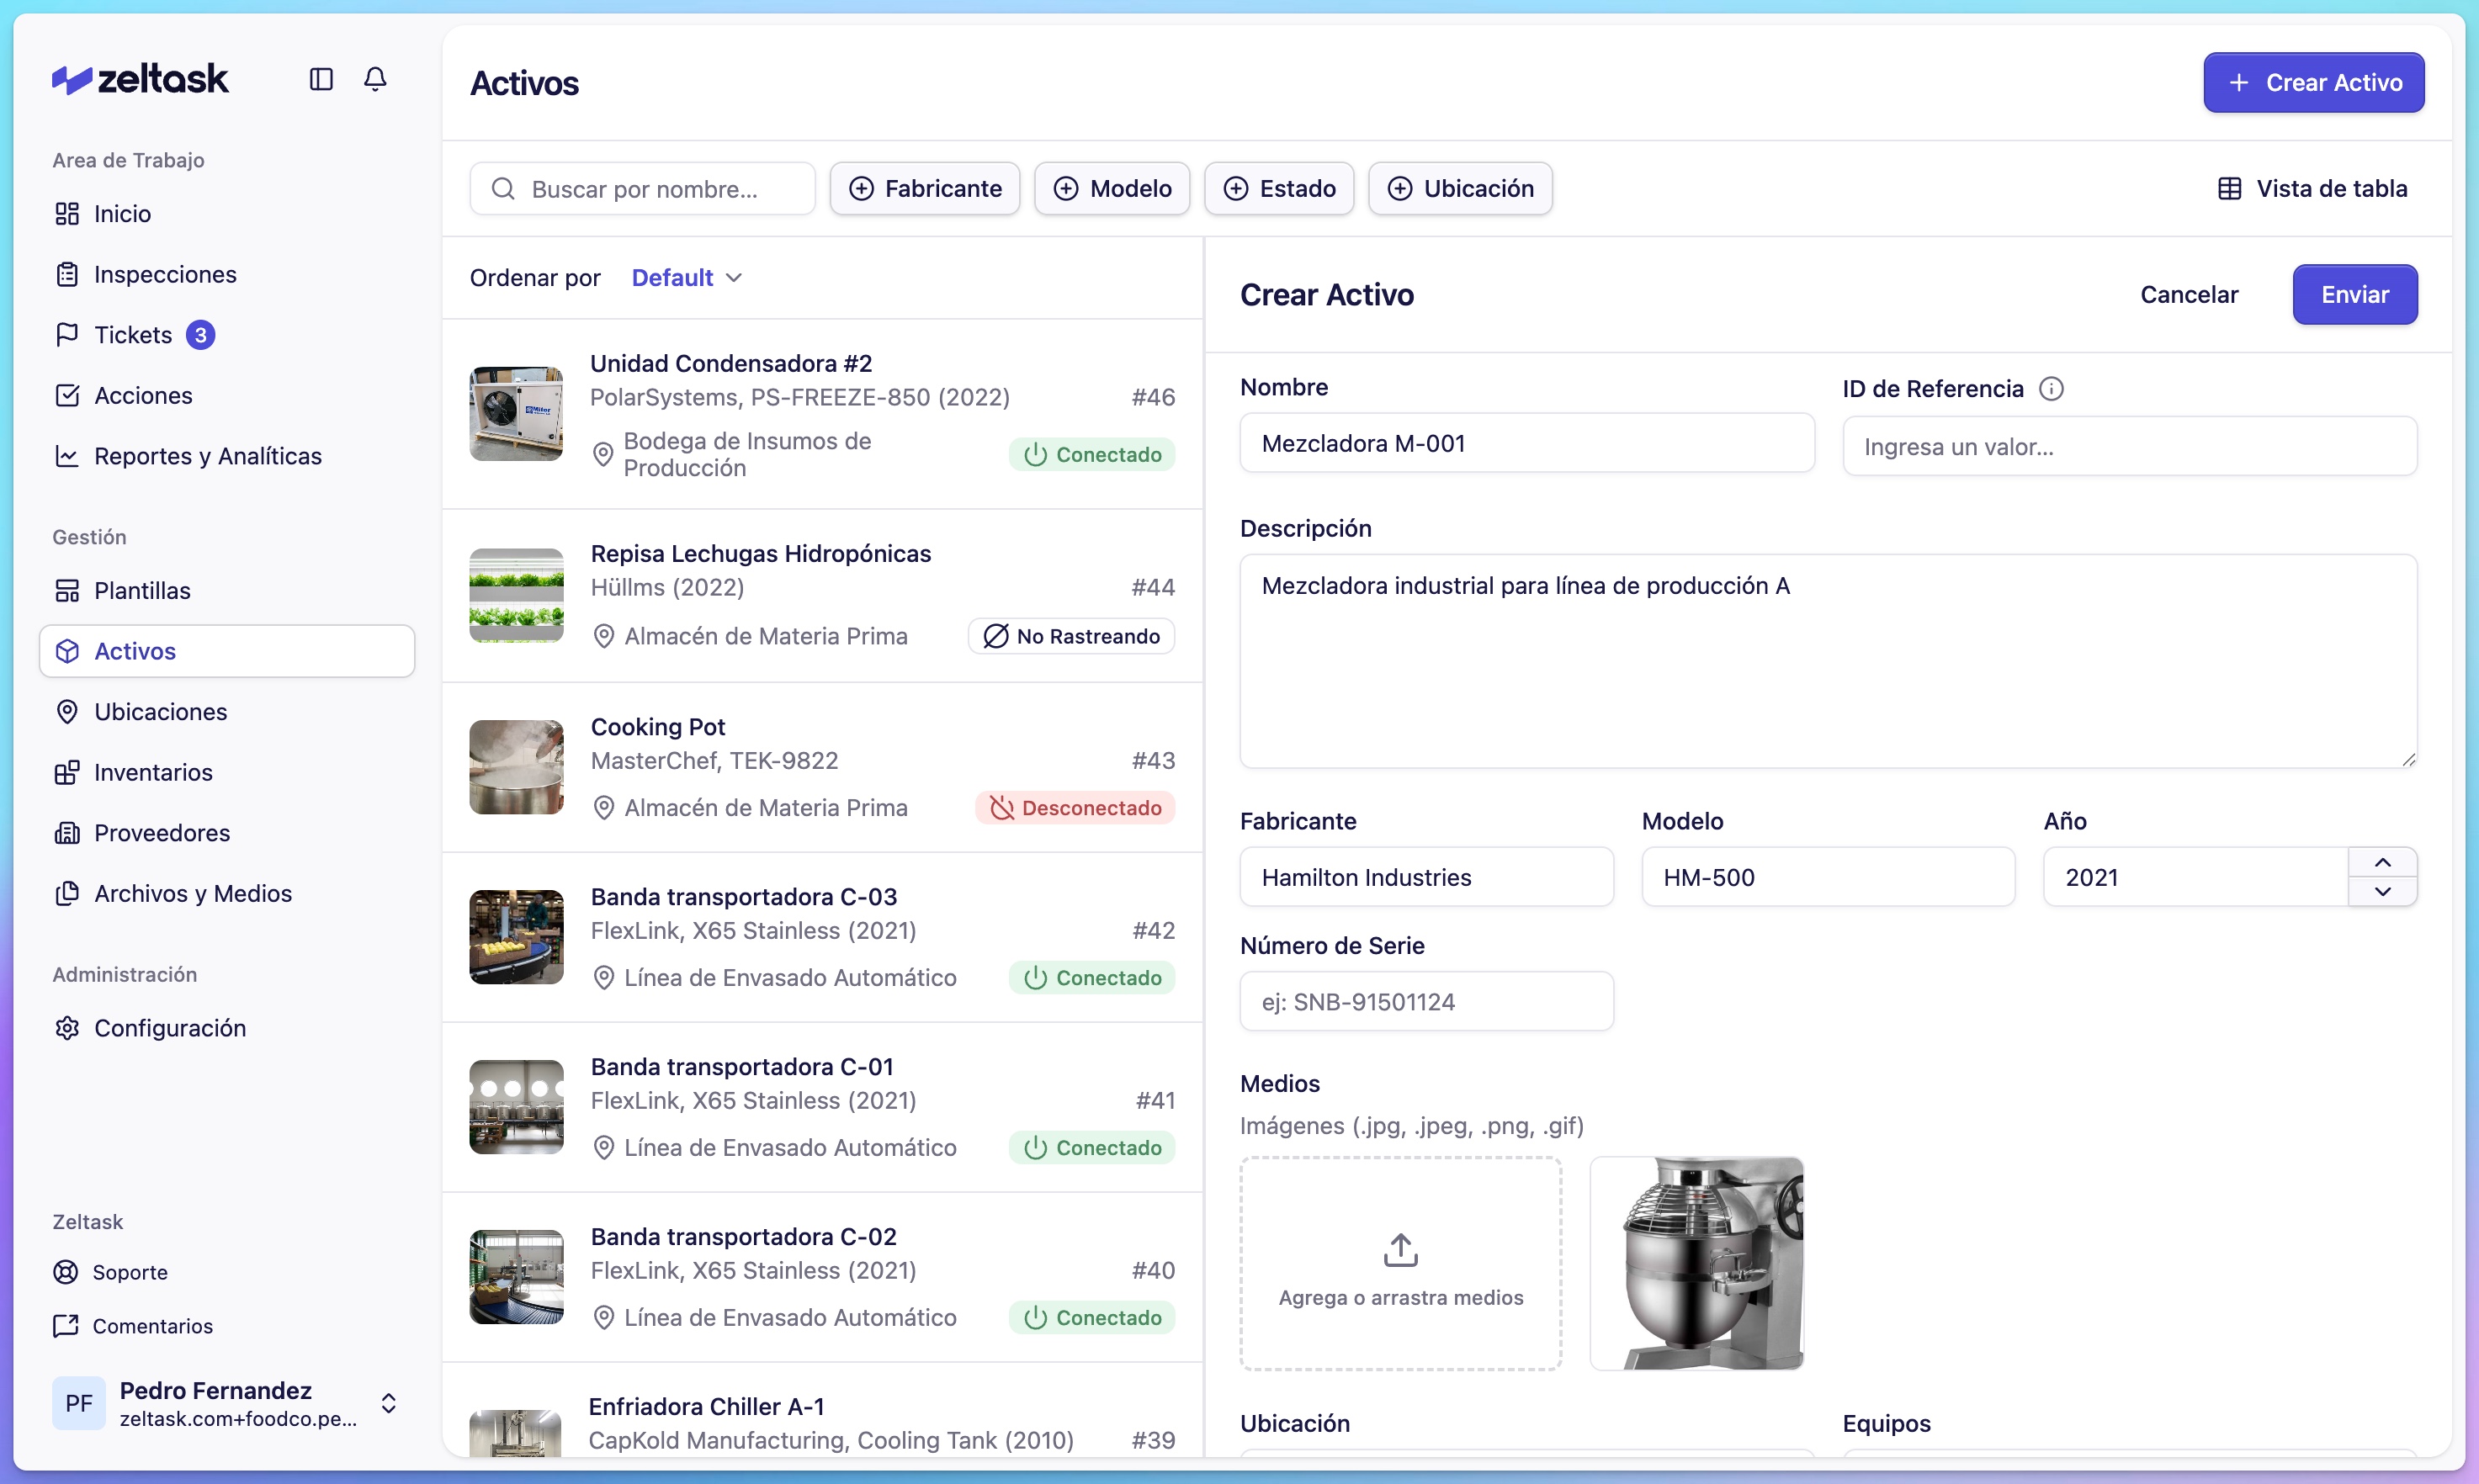
Step 4: Enter asset information
Complete the following fields:
| Field | Description | Example |
|---|---|---|
| Asset Name | A unique, identifiable name | "Mixer M-001" |
| Description | Details about the asset (up to 1,000 characters) | "Industrial mixer for production line A" |
| Manufacturer | Company that built the equipment | "Hamilton Industries" |
| Model | Model number or designation | "HM-5000" |
| Year | Manufacturing or installation year | "2021" |
| Location | Where the asset is installed | "Production Floor A" |
| Asset Type | Category for grouping | "Production Machinery" |
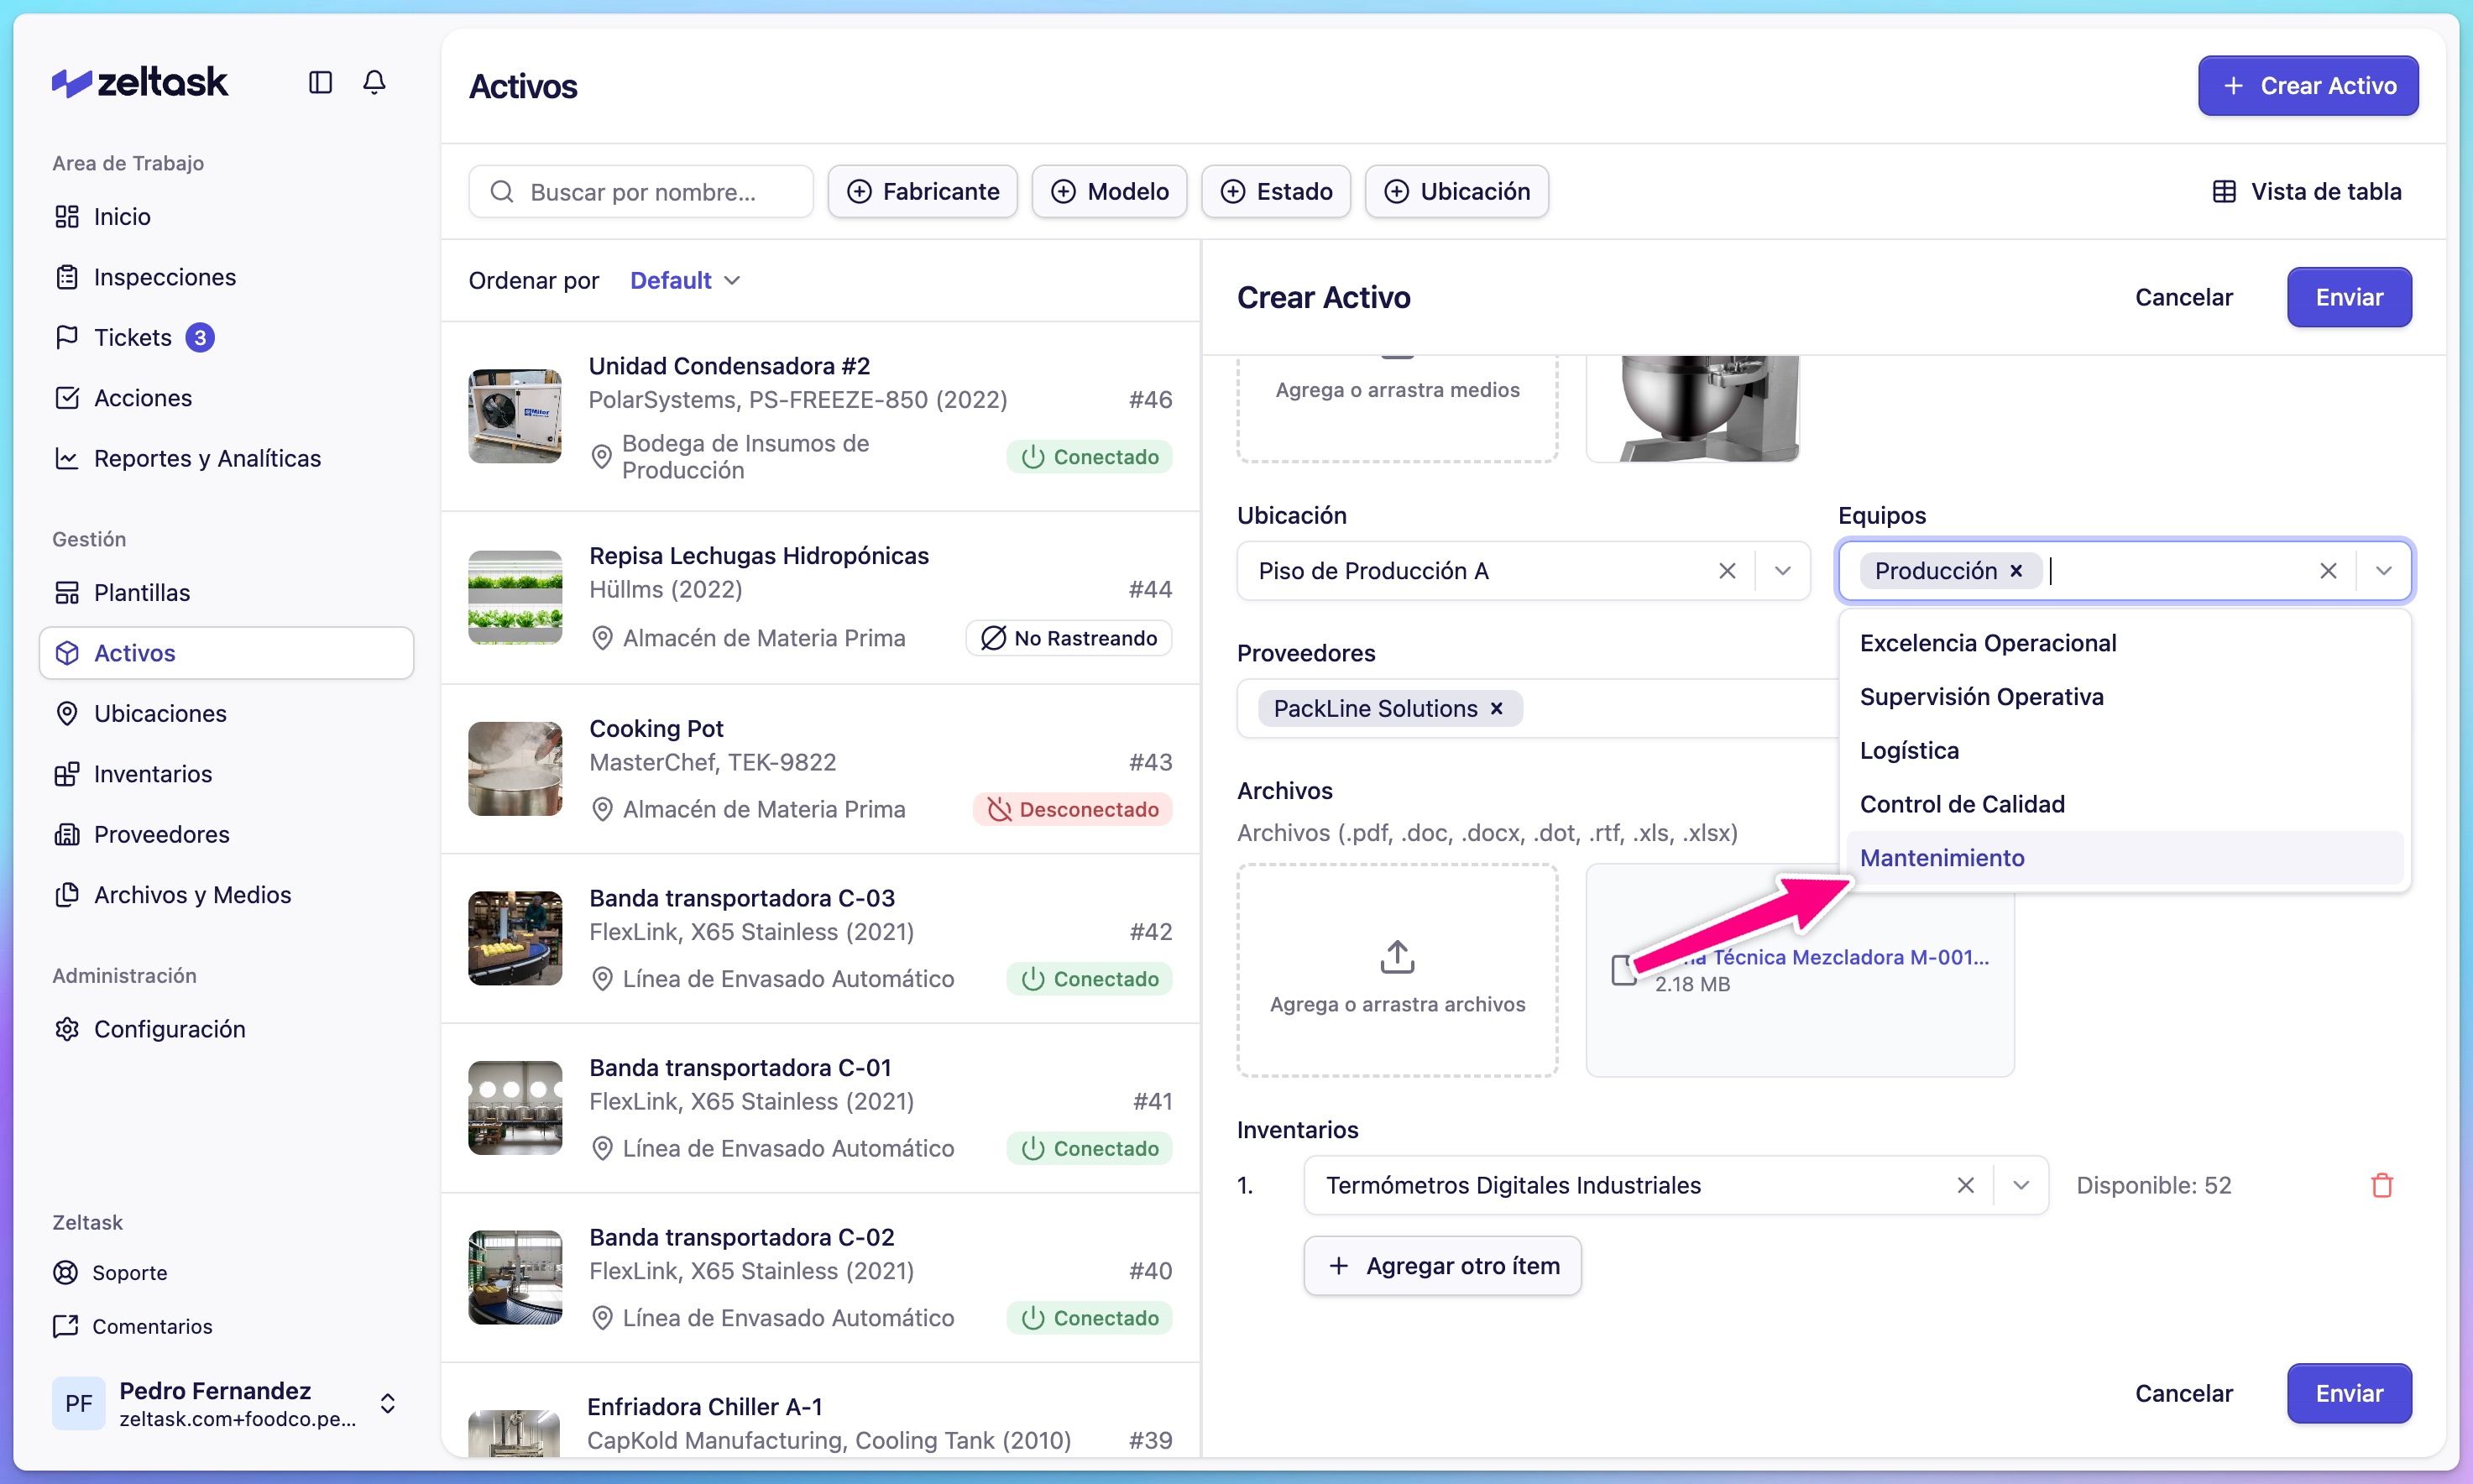
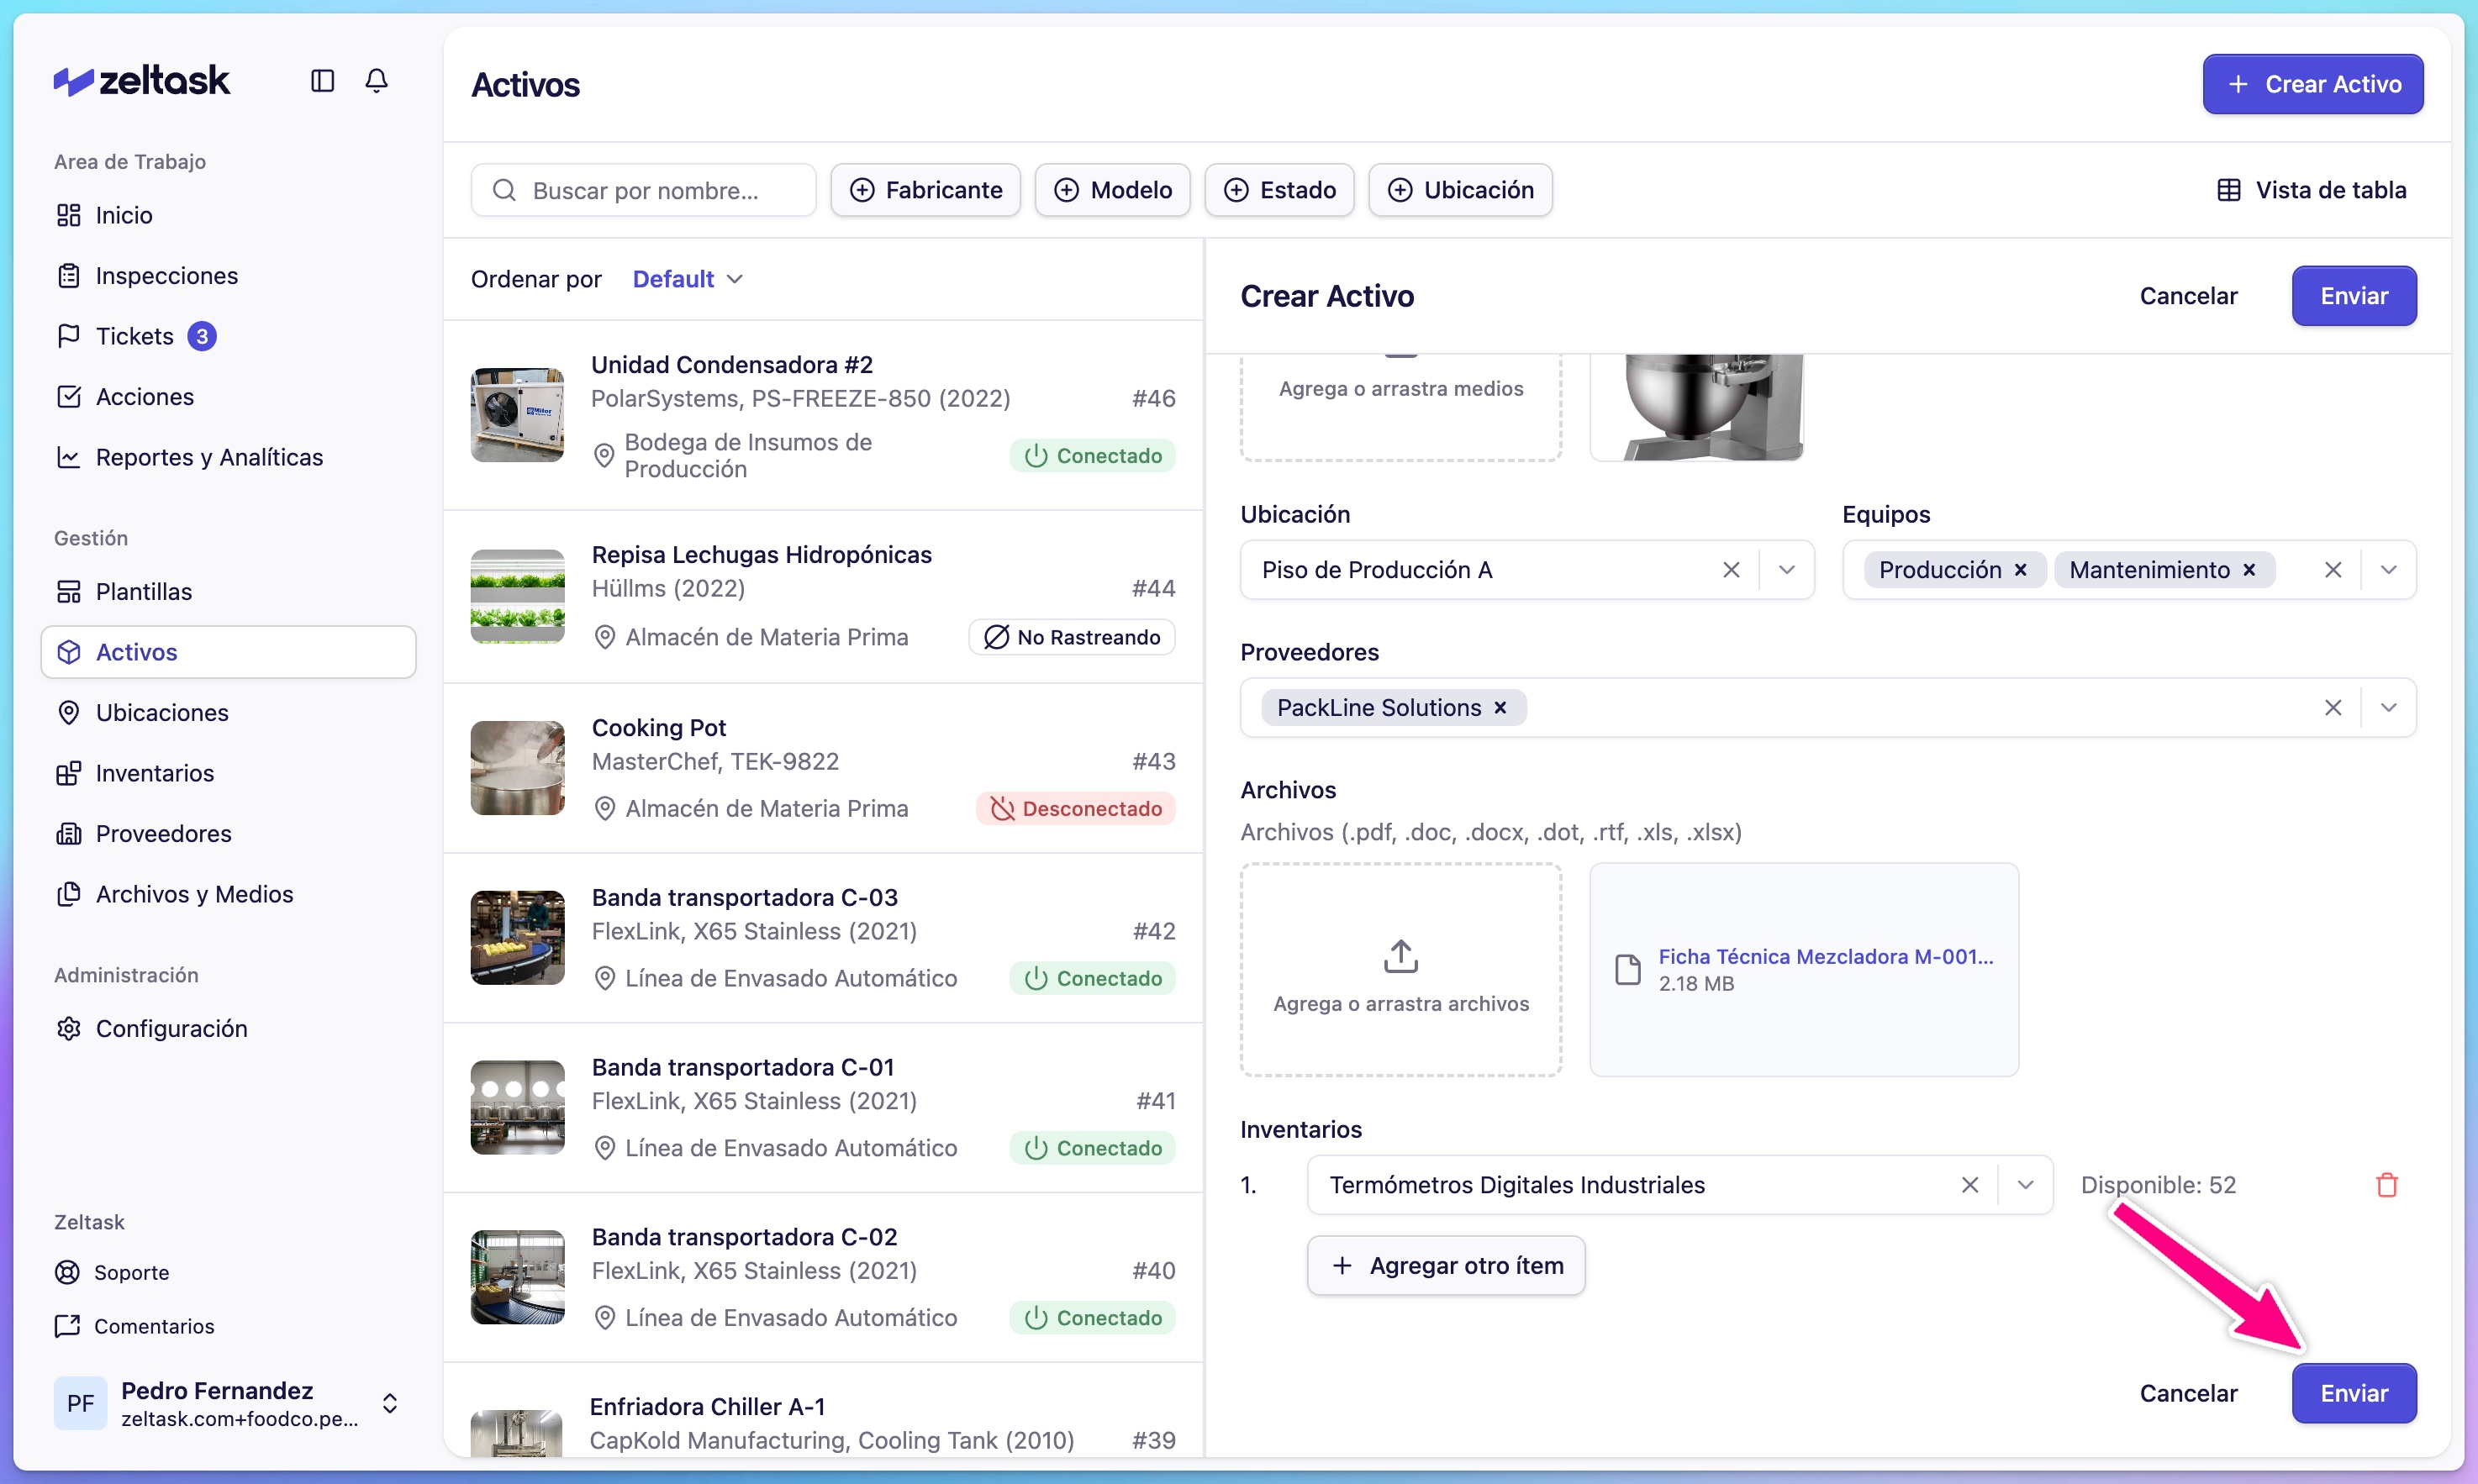
Step 5: Add additional details (optional)
| Field | Purpose |
|---|---|
| Media | Attach manuals, invoices, or warranty documents |
| Assign Team | Link the responsible maintenance team |
| Vendors | Add contractors for service or warranty |
| Inventories | Connect spare parts commonly used for this asset |
Step 6: Save the asset
- Review all information
- Click Save
The asset is now registered and ready for work orders, inspections, and tracking.
Exploring the Asset Detail View
Click any asset card to open its Detail View. This is where you'll find:
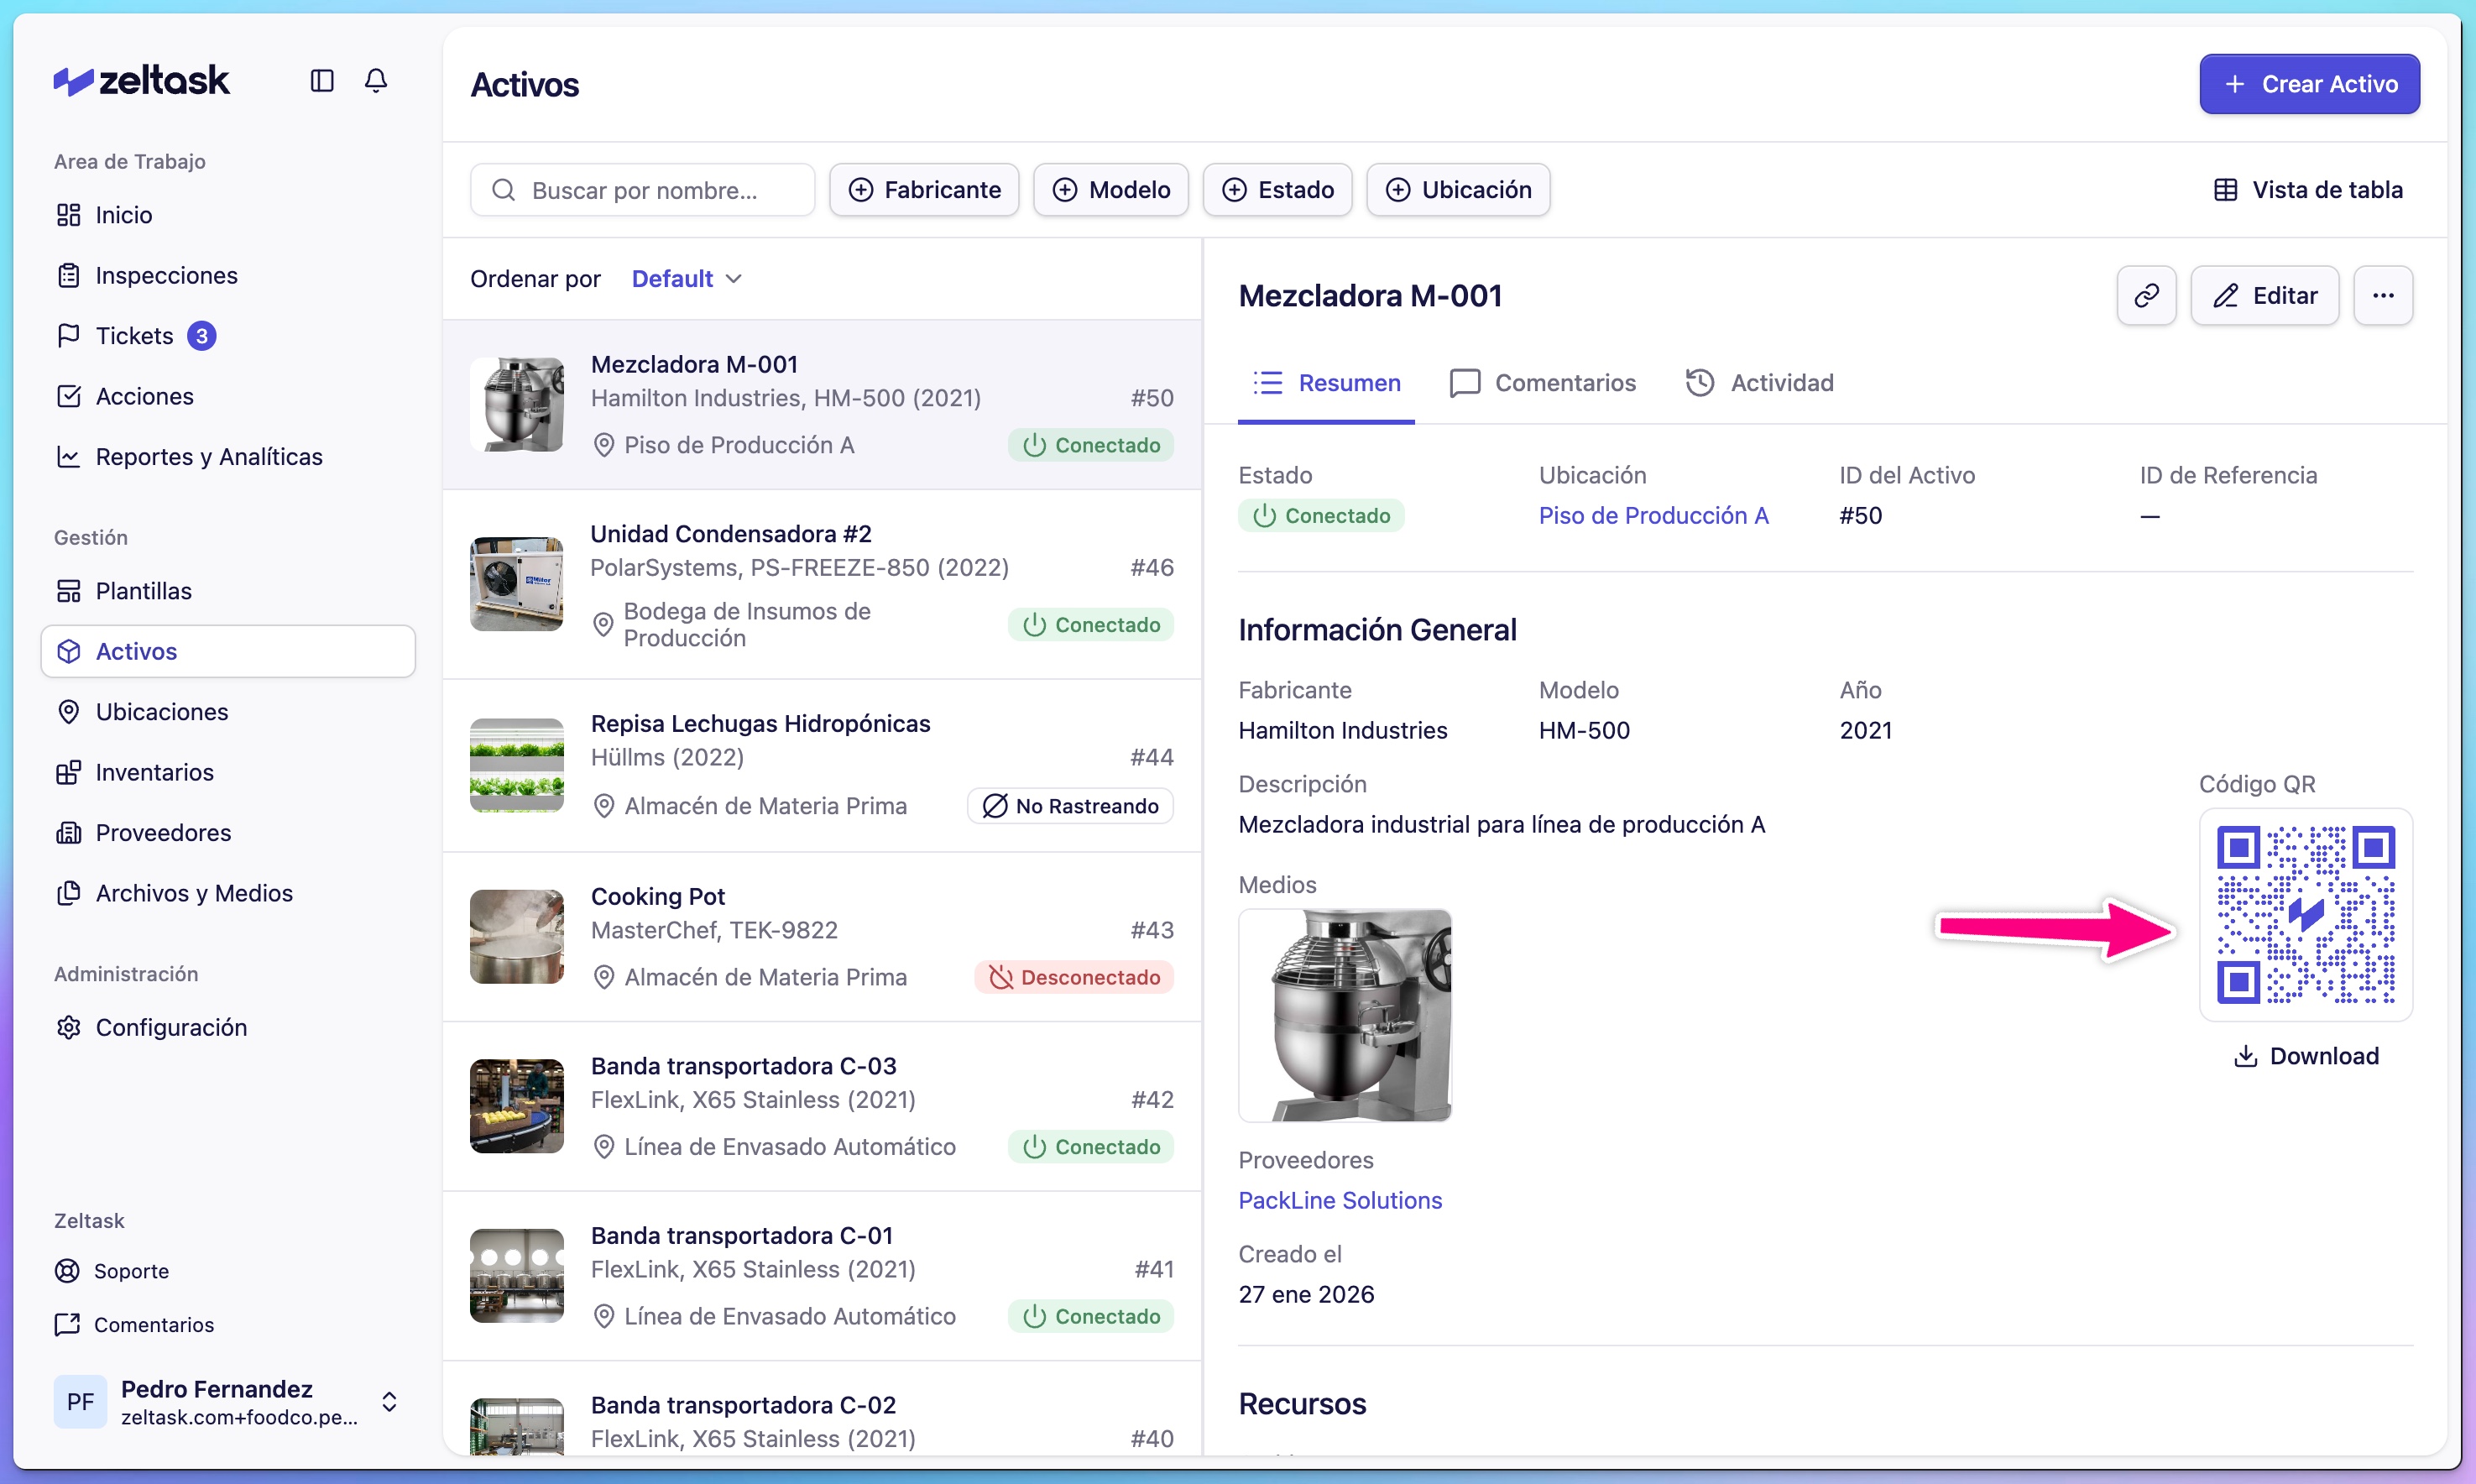
Overview Tab
All registered information: photos, specs, documents, and linked teams.
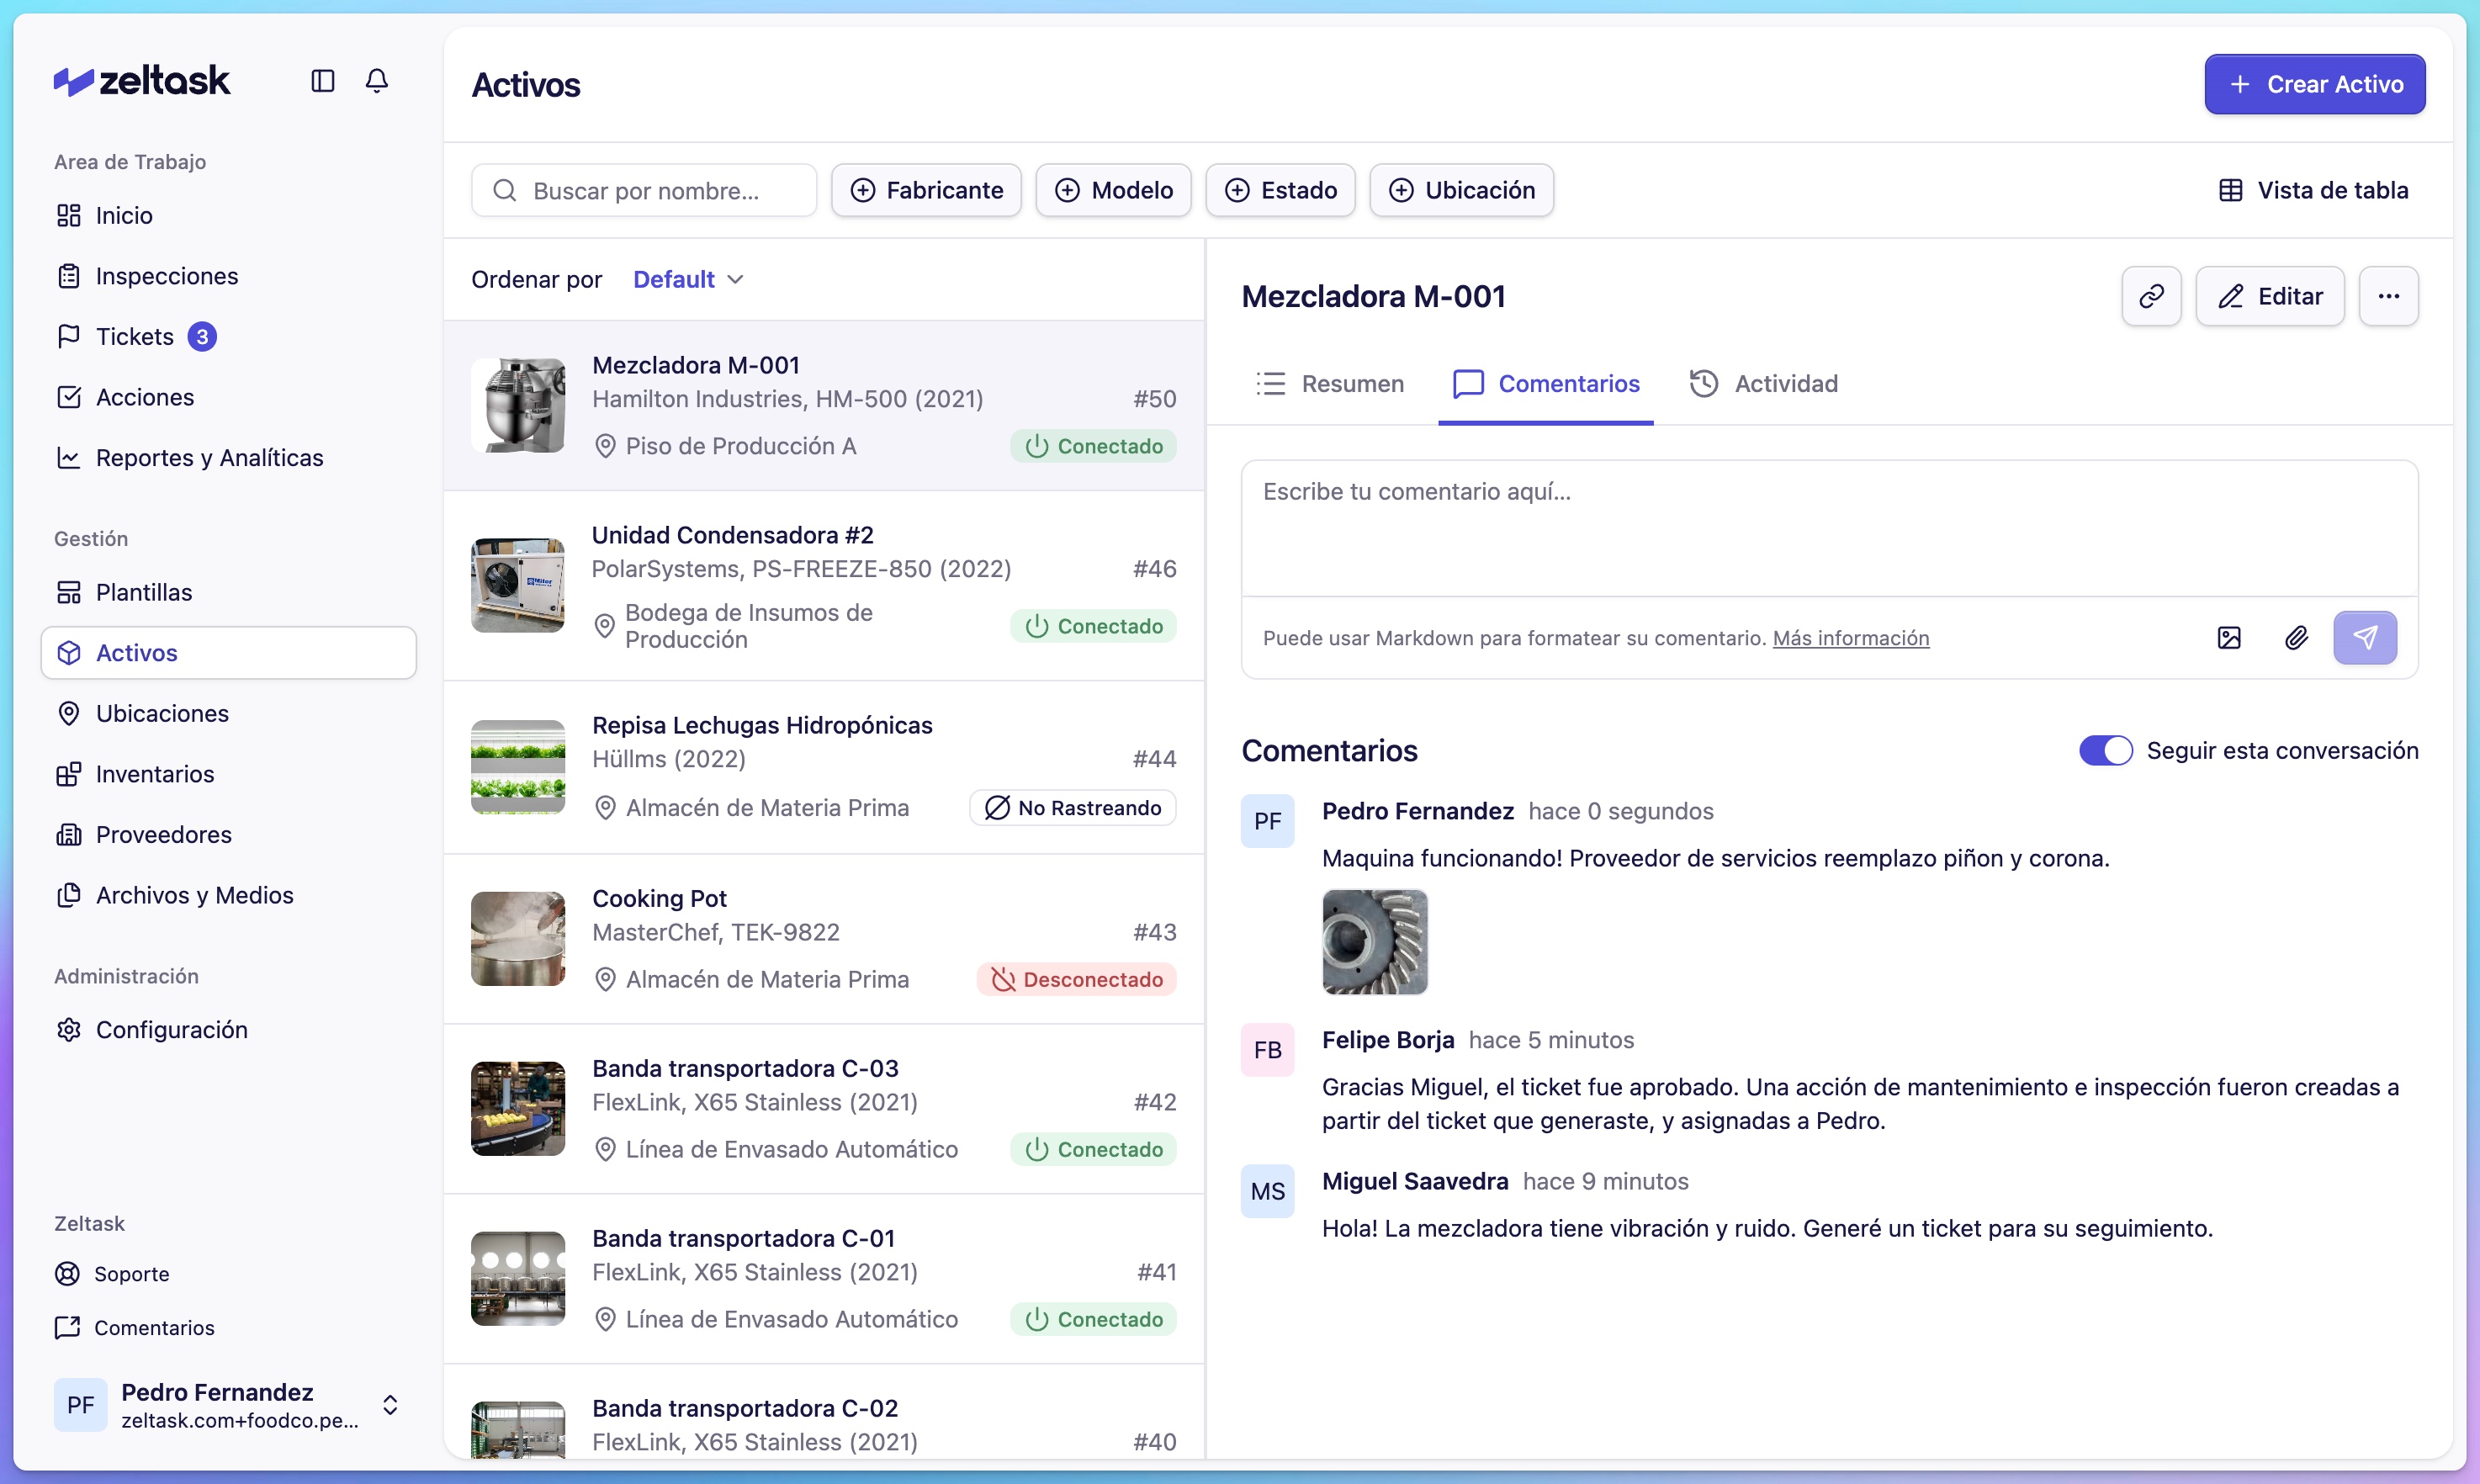
Comments Tab
Leave notes, observations, or updates about the asset. Click Follow this conversation to receive notifications when new comments are added.
Activities Tab
View the complete history of actions, inspections, and status changes.
Status History
A visual timeline showing when the asset was online, offline (planned or unplanned), and when maintenance occurred.
Using QR Codes
Each asset gets a QR code you can print and attach to the physical equipment. When scanned, it opens a quick-action menu:
- View asset details
- Create an action for this asset
- Report an issue
Tips
- Use consistent naming conventions (e.g., "Type-Location-Number": "Mixer-A1-001")
- Upload the equipment manual as a media file for easy technician access
- Link spare parts from inventory so technicians know which parts to use
- Add the installation year to track asset age and plan replacements